Home » Misc » How to practice basketball without a ball
How to practice basketball without a ball
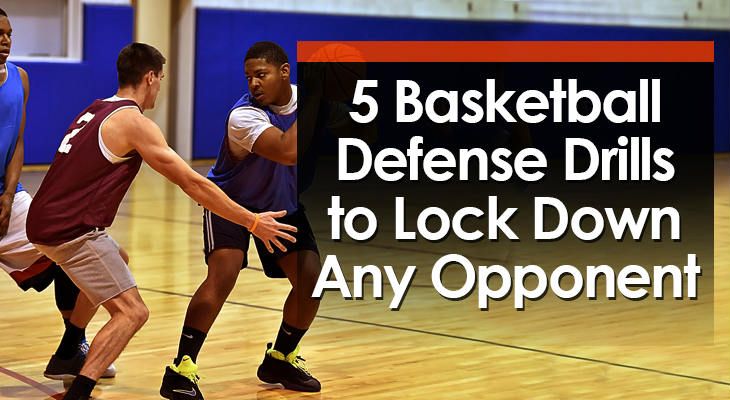
How To Build Your Defense During The Preseason Without A Ball and Without Assistants
Home > Coaching > Drills > Man to Man Defense > Off Ball Defense Footwork & Conditioning
When developing your defense, here is something that will give you a huge edge over your opponents this season...
With the following article and videos, you learn how to build your defense during the preseason... without a ball... without assistants... and without breaking state rules!
And it works with any defense...
In most states, there are rules that forbid you from using a ball during the preseason.
However, you are allowed to do conditioning without a basketball.
And even if you're not allowed to be on a basketball court...
You can go outside, to a tennis court, or to a conference room. You can use cones for points of reference to accomplish the same thing.
Can you imagine having your defense installed before day 1 of practice!?
Then you can spend a ton of time on your offense, skill development, and other tactics.
There are even reasons to do this if you have no preseason restrictions...
But we want to get the video first, so we'll explain those below.
3 Short Video Clips That Shows You How To Develop Your Defense in the Preseason
The innovative 35-year coaching veteran Don Kelbick demonstrates the coaching method below.
Don actually discovered this simple idea and used it to his advantage when he was coaching high school basketball for a few years. His teams produced 6 Division I players and was ranked #1 in Florida 28 out of a possible 34 weeks.
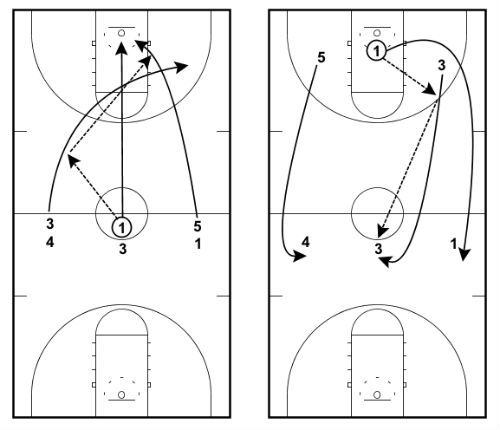
When Don builds this defense in his Match Up Zone Defense Video, there are over 20 drill progressions that flow seamlessly together and improve retention based on prior progressions.
In the video clips below, you will see a few of the progressions for building your defense.
Video 1 - Explanation
Don explains why he uses his teaching method.
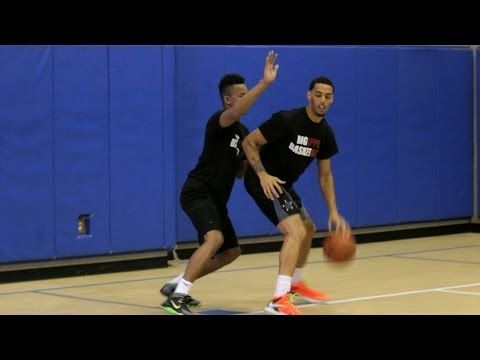
Video 2 - Stance and Perimeter Pass Progression
This is the 3rd progression of Don's off-ball drill to give you a visual of how he progresses. It covers defensive stance and defending backdoor passes and perimeter passes.
Video 3 - Final Off-Ball Drill Defense Progression
This is the final progression of the drill to give you a big picture of how Don progresses through all of the principles for teaching off-the-ball defense. As you can see, it is a highly efficient way to first teach the principles in a team setting.
As you can see now, this way of coaching is a tremendous benefit because....
You don't need offensive players.
You don't need a basketball.
You don't need assistants - especially helpful for youth coaches.
You can apply this to ANY defense since these defensive principles are universal.
You can save practice time teaching the defense. Don't have to deal fumbled passes and can progress through each concept very quickly.
This leads to fewer headaches, more early season wins, and possibly even more post season wins...
Because now you've had more time to develop your team than you typically would have.
Why You Might Even Use This Coaching Method During The Season
Since I've learned of this method, I've personally used it with youth and middle school teams. And we didn't have a preseason.
That's because this method can...
Save you tons of practice time.
Help you progress quicker through the defense.
Allow you to focus on a particular aspect of the defense rather than all of the concepts at once.
How This Saves You Practice Time & You Can Progress Quicker
When you don't have a basketball to deal with, you don't have to wait for the offensive player to pass the ball. You don't have to deal with players passing the ball in the wrong direction.
When you don't pass the ball, you don't have to deal with bad passes, the wrong pass, or fumbled catches.
Rather than taking 8 to 10 practices to build a solid defense, you might do it in 5 or 6 practices by saving time.
You Can Be A Beginner Coach And Still Have Success
This is one of the biggest issues most beginner coaches have when first coaching. I know that I did.
When you have 8 to 10 players on the court at once,
it's hard to make sure everybody is doing everything correctly from a defensive standpoint. And you feel like you have to watch and correct 50 different things at once!
While you certainly get better with experience, even the 30-year seasoned vet won't catch everything.
And that's what's great about Don's method... you can focus on one action at a time.
And you can instantly tell if somebody is doing something incorrectly because...
Everybody is doing the same thing.
You know exactly what to look for because you are telling them what to do with your voice command.
There are fewer players to focus on.
Well, we hope this tips get to a great start this season! If you'd like to learn more, take a look at Don Kelbick's Match Up Zone Defense videos.
More About Don Kelbick
Don Kelbick is the creator of the Attack and Counter Skill Development System. He is a regular contributor and has been featured in multiple videos for Breakthrough Basketball.
Don has trained Olympic Gold Medalists, NBA Champions, NBA All-Time 3-Point Leaders, NBA Defensive Players of the Year, and many other professional, college, high school, and youth basketball players. He also has 25 years of college coaching experience at the D-1 and D-2 levels.
What do you think? Let us know by leaving your comments, suggestions, and questions...
USA Basketball - No Court? No Problem for Creative Coaches
The term "creating space" has always had a definitive meaning in sports. Whether it is a shooting guard in basketball working to get off a shot or a wide receiver in football trying to get open or pick up yards after a catch, "creating space" is the term likened to distancing oneself from a defender.
In youth sports practices, the term takes on a different meaning. Coaches are frequently handcuffed by the lack of available practice fields, gyms or even ice time.
For basketball practice, court time is at a premium and coaches sometimes must make do with only one rim and 12 kids. In baseball, especially in areas with seasonal changes like the northeast, the supply of fields cannot keep up with coaches' demands. How are coaches supposed to rectify situations like this and run effective practices with limited space?
When I first began coaching youth sports, I remember showing up at a field to practice and another team had just stepped on the field before us. My coaching staff and I stood there looking at each other. I got the team together and told them sheepishly that practice was canceled.
Luckily most of the parents hadn't left, so the kids' rides were still there. Had I been more prepared and creative, I could have moved the practice from the intended field to any safe alternate, including a much smaller grass field or even a parking lot.
Coaches can be creative and run efficient practices in even the smallest or oddest of places.
In basketball, coaches can integrate a number of ball-handling drills involving the whole team. Stationary drills such as passing the ball around the body starting with the neck then moving down the body, to the waist and then each leg is a favorite of players.
The "Ball Switch" drill is also popular and builds up hand quickness. In this quick ball-handling drill, the player will hold the ball between his legs, one hand in front and one hand in back. The player will then switch hands, moving both hands simultaneously going from front-to-back and vice-versa without letting the ball touch the ground. If a young or inexperienced player can't do this drill right away, he can bounce the ball, and then switch hands with the front hand going in back and the back hand going in front, catching the ball after one bounce.
The benefit of this drill is that it enhances a player's coordination and develops quick hands. The player can challenge himself and see how fast he can do this. Again, the whole team can do this drill in a small confined area.
These are examples of optimizing limited space when challenged with less than optimal surroundings. Coaches need to make up two lists of drills at the beginning of the season. One list will have drills that are used on the regular court and the other list will have alternate drills for a smaller practice area. Coaches need to map out the props they will need and keep these in their trunk. Youth sports practice time is valuable because coaches can actually teach the sport and have the kids learn from their mistakes.
Don't let limited space change your practice plans. Be creative and create space!
How to learn to play basketball, when to start, what exercises are effective
In each school, children are introduced to different sports, and the most common games are volleyball and basketball. They tell the basics, but few people after these lessons become Michael Jordan. However, it is quite possible to achieve sports success. If you always hit the ball in the basket and decided to learn how to learn how to play basketball, read this article. We'll walk you through the first steps to help beginners start playing well.
At what age do you start playing basketball?
Of course, if you want to build a career as a basketball player, you have to start in childhood. The most optimal age for the first basketball lessons is 8-9 years old. Some professionals started at the age of 12, but not later. At this age, the body is considered sufficiently strong, and the brain is ready to build complex schemes.
Sometimes a child is too small and is not taken to the section. But his parents may be advised to attend prep basketball for 1-2 years. There, the kid will not be taught the technique of the game, but he will begin to learn how to control the ball. This game will positively affect the health of the child and his development. It helps to develop endurance, develop coordination and agility. Basketball players improve their vision and logical thinking.
Who is banned from basketball practice?
They are not available to people with the following diseases:
cardiovascular diseases;
excessive mobility of the cervical vertebrae;
flat feet;
gastric ulcer;
asthma and other respiratory diseases;
diseases of the musculoskeletal system.
Exercises for Beginner Basketball Players
Not a single training session takes place without these basketball exercises, therefore, their implementation must be approached especially responsibly. They are aimed at developing the basic necessary skills:
To speed up the effect of basketball training, start with 5 minutes of running without stress.
After that, you can do the following exercises, which are needed to warm up each muscle group.
Shoulders
Stand up straight and stretch your arms out to the sides. Straight arms should move in a circle: 10 turns back and forth.
Pelvis
Fix the hands on the belt, and spread the legs shoulder-width apart. Perform rotations in the hip joint.
Back
Bend your elbows and press them to your chest. Put your feet shoulder width apart. Turn right and left 5-10 times in each direction.
Knees
Stand up straight, connect your toes and heels. Bend your knees slightly and put your hands on them. Perform circular movements with your knees, helping yourself with your hands.
Ankle
Keeping the hands on the belt, and placing the right foot on the toe behind the back behind you, you need to make several rotations of the feet. After a while, change legs.
Squats
Squat 5 times. The exercise must be performed carefully, do not lift your heels off the floor, and stretch your arms in front of you.
How to learn how to throw a ball correctly?
The ability to throw the ball correctly is practically the most important thing in basketball, so pay more attention to throwing exercises.
Stand 2-3 meters from the ring. Take two slow steps. Standing on one leg, throw the ball into the ring;
get behind the line. Hit the ball on the floor a couple of times. Take two steps towards the ring. Throw the ball into the basket;
standing on the three-point line, throw the ball at the wall and catch it. Take two steps and throw the ball around the ring;
to get the ball into the basket, you need to throw it into the corner of the rectangle drawn on the shield.
Leg development
If you take an extra step, you can lose points and let the team down, so you need to have trained legs. Practice the jump stop.
Do not change position while performing the exercise;
throw the ball against the wall, catch it with both hands and at the same time jump with both feet;
choose one foot as a point of support and turn forward and backward on it;
imagine that you are catching the ball with your hands while in a jump, land and make turns on the supporting leg. Please note that you need to land on 2 legs.
Practicing the pass
Basketball is a team game. Even if you accurately hit the ring, you still cannot pass the ball to others, you will be of little use to the team.
Stand 2-3 m from the wall. Throw the ball at her twice and catch it;
hold the ball with both hands. Make a movement with brushes, directing it to the wall;
Gradually increase the distance between the player and the wall. During long passes, you need to take a step forward.
Learning to dribble
Do you remember how pathetically Adriano Celentano dribbled the ball in the film "The Taming of the Shrew"? You can do the same if you practice these exercises;
quickly toss the ball with the fingers, keeping it off the floor;
transfer the ball from one hand to the other by wrapping it around the body, head or leg.
Basketball is a very versatile sport, so many skills will have to be developed. A basketball player must accelerate, practice shuttle running, be able to run backwards and move on half-bent knees, work out the speed of hand movement (which is very important when intercepting).
How to learn to play basketball from scratch
“School 2.0” is the best educational project in the history of Russian basketball, which has collected in one material all the basic skills that are needed for those who want to jump like Michael Jordan and throw a three-pointer like Steph Curry. We literally chew on you how to play basketball and become cool. Lots of videos are included.
Passion for basketball usually begins with the ball hitting the basket. Do not deprive yourself of this pleasure, learn to score from under the basket, then from two steps ... But after that, you should think about what elements to master in order to become a “correct” basketball player. We won't let you get bored - we won't fill all basketball practice with boring stops and turns. But in general, you can’t do without it, because the correct work of the legs, the habit of standing firmly, not mincing, not taking extra steps, quickly and correctly changing the direction of movement is an absolute must for a basketball player. Plus, of course, dribbling and passing.
In general, to start the basketball path, “School 2.0” recommends exercises to develop the following skills during basketball training:
Throw
Footwork
Transmission
Maintaining
Do two or three dozen workouts, combining the exercises from the following list, and you will notice real progress. Start each workout with 2-4 minutes of quiet running and such a joint warm-up:
Exercises are performed one after the other without stopping.
Shoulder warm-up. Stand up straight and stretch your arms out to the sides. Make circular movements with straight arms 10 times forward, then 10 times back.
Pelvic warm-up. Put your hands on your belt, feet shoulder-width apart. Perform rotations in the hip joint, as if twisting a hoop, 10 times in each direction.
Back workout. Bend your elbows and press to your chest, feet shoulder-width apart. Do rotations in the lower back 5-10 times in each direction.
Knee warm-up. Stand up straight, feet together. Squat down a bit and put your hands on your knees. Then perform rotational movements with your knees, helping yourself with your hands. Do 10 times in each direction.
Ankle warm-up. Put your hands on your belt. Place one foot on the toe slightly behind you. Resting on your toes, do 10 rotations in the ankle joint in each direction, then change legs.
Squats. At the end, do 5 deep squats, keeping your heels on the floor and extending your arms in front of you.
Throwing
Get used to throwing correctly right away - with one hand (the other can only hold the ball), with reverse spin. The forearm is perpendicular to the floor, the arm straightens completely, the hand “closes”. Listen to how the ball blows up the net - it's a thrill.
1. Shooting stand
Stand straight, feet shoulder-width apart, ball in hand.
At the signal, take a throwing stance, and at the next signal, return to the starting position.
Ready to throw: legs bent, back straight, slightly tilted forward. Throwing hand behind the ball (not sideways!), the second hand holds the ball in front-side.
Raise the ball to shoulder level.
Repeat 10 times with right and left hand.
2. One-handed throw on the spot
Get into the throwing position. The ball lies in one hand at the level of the head, the elbow is directed forward, the second hand does not help.
Squat down a little and with the simultaneous extension of the legs and elbow, throw the ball up in front of you. Stay in the final position until the ball hits the floor.
Repeat 10 times with right and left hand.
3. Throw with one hand into the ring from one meter
Stand under the ring, the ball is in your hand at shoulder level. The other hand does not help!
Squat down and at the same time extend your legs and arms, make a throw around the ring. Keep the final position of the straightened arm and closed hand until the ball hits the floor.
Try to hit the ball in the corner of the rectangle drawn on the shield, then the ball will be in the ring.
Throw from different positions. 10 times with the right and left hand.
4. Medium throw
Stand at a distance of 3-4 meters from the ring and take a throwing stance. Sit down and with the simultaneous extension of the legs and arms, make a throw around the ring. Keep the final position of the straightened arm and closed hand until the ball hits the floor.
Throw from different positions.
Stand a few meters from the ring. Make yourself an autopass, take a small jump forward, catch the ball, take a shooting stance, and hit the basket.
Perform the exercise 10 times with your stronger arm.
5. Two steps - throw
Stand three meters from the ring. Take two steps from the spot and throw the ring.
Get on the three-point line. Take a couple of hits with the ball, then two steps and throw the ring.
From the three-point line, make yourself an autopass. Then catch the ball, take two steps and shoot the ring.
Try to hit the ball in the corner of the rectangle drawn on the shield.
Repeat 10 times with right and left hand.
6. Two steps - low shot
Get on the three-point line. Take a couple of hits with the ball, then two steps and throw from the bottom of the ring.
Stand three meters from the ring. Take two steps from the spot and throw the ring from below.
From the three-point line, make yourself an autopass. Then catch the ball, take two steps and shoot the ring.
Try to hit the ball in the corner of the rectangle drawn on the shield.
Repeat 10 times with right and left hand.
Footwork
Glue your feet to the floor. No extra steps! Otherwise - "jog", whistle, give the ball to the opponents.
1. Jump stop
The exercise is performed on the spot. Make yourself an autopass, catch the ball with two hands and at the same time do a two-foot jump into a basketball stance.
Determine the axial (supporting) leg and perform turns on this leg forward and backward.
Then imitate the following sequence of actions: take the ball in your hands, being completely in the air; land on both (!) feet at the same time; do turns around the same (!) leg.
Repeat the exercise 10 times: 5 times turning on the right foot and 5 times on the left.
2. Walking stop
The exercise is performed on the spot. Make yourself an autopass, catch the ball with both hands and stop at the same time with two steps into the basketball stance.
The axial (supporting) leg will be the one with which you took the first step - on this leg, perform turns forward and backward.
Repeat the exercise 10 times: turning 5 times on the right foot and 5 times on the left.
3. Zigzag without a ball with a jump stop
All changes in the direction of movement are made by a clear turn around the near leg - even through the “face”, even through the “back”. This is very important in basketball!
4. Zigzag without a ball with a stop in steps
It is performed in the same way as the previous exercise, but the stop at the cone is one-two, not a jump.
Transmission
Mastering the culture of passing will not only earn you the respect of your playmates, but it will also give you a lot of fun. Maybe even more than hitting the ring.
1. Passing with two hands into the wall
Stand 3-5 meters from the wall. Pass the ball into the wall with both hands from the chest.
Hold the ball with both hands from the sides and direct it to the wall with a wrist movement. As a result, the arms at the elbows should straighten, and the hands should “close”.
Move further back to make longer passes. At the moment of such a transfer, one leg takes a step forward. Catch such a transmission from the floor.
Repeat the exercise 15-20 times.
2. Passing with one hand into the wall
Stand 3-5 meters from the wall. Pass the ball into the wall with one hand from the shoulder.
Hand behind the ball, thumbs up. Carpal movement.
Repeat the exercise 15-20 times for each hand.
3. Lying One-Hand Pass
Lying on your back, pass with one hand up.
Repeat the exercise 15-20 times for each hand.
Dribbling
Great basketball dribbling is the key to all doors. Not to mention how effective it is.
1. Palms on the ball
Take the ball in your hands and move it from hand to hand, hitting it with your palms.
Start slowly and then speed up. 15 seconds slow, 15 fast.
Repeat 1-2 times.
2. Ball on fingers
Quickly toss the ball with your fingertips from one hand to the other: raise and lower in front of you; sit down and get up; raise and lower in motion.
Perform each exercise 2-3 times for 15 seconds.
3. Ball around the body
Move the ball from one hand to the other as quickly as possible: around the body; around the head; in a basketball stance around the leg; in a basketball stance figure eight around the legs.
Do 5 reps each side.
4. Low dribbling on the spot
Low ball dribbling in different positions:
Basketball stance, feet parallel. Dribble to the side of your foot. Free hand in defense position.
Sit on the floor and dribble the ball from your side, bringing the ball closer or further away.
Repeat 15 times with each hand. Do 2-3 sets.
5. Medium dribbling in motion
Medium dribbling of the ball (height - to the waist) in motion. Do it at speed.
Make a turn leaving the ball in place and picking it up with your other hand.
Dribble two courts with each hand.
6. V-dribbling in front of you
Stand in a basketball stance.
Dribble with one hand in front of you in a V, with your right and left hands in turn.
Repeat 15 times with each hand. Do 2-3 sets.
7. Crossover
Move the ball in place in front of you from one hand to the other.
First do the exercise for each stroke.
Then - for every third hit.
After translation, touch the floor with your free hand.
Repeat 15 times with each hand. Do 2-3 sets.
8. Underfoot transfers
Transfer the ball between the legs from one hand to the other.
Translate every third hit with the ball.
After translation, touch the floor with your free hand.
Repeat 15 times with each hand. Do 2-3 sets.
That's it for starters. Of course, it would be nice to learn how to fly - in the sense of jumping high without a trampoline. But that's another story. If you only jump, you are a jumper. And if you have mastered these exercises, you are almost a basketball player. Then you can already learn to play in a team, in real contact conditions.
Why Andrey Kirilenko created School 2.0:
And remember,
"School 2.0"
will introduce you to people who you want to follow an example from: winners in whom at first no one believed; music and film stars going crazy about basketball; heroes who, thanks to sports, managed to overcome themselves.
School 2.0 will recommend movies and books, and they will help you move mountains. With us you will be in trend and understand that success breeds success.


 As you can see, it is a highly efficient way to first teach the principles in a team setting.
 And we didn't have a preseason.
 I know that I did.
 He is a regular contributor and has been featured in multiple videos for Breakthrough Basketball.
 Coaches are frequently handcuffed by the lack of available practice fields, gyms or even ice time.
 The player can challenge himself and see how fast he can do this. Again, the whole team can do this drill in a small confined area.
 However, it is quite possible to achieve sports success. If you always hit the ball in the basket and decided to learn how to learn how to play basketball, read this article. We'll walk you through the first steps to help beginners start playing well.
  Basketball players improve their vision and logical thinking.
 Please note that you need to land on 2 legs.
  A basketball player must accelerate, practice shuttle running, be able to run backwards and move on half-bent knees, work out the speed of hand movement (which is very important when intercepting).
 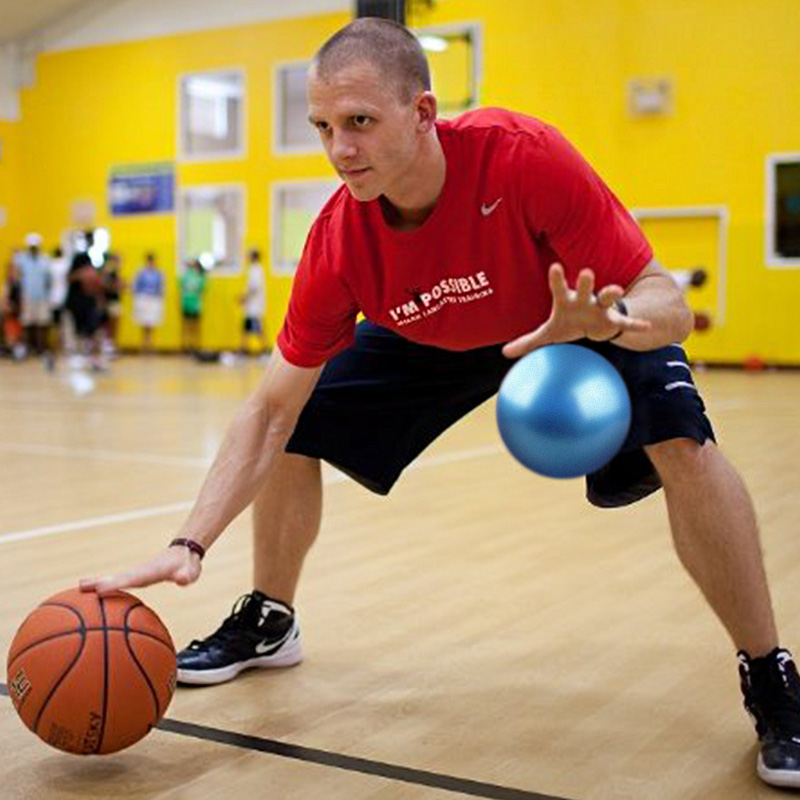 But in general, you can’t do without it, because the correct work of the legs, the habit of standing firmly, not mincing, not taking extra steps, quickly and correctly changing the direction of movement is an absolute must for a basketball player. Plus, of course, dribbling and passing.

 Keep the final position of the straightened arm and closed hand until the ball hits the floor.
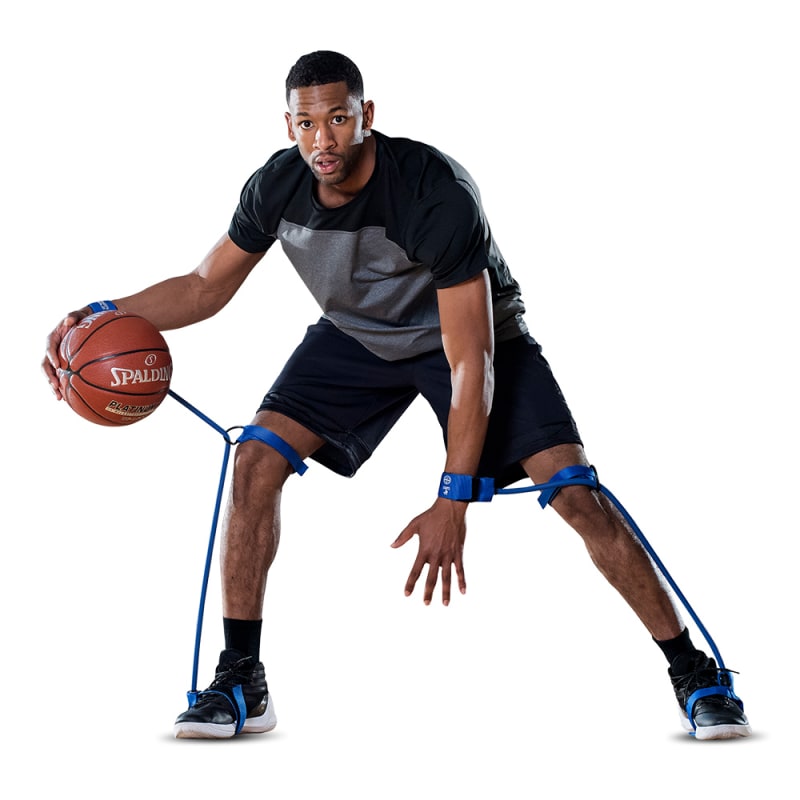

 Do 2-3 sets.