Home »
Misc »
How to run basketball tryouts
How to run basketball tryouts
15 Basketball Tryout Drills for Efficiently Evaluating Players
When conducting tryouts, you want drills that allow you to efficiently evaluate players.
The key word here is “efficiently”. You only have so much time in tryouts to evaluate players. So you want to make good use of your time!
Tryout drills should be fairly simple yet similar to what you normally do in practice. If drills are too complicated, you’ll waste hours of time teaching new players “how to run” the drills. So simplicity is critical when choosing.
Drills should also accommodate varying degrees of ability and experience – since you’ll most likely get a wide variety of players at tryouts. Some players might be inexperienced yet have a lot of potential. You don’t want to exclude those players.
Here are the tryout 15 drills that I like to use. They are simple and effective in regards to evaluating players for your team.
Drill #1 – Learn Players’ Names with Circle Passing
Depending on your situation, you may or may not want to use this drill.![]() The main purpose is for me as a coach to learn the names of the players. However there are other benefits. You’ll find out which players put effort into learning names of teammates and who actually uses their names in practice. Players also get to meet new potential teammates and begin the bonding process.
The main purpose is for me as a coach to learn the names of the players. However there are other benefits. You’ll find out which players put effort into learning names of teammates and who actually uses their names in practice. Players also get to meet new potential teammates and begin the bonding process.
To conduct the drill, players get in a circle (close enough to reach out and touch the person next to them). Instruct players to learn the name of the person standing on their left and their right. Then as the ball is passed, the player receiving the ball will say their own name, and the names of the players next to them. Then they pass to a different player. This repeats until someone knows the name of everyone there… it can be a player or a coach that recites the names of each player.
Drill #2 – Full Court Dribbling and Finishing
This simple drill gives you a good idea of a player’s all around dribbling skill and idea if they can make uncontested lay ups.
Drill #3 – Full Court Dribble with Weave and Finish
This is very similar to the drill above except it adds a cone dribbling aspect that can be telling. Make sure they spread out so you can watch close. Here’s a progression you can use:
- 2 ball dribble (no shot)
- Cross overs and then retreat at wing area
- Cross overs and then fan (lateral) dribble at wing area
- Behind back
- In/out
Drill #4 – Form Shooting
Even though this is an evaluation, I still want players to practice the “right away” and start with form shooting. This drill also allows you to evaluate who listens to instructions closely.
Drill #5 – 3 or 4 Player Shooting
Very simple drill that gets players a high number of reps. I usually start with mid-range shots for a few minutes. Then for older players I instruct them to move out to 3pt range.
Drill instructions: 2 balls and 3-4 players per basket.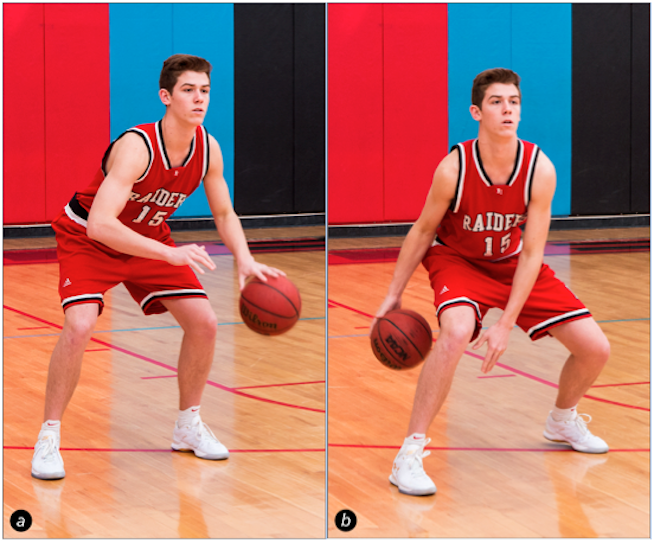 Each player shoots and gets the rebound. As soon as Player A shoots, Player B shoots and repeats the process. Player A passes to B, B passes to C, C passes to A. Players get an average of 14 shots per minute.
Drill #6 – 2 Person Full Court Passing
Passing drill that is very quick and easy to set up for players new to your system.
Drill #7 – Pass and Cut Lay Ups
Really simple drill. Line on top of key and line at wing. Wing player has ball. Pass to top, cut, and receive a pass back for lay up. You’ll see who can pass to a player on the move and who can make lay ups. Also preps players for basic pass and cut offense when we scrimmage at end.
Drill #8 – Footwork Drill – Partner Pass and Pivot
This drill gives you an idea of a player’s footwork skill. I also like to use this drill before the next drill (3 on 2 no dribble). Because I can refer to the jump stops and pivots they are practicing now.
Drill #9 – 3 on 2 full Court – No Dribble
Gives you a good idea on who can pass the ball, pivot, and make good decisions.
Drill #10 – 1 v 1 full court
Real simple. Check the ball and play 1v1 full court trying to score. Make sure players switch around going against different opponents. This really tells you who can defend, who can handle the ball, and how well players move. This is a very telling drill.
To get more reps we use both side courts. After a possession, players go to other court (offense goes to defense) — so they are essentially rotating in a big circle.
Drill #11 – 1v1 Speed Dribble
Shows you who can handle the ball at full speed, who can finish under pressure, who can run fast, and who is a competitor.
Drill #12 – Shell Drill
We like to run the shell drill. This tells us right away if a player knows anything about defensive fundamentals.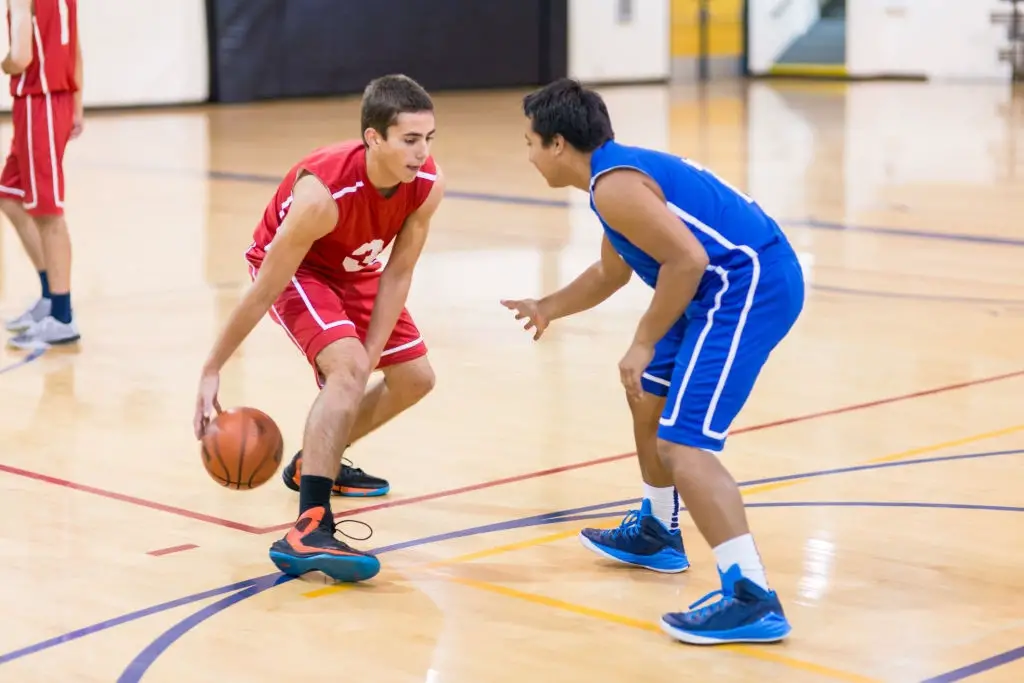 It also gives us an idea of who learns quickly and listens to instructions.
Drill #13 – Basic Offense
Explain our motion offense: “we just want spacing and ball movement until you get a good shot.” Then practice a little 5 on 0 motion — 5 v 0 pass and cut, and 5 v 0 pass and screen (if time).
Drill #14 – Speed and agility drills
In some cases we have players race so we can compare their speed and agility. You can simply have them line up in rows and then race to end of gym, run shuttles, or use agility drills like the lane agility test.
Drill #15 – Scrimmage
At the end of tryouts we let them play. Self explanatory. If we have a lot of players, we try to split them up on multiple courts. We also keep the games short… 5 min games or first to 5 points.
Final Thoughts
You probably won’t have time to use all 15 of these drills in one practice — but hopefully this gives you some ideas on drills you can use at your next tryouts. These are all drills that have worked well for us in the past.
1.5K Shares
- Facebook
- Pinterest
- Twitter
- More
The Defensive Shell Drill Sucks? (VIDEO)
By - Joe Haefner
Home > Coaching > Basketball Defensive Strategy > Man to Man > The Defensive Shell Drill Sucks?
"The defensive shell drill sucks."
"We always use the shell drill to work on defense. "
"
These are two contrasting statements that I have heard from coaches on multiple occasions.
People from the shell drill sucks group criticize the shell drill because it is too controlled. It is not game-like enough. The argument is that you can become great at the shell drill, but still have a poor defense when the games are played.
On the opposite end, the coaches who spend a lot of time on it swear by it. Some will even claim it is the reason that their defense is great.
Well, here's what I think...
Both opinions are right!
If you exclusively use a CONTROLLED shell drill for teaching your defense, you probably won't become a great defensive team.
However, the shell drill can also be a vital tool from your coaching toolbox to develop a great defensive team. That means you don't rely on the shell drill exclusively. Just like anything else in coaching, you use every tool with a specific purpose to create a greater whole.
Here is why I believe every coach should use the shell drill...
- Great for teaching and getting players on board.
The shell drill is great for teaching and allows you to demonstrate to the players exactly what your team defense should look like and to build confidence. It allows you to communicate the players how you want things to be done and why you want things to be done a certain way.
Are you closing out properly? Are you sprinting to areas? Are you in the right position? Are you guarding the ball properly? Are you properly rotating on help?
It also gets your players on board so they understand the big picture.
-
Great progression for developing your defense.
Most great coaches like to start in a closed, controlled environment to teach and build confidence before introducing an open, reactive environment. This would be a prime example of progressing from a shell drill to live scrimmaging.
When you are working on developing a player's shooting form, you're not going to teach them the form, then instantly progress them to a 5 on 5 setting and say, "Okay. Work on your shooting form." You're going to build the proper habits in a controlled environment. You're going to practice repetition after repetition to develop the skills and habits needed to be a good shooter.
Even though teaching defense is not the exact same as teaching shooting, you should still use similar philosophy when teaching your defense. The shell drill does that by building the proper habits and engraining proper defensive positioning through repetition.
- Used to improve weaknesses.
Sometimes, during the middle of the season, you may find a few weak areas in your defense. The shell drill is a tool that you can use to go back to those areas, emphasize them, and clean it up to improve your defense.
- Used to be more efficient with your time.
As a coach, you are always trying to be more efficient with your time. What's a better way to be more efficient with your practice time than getting 8 to 10 players on the court at the same time working on defensive and offensive fundamentals? This is especially useful if you don't have a bunch of quality assistants to run breakdown drills.
Your players also get to work on multiple aspects of defense all at once: on-ball defense, help positioning, close outs, defending cutters, defending screens, defending post play, rotations, etc.
Coach Jim Huber demonstrates a progression of the shell drill below. This followed a teaching section in which he taught positioning.
For those of you unfamiliar with Coach Jim Huber, he coaches some of the best high school players in the nation. He is a coach and director of operations for Mokan Elite who is a team in the Nike Elite Youth Basketball League (EYBL). Since Jim's team competes nationally and they often face teams with more physical talent, great defense has been a staple for Jim's teams to win tournaments and compete in the EYBL.
Jim has coached defense at almost all levels, ranging from 4th grade to college.
This is a preview from our Man to Man Defense 4-DVD Set that we will be introducing shortly. We are really excited to get this out as we've spent nearly 10 months on this project and it's unlike any man to man defense video that we've ever seen.
More details coming soon!
UPDATE 5/12/13: Jim Huber's new DVD set is now available here.
What do you think? Let us know by leaving your comments, suggestions, and questions...
10 exercises for developing attacking skills of basketball players
Hello, dear visitors of basketball-training. org.ua! Today I want to tell you about a few basic exercises, by regularly performing which you can reach the next level, becoming a really good attacking player.
Yes, many articles have already been written about this and many videos have been shot. Yes, we all know a few dozen exercises that promise to make you at least the next Michael Jordan. I will not reinvent the wheel, but will tell you about a series of exercises that just a year ago helped me a lot to improve in the attacking aspects of the game. Let's start the story.
Basketball drills
Mikan Drill
This drill gets its name from the first really big guy in the NBA, George Mikan. Begin to perform the exercise, located on the right side of the basketball basket (a meter and a half from the ring). Take two steps to the left, parallel to the endline, and throw a half hook on the other side of the hoop using your left hand. Without letting the ball fall to the ground, pick it up and take 2 steps to the right (again parallel to the base line) and again throw the ball into the ring with a half hook using your right hand. Try to get into the rhythm and hit 10-20 in a row.
[youtube]CmFOj0nhUN8[/youtube]
This exercise will teach you how to attack with a weak hand and turn it into a formidable weapon. Personally, while doing this exercise, already on the second day I began to complete the passages with my left hand. And after a couple of weeks, the effectiveness of the attacks doubled: now the defender had to hold both sides, and I could always attack with the hand farthest from him.
Superman Drill
This exercise is very similar to the previous one. Position yourself almost on the border of the three-second zone (you always want to call it a “trapeze”, but with the change in the rules of basketball, it has lost its usual shape). We perform a throw on the ring with one single difference: do not try to hit the ring! On the contrary, raise the trajectory higher so that the ball, bouncing off the backboard, falls on the other side of the ring. This is where you need to catch him, not allowing him to fall to the floor.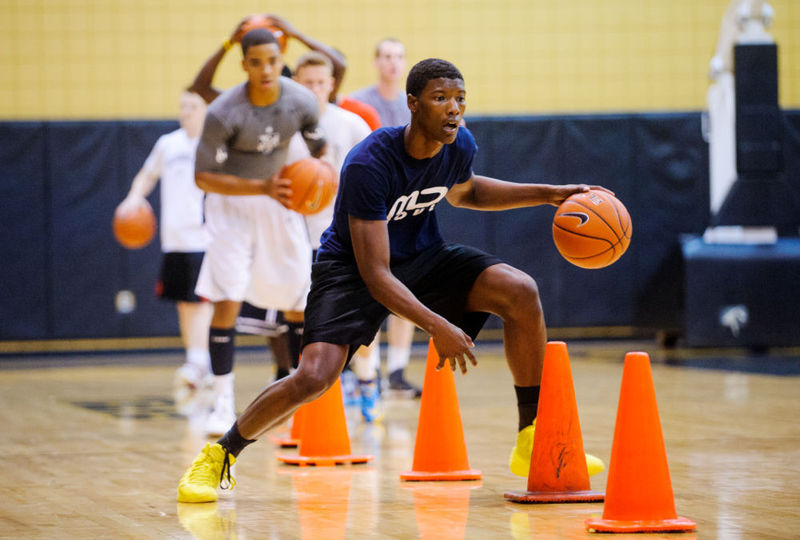 Important: try to take no more than three steps to overcome the distance from one side of the ring to the other. Follow the rhythm: let the entire exercise be performed in the same rhythm. Do 10 to 20 repetitions of this exercise.
[youtube]T2Jo-2ME-z4[/youtube]
Beat the Pro
Imagine that you are playing 1 on 1 against your favorite player. You just need to beat him by being the first to score 21 points. Perform game throws (with deviation, after strides, after crossovers and sudden stops). Be clear about your opponent, how he defends against you, how he tries to cover your every throw, how he waits for the slightest mistake in order to intercept. For each roll you make, you get 1 point. For each miss, the opponent receives 2 points. When you reach 20 points (if you haven't lost before) - you need to make a "buzzer beater" and it needs to be scored. How will you do it: with an incredible deflection after a fabulous dribbling or just hitting the ball with 9meters. Try to beat the best players in your imagination. Important: be realistic when playing against Shaquille, it is foolish to push him with your back or try to shoot the ball while in close contact. Also, it would be wrong to try to overtake Rose or Jordan. In general: adequately assess your opponent and try to make your life as difficult as possible.
Shoot the Shot
Do you remember the good old game "Around the World"? Sometimes it is called "Points", but that's not the point. Now we will try to add a hit percentage to this game. Also, we will add a couple of new points to it, the so-called "elbow spot".
In order to advance to the next point, you must make at least 3 out of 5 rolls. Naturally, if the level of your game (and especially your sniping skills) allows you to regularly shoot with a percentage higher than 60%, then increase the number of goals scored to 4 out of 5 from each point. Or up to 5 out of 5 from medium and 4 out of 5 from long range. Total: you have 18 points, 90 throws of which at least 54 must reach the goal. Challenge accepted?
Ball slaps and squeeze
Throw the ball up as if it had bounced off the ring after a bad throw. Jump up, grab the rebound and squeeze the ball as hard as you can with your hands. Imagine that you had difficulty getting this rebound and now they are trying to knock it out from you. Immediately after the rebound, rotate the ball around the body (at different heights): around the head, back, knees and calves. Repeat this exercise 10-20 times.
Figure 8's - with dribble and without dribble
Eight, the famous eight is back, now with dribbling. Do you remember how Petya Maravich taught us how to handle the ball? So, now we are doing the same thing, but using dribbling. For those who find it difficult to perform such dribbling - try to perform the exercise without it.
[youtube]DYAQoOxuskg[/youtube]
Quick hands
This is a cool exercise that is sure to be performed at every training session for young basketball players.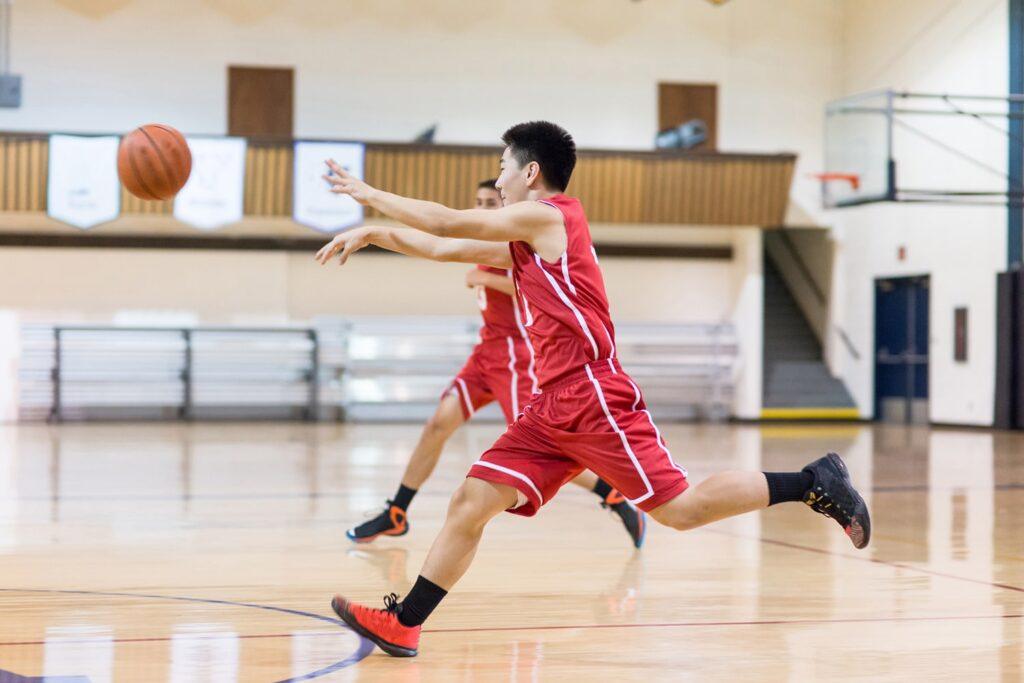 Starting position: one hand in front, the second - behind, the ball is between the legs. After releasing the ball, you need to change the location of the hands: if the right one was in front and the left one was behind, then now the ball needs to be grabbed with the right one from behind, and the left one in front. Diversify the exercise: both hands in front, the ball between the legs. We release the ball and catch it with our hands, but from behind. Important: regular performance of this exercise will allow you to develop hand speed, which is very important for performing high-quality and fast feints.
How to do it: 30 seconds first option, 30 seconds second option. Write down how many times you managed to do the first time, and then compare with the results after a week.
[youtube]TGh81tj6zbU[/youtube]
Tom-Tom dribble
This movement is also familiar to many of us. Stand with your legs slightly apart so that you can easily transfer the ball between them. We start with the right hand. We transfer the ball in front of us from the right hand to the left; then from the left hand, transfer under the foot to the right hand. Now with the right hand we transfer the ball behind the back - it turns out to be in the left hand and we send it back (also behind the back) to the right. This is 1 repetition. Repeat 10 times and change hands (i.e. mirror).
Drum dribble
The point is to learn how to quickly and comfortably change the pace of dribbling and its pitch. For example, right after a screen or a run, you may find yourself kicking the ball out from behind (even though you already think your opponent is offside). The most elementary countermeasure is to sharply reduce the height of the dribbling. So, the exercise is that you need to knock the ball on the floor alternately with your right and left hand. Start from a normal static position (legs and back straight) and go down, increasing the intensity of the knocks on the floor. As soon as there is a space between your hands and the floor, a little more than a ball, begin to rise up. Make several series (for example, 5). For advanced players, try this exercise without looking at the ball, or by hitting it with 1 finger of your right hand and 1 finger of your left hand.
Summary
Here is a set of exercises I suggest you do every time you enter the court. Believe me, the results will shock you! Of course, if you are a professional player, then these exercises will be familiar to you and will be given easily. However, who, if not you, should know about their usefulness. Join our VKontakte group: https://vk.com/uroki_basketbola - there are a lot of useful and interesting things.
And this is the end of the article, I wish you successful training and look forward to visiting this site!
Basketball Coach Online
- Basketball Coach Highlights
- Responsibilities of a Basketball Coach
- Where you can learn the profession of a basketball coach
What is a good coach? This is a mentor who is able to teach the player not only the necessary motor skills and theoretical knowledge, but also develop confidence, the will to win, and team spirit in him. It depends on the coach whether basketball becomes a pleasure or turns into an ordeal. A good basketball coach is also an inspiration, a friend, and even a psychologist.
To start working as a coach, you need to have basic knowledge, learn the rules of the game, use motivational games for your wards, and much more. Good coaches are distinguished by love for their profession, the desire to develop, and, of course, experience.
Basketball coach highlights
A successful athlete is the main indicator of good coaching. In order to achieve good results, they start playing sports from childhood, constantly developing, not stopping at the results achieved. If an athlete stops showing good results or gets stuck at some level, the coach tries new techniques, is responsible for physical preparation, as well as for the morale before the competition. One of the most important tasks of a coach is to identify and reveal the athletic abilities of his ward.![]()
Coaches can work in different areas:
-
Work in sports sections and schools (mass sports). Here the coach teaches the basics of sportsmanship, looks for talented children, works with pensioners. In such cases, the coach helps people maintain an active lifestyle, physical fitness.
-
Individual preparation of the athlete. The coach is responsible for his sports future, draws up a training schedule, selects training methods, draws up a nutrition plan, monitors the health of the athlete.
-
Conduct team training. The coach selects the tactics of the game, including based on the characteristics of the team members. And of course, it creates and maintains a friendly atmosphere and team spirit among the players, setting them up for victory.
The coach always knows everything about his wards, in fact, lives the life of his athletes. If he thinks only about his professional task, then he will not be able to reach an understanding with his wards. Accordingly, the work of the coach will not be one hundred percent effective.
Coach's duties
An individual or team coach has many responsibilities - from sports to household.
-
Decides what load to give to the athlete during training, develops a plan for the training period.
-
Solves household issues: finds a place for training, deals with sports equipment and inventory.
-
Conducts pedagogical work with athletes (this applies to those coaches who work with children).
-
Shows how to perform elements of technique, exercises, helps the student (insures).
-
Conducts psychological training of athletes, helps to cope with pre-start excitement, reveals the potential of the wards.
-
Sets goals and ways to achieve them.
-
Forms a team in a team sport.
Where can you learn the profession of basketball coach
The main thing that makes people choose the profession of a coach is the love for sports and the desire to dedicate their lives to this work.