Home »
Misc »
How to set up a basketball court
How to set up a basketball court
How to DIY Build a Basketball Court (8 Step Guide)
Inspired to build your own backyard basketball court?
If you're interested in DIY'ing a basketball court or having a local contractor install a court for you then you've come to the right place.
Last Updated 2nd of April, 2020.
1. Choose the Size and Location of Your Court
Ideally you’ll choose a location that is reasonably flat, to keep excavation needs to a minimum.
Recommended subsurface base: Concrete (100mm thick, 25MPA, Reinforced, Helictoper/smooth finish, Standard slope to allow water to drain off the slab)
We strongly recommend a concrete base for any new base being built for a MSF PRO sports court. Concrete provides by far the best longevity, performance and value over the long run and requires virtually no ongoing maintenance or repairs for many years. Other suitable bases include Pavers, Asphalt or Decking.![]()
- Option 1: Have an elevated concrete slab & then fit your landscaping requirements around it.
- Option 2: Level the slab with the rest of your backyard. This option involves more excavation work/costs.
The size of a full size NBL court is identical to the FIBA regulation sized basketball court of 28m x 15m (420sqm), which is usually too large to fit into the average backyard. We recommend considering a half court, which can be customised to suit your space. Sizing can range from very small approx 4m x 6m (24sqm), 9m x 5m (45sqm), 10m x 7m (70sqm) to a 3X3 regulation half court of 15m x 11m (165sqm).
Precise measurements and planning are crucial in order to end up with the best result.
2. Purchase the Hoop & Sports Court Surface Tiles
The in-ground Hoop anchor kit should be installed during the concrete pour, so ensure you’ve ordered your Hoop in time to arrive before you schedule the concrete. Take note of the hoop's overhang in centimetres so you can plan accurate placement of the hoop anchor, free throw and three point lines.
Surfacing your court with a specially designed synthetic sports surface such as Australia's #1 selling, top rated MSF Pro™ will not only produce an amazing looking result, but will also provide more accurate ball bounce, sound reduction and minimises joints strain/injuries.
3. Level the Ground
Prior to concreting, the space must be dug up and levelled. If you require the concrete to be flush with the surrounding ground then you must excavate 115mm below surface level to allow for the concrete slab (100mm) and sports surface tile (15mm). If you are opting for the elevated slab then you may not need to excavate but you do need to remove any grass and level the ground.
IMPORTANT SAFETY PRECAUTION: Before you dig, call 1100 (Australia) or your local utilities to rule out the presence of buried cables including power, water, gas and phone lines. Failure to do so could result in serious or fatal injury. Dial Before You Dig is a FREE national referral service designed to assist in preventing damage and disruption to Australia’s vast infrastructure networks which provide essential services we use every day.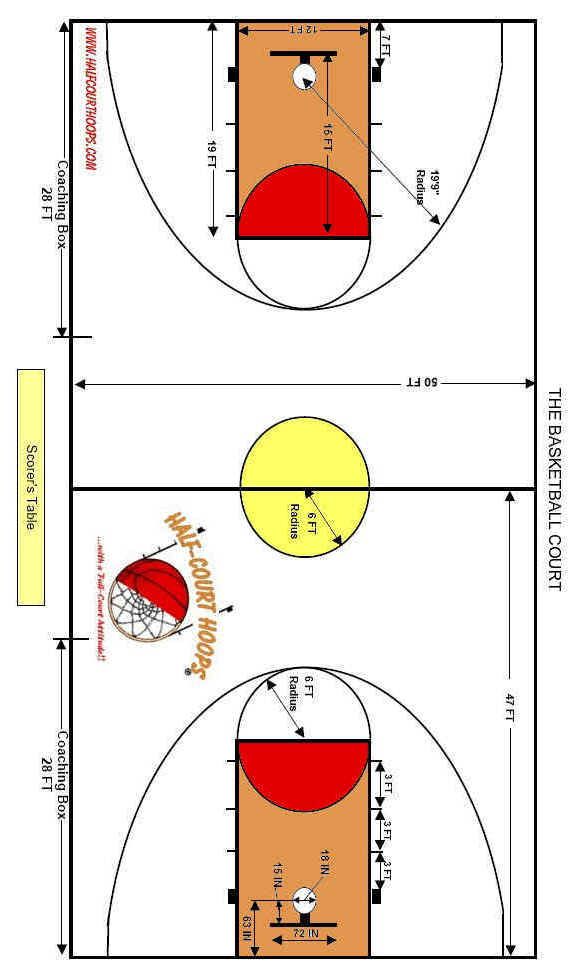
4. Pour a 100mm Concrete Slab
Prepare and pour a 100mm thick slab of concrete (25MPA, reinforced, standard slope, helicopter/smooth finish) matching your exact MSF PRO™ Court Design measurements. Ensure you have someone experienced with concrete slabs on hand for this step. Plan the concreting for when the weather is dry and allow for 72 hours to let the concrete set.
It's recommended to install the hoop anchor at the same time as pouring the slab to save on expenses. The recommended hole size for a hoop anchor system is approx 500mm x 500 mm and 1.2m deep. Please note: Always remember to closely follow the installation & safety instructions that come with your in-ground hoop.
Always be sure to follow the official basketball hoop installation instructions. Goalrilla in-ground hoops generally require 3-5 strong labourers with multiple ladders and power tools. Hoop installation can take up to a few hours for those inexperienced with installing.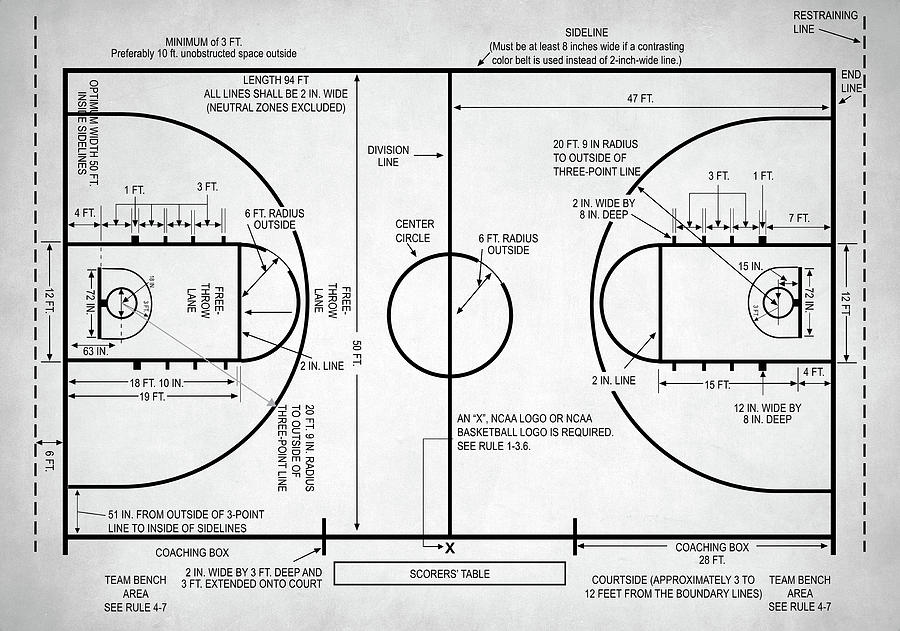 The below videos provide an example of the procedure involved for installing a popular Goalrilla in-ground basketball hoop system yourself...
7 Steps to Building Your At Home Basketball Court
A dream of most basketball players is to have a court of their own at their home. Give this post a read for 7 steps to for planning your at home basketball court.
When at a home, a sport court can be made up of pretty much anything as long as you have a basket and a ball! But, some setups are definitely better than others. Depending on your yard/house, a “court” could take form in your driveway, back patio, basement, or the most common - driveway. At my house, we just decided to fill in our pool and install a ½ outdoor court, so I am very familiar with this process.
Here are some decisions you have to make:
1. Determine the general space:
The most important decision if you’re interested in having a basketball court at your home is determining the space. Is your court going to be indoor or outdoor? If outdoor, do you have an existing hard surface or do you need to build one? Start exploring an ideal situation.
As I mentioned, we recently built out our own basketball court at home by replacing the patio and pool in the back. We knew this meant filling in the pool legally, ripping out the patio bricks and then laying a cement slab.
2. Determine the Size of Court:
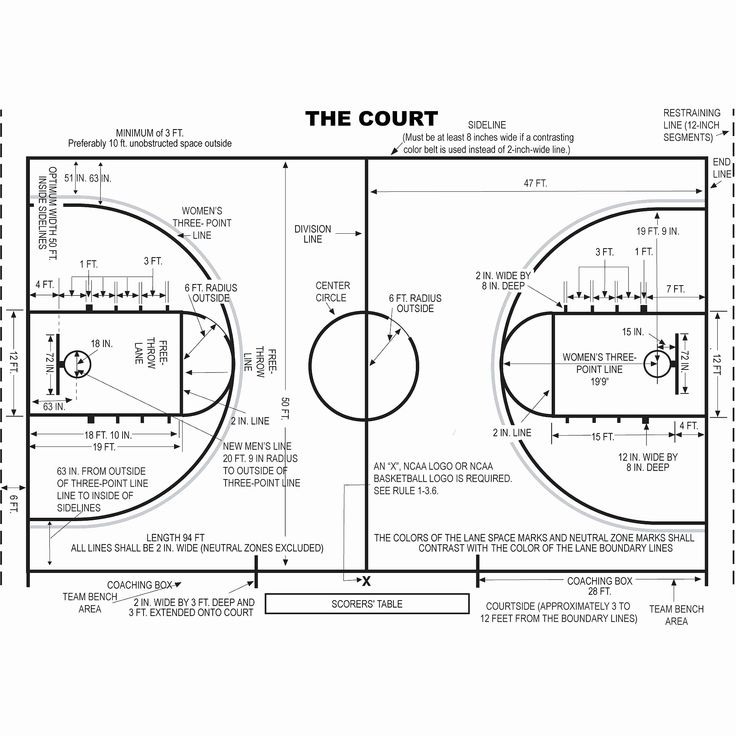
Most home courts are some version of a ½ court. College regulation courts are 94 ft x 50 ft while high school courts run 84 ft long. Your home court does NOT have to be even close to this, in fact we see a ton of customers that have a small lane-line sized area and still use a Dr. Dish.
For us, getting a college regulation 3 point line was very important so we measured over and over again to ensure we had enough space. To do this, we put a stake in the ground of where the hoop would be and measured out 4 feet to account for the hoop overhang. We then cut a string 20 feet long and drew a large half circle of the estimate 3 point line area.
We filled in our pool and the space allowed for about a 30” x 60” cement slab. This allowed for a NCAA approved 3 point line.
3. Decide on the Surface Type
Budget is typically the main factor for the type of court surface - but it may be also on what you aesthetically prefer. Weather conditions may also play a part in this decision. We live in a heavily wooded area in Minnesota, so opted against investing in VersaCourt tiles due to the debris, maintenance, and cost.
Here are some options to consider:
1. Gravel
2. Pavement
3. Concrete
4. Patio Pavers / Stone
5. Tile
6. Decking
7. SportCourt Tiles
4. Set Your Budget & Get Bids!
Once you have the basic area planned out, with material type decided on, it’s time to get some official bids! Do your research. In our experience, bids can vary greatly and cheaper isn’t always best - opt for a reputable company with reviews you can trust.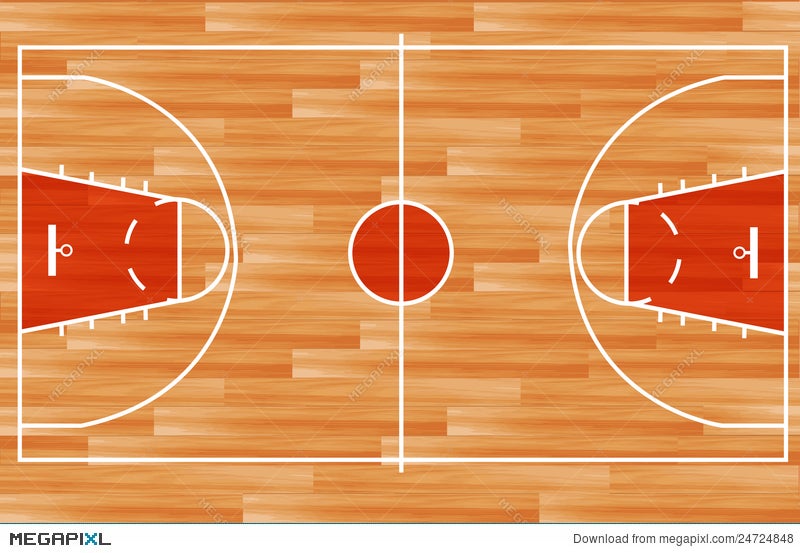 If you intend to perform any of the work yourself, account for your time and materials. Get a number that you feel comfortable with and move forward with the project.
While you wait for the project to take place there are a few other things you can do:
5. Purchase The Hoop
If you are making the investment in a dedicated area to play basketball, I would suggest you also invest in an in-ground basketball hoop versus a portable one. The main thing you need to be cognizant of is the backboard size and the overhang, as it will impact your court footprint. Here are some brands to consider. We decided to go with MegaSlamXL for ours and love it!
MegaSlam
Spalding
Goalrilla
Goalsetter
Check out this blog post of the Best Portable Hoops for 2019 for some options if you want to go with a portable, less expensive one.
6. Paint Court Lines
Adding painted lines to your court is optional and something you can always come back and do.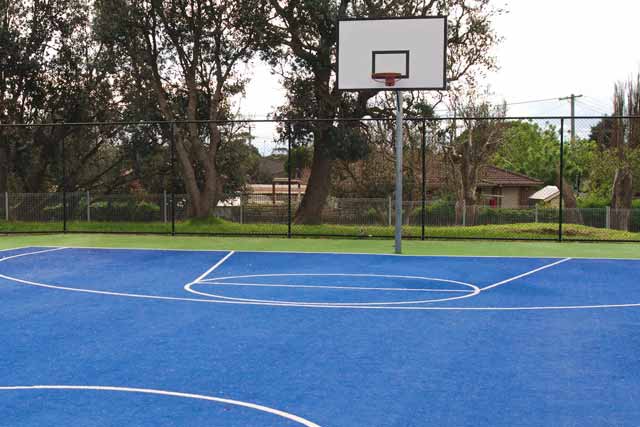 Having court lines would be very valuable for practice. If you decide to purchase a stenciling kit, this shouldn’t be too tough. It is possible to do this yourself without a stencil but you will have to be very good at measuring/taping and have a steady hand when it comes time to paint!
Here are the most important things to draw in:
- The 3 point line (you pick: NBA, college, or high school)
- The free-throw line: exactly 15 feet from the backboard
- The free-throw lane, 12 feet by 19 feet (the top of the box is the free-throw line)
7. Purchase Accessories
Once the project is complete, with the hoop installed it’s time to get reps up! Make sure to purchase some basketballs that will withstand the environment if your court is outside. We purchased composite balls like this one by Spalding. If your court is indoors, opt for some more game-like balls.
The ultimate accessory would be a Dr. Dish Home for basketball training. This shooting machine designed specifically for home will take your at home court to the next level, with on demand training and over 1,000 reps per hour.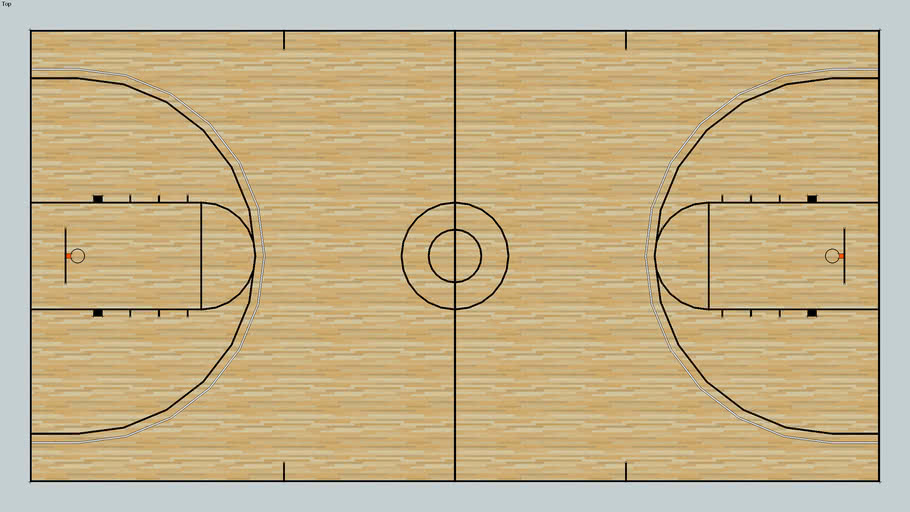 The player will never leave your court!
Looking for more accessories for your home court? Check out this blog post:
Top 13 Gifts for Basketball Players
Click here for more info on Dr. Dish basketball shooting machines.
For drills and workouts using Dr. Dish, click here: https://www.drdishbasketball.com/resources
Follow us on social media for daily basketball drills, tips, and inspiration!
https://www.facebook.com/drdishbball
https://www.twitter.com/drdishbball
https://www.instagram.com/drdishbball/
How to equip a basketball court in the country or in the yard
Basketball develops the child's physical abilities - coordination, endurance, develops strong-willed qualities, concentration, attentiveness and teaches non-standard thinking. Professionals recommend sending a child to the basketball section from the age of 8-9, but outside the city or in the yard, you can “chase the ball” from an early age.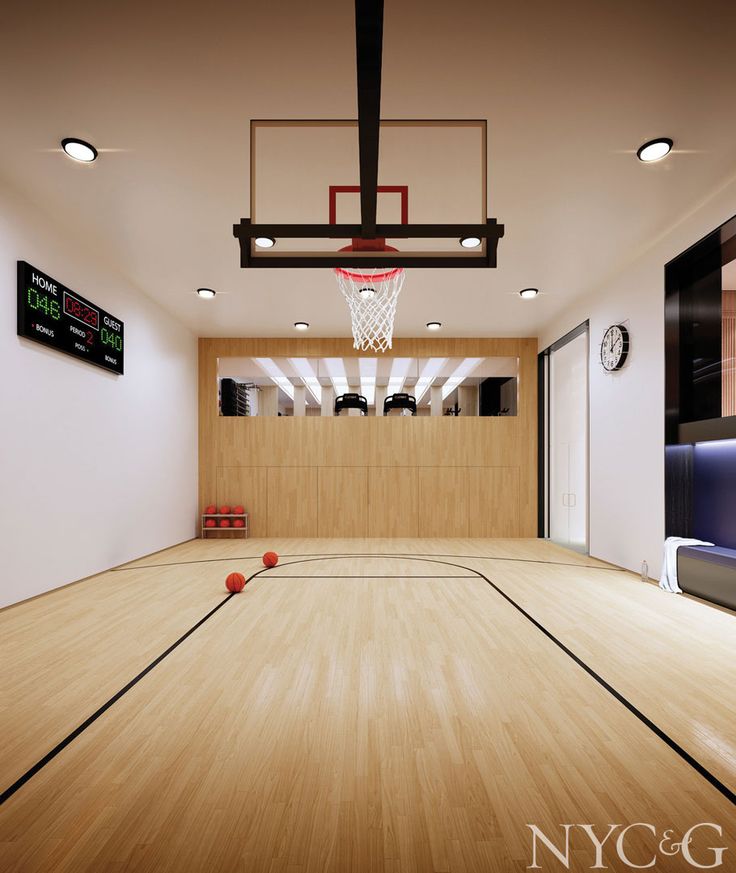
I myself equipped a basketball court in my country house and now I am ready to share the secrets of its arrangement. I'll tell you what you need to do, how to choose the right equipment and how to care for it.
Prepare basketball court surface
To create a basketball court in accordance with all the rules, you need to select a flat horizontal surface for it and fill it with concrete. After that, I recommend applying a special rubber coating, like on playgrounds in the yard. There is a more expensive coating option - from rubber.
The coating will provide cushioning - the ball will bounce well.
If it is not possible to organize a special platform, you can simply place a rack or hanging basket on a dirt surface. In this case, the ball bounce will not be so strong. An important requirement for safety: the surface must be flat, without holes and bumps.
The dimensions of the site depend on the features of your yard or plot in the country.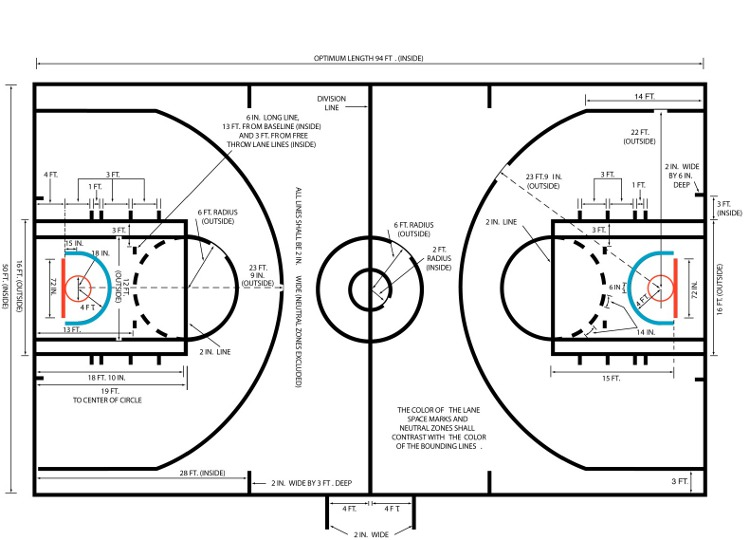 A full-fledged basketball court has dimensions of 28 × 15 meters. However, not everyone has the opportunity to build such a site in the country.
It is necessary to take into account the technical features of the game. The three-point line in basketball is 6.75 meters from the hoop. Therefore, it is necessary that the size of the site be at least 10 × 13 meters. If you are not going to train three-point shots, a 5 × 5 meter court will do.
Mark out
The second step is to mark up. It is important to use paints of contrasting colors. It is better to buy paints with a high content of rubber or polymer.
If you are equipping a basketball court for children, make the markings bright so that they cheer you up and attract attention. For the game of teenagers and adults, it is better to immediately apply technically correct markings.
Place a small fence or protective net on the site. Thanks to them, you do not have to constantly run after the ball to the other end of the site.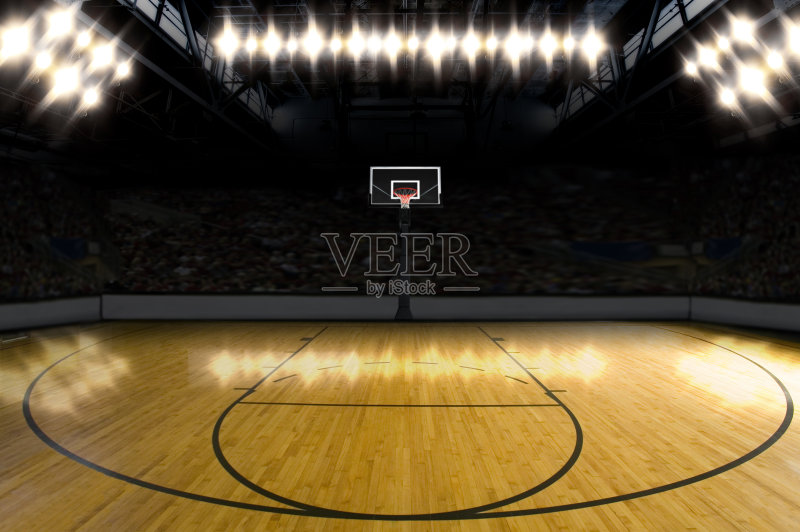
Buy stand or backboard
It is difficult to answer the question of what is better - a basketball stand or a backboard. It all depends on taste, tasks and opportunities. Each of these types of equipment has its pros and cons.
There are two types of racks: mobile and static. The static one is mounted in the ground.
The base of the mobile rack is filled with sand or water - for stability. The main advantage of a mobile rack is that it can be moved from place to place. This is convenient when there is no dedicated basketball court or if you are going to play other games in this area, such as tennis or football.
The main requirement for racks is their stability. It will be much more comfortable and safer to play if you are sure that the stance will withstand a blow of any force.
Pay attention to the materials from which the racks are made. A static rack will be outdoors throughout the year, which means it must be made of reliable materials.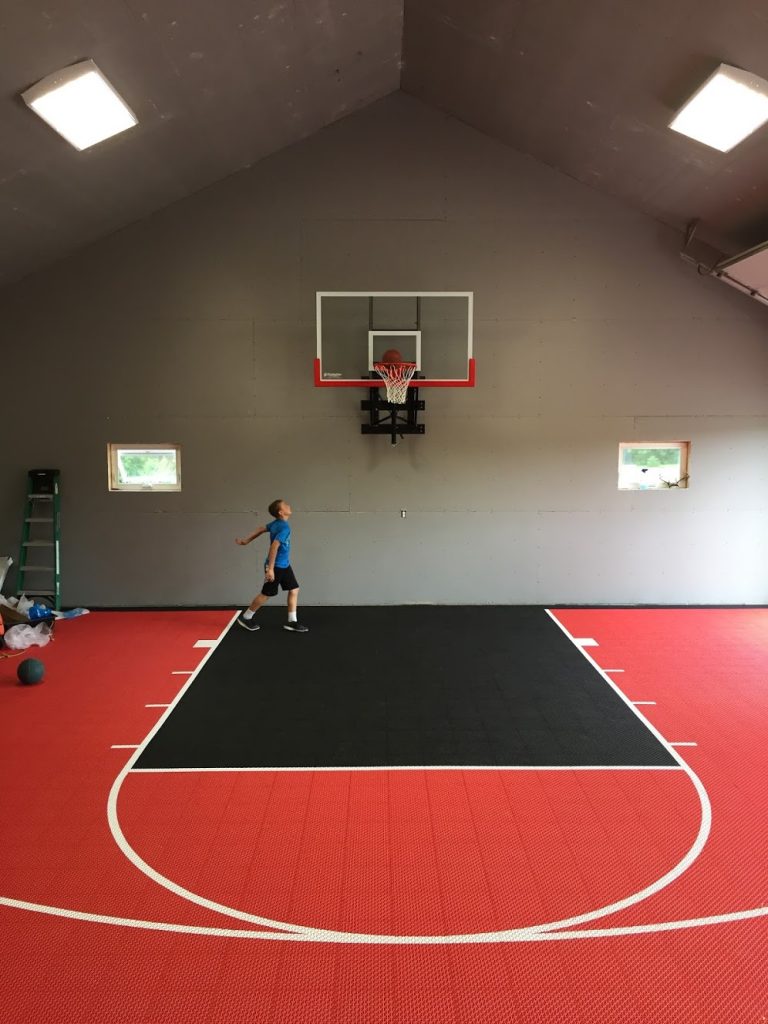 It is better to buy racks from well-known manufacturers. So, the American companies Spalding or Royal Fitness guarantee high quality, durability and safety.
Basketball backboards can be made in the country with your own hands from a board, chipboard or plywood remnants. If this option does not suit you, you can purchase semi-professional or professional options in stores.
There are four types of materials from which the shield surface is made: composite, polycarbonate, acrylic and tempered glass. The first one is the cheapest. It is intended for entry-level players. Now manufacturers offer a large selection of colors. A carbonate backboard will provide a good bounce of the ball. An acrylic shield is bought to hold competitions or intense games.
The mobile stand can be moved, so it is suitable for a playground in the country and for those who want to play other games besides basketball
Shields and racks made of tempered glass look solid.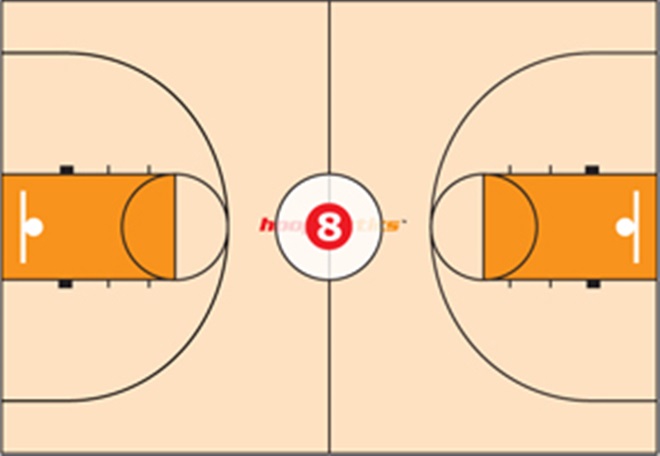 They will be appreciated by experienced basketball players
Pay attention to rings
You can buy cheap rings, but I don't recommend doing that. In a year they will deteriorate and you will have to buy new ones. Basketball hoops from Spalding and Royal Fitness are made from quality metal that won't rust in the rain.
The ring must have a springy structure - no rigid attachment to the shield.
According to NBA rules, the ring must be fixed at a distance of about three meters from the ground. For a game with the participation of younger students, it can be hung lower so that it is not very easy to hit it, but at the same time it is quite possible.
Choose rings made from high quality metal to last for many years. For a game involving adults and teenagers, metal chain rings are suitable. They are distinguished by durability and strength.
Know what types of basketballs exist
Success in the game depends on the basketball.
They are divided by size. Size 7 is for men, 5 for women. Even smaller balls are bought for children. The size 6 ball is suitable for street ball or street basketball where the game is played on half the field.
You also need to take into account where you will play the ball: on the street or in the hall. The street ball has a stronger bounce, it is harder and more wear-resistant, but the indoor ball is more convenient to hold in your hands.
It is important to pay attention to the composition of the basketball. Well-known companies use complex polymer compositions for its production. The more expensive the ball, the more complex the polymer composition. The quality of the material determines how comfortable it will be for the players to hold the ball, what kind of rebound it has from the floor and from the bow of the ring.
Another important nuance: do not forget to purchase a pump with any needle.
If you want the ball to have good grip and bounce well, you need to choose polymer models from world famous manufacturers
Proper care
Professional athletes are ready to play in any weather, but amateurs are better off not following their example. If you don't properly store, use and care for your basketball arsenal, its lifespan will be shortened. Humidity will ruin the ball and all equipment, so you can’t leave them outside during rain and snow.
Balls should be stored only in a dry and ventilated room at a temperature of 10 to 20 °C.
Before winter storage, water must be poured out of the base of the mobile rack, and then removed from the street. If you don't feel like doing this every time, fill the rack with sand. Then it will not need to be constantly moved. Basketball stands from Royal Fitness can be left outside in the winter.
Points to remember when setting up a basketball court
- The area needs to be determined. The classic version - 28 × 15 meters - is not suitable for everyone. For a dacha, a 5 × 5 meter area will be enough if you want to train three-point shots.
- Don't forget the markup. It should be in a contrasting color. Bright colors will interest children and cheer them up.
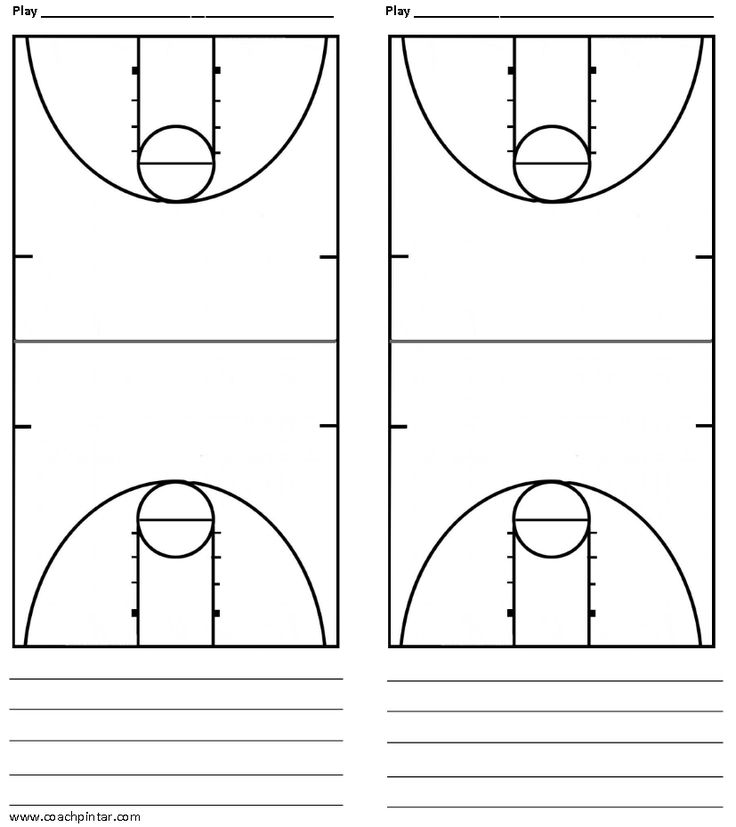
- It is necessary to install a protective net so as not to constantly run after the ball to the other end of the area.
- If the shield is stable, then it is safe. A mobile stand from a well-known manufacturer will also not let you down, and it can be moved around the site.
- When choosing a basketball, you need to focus on the players. For games involving children and adults, balls of different sizes are needed.
- If you want a basketball ring that doesn't rot in a year and you don't have to spend money on buying a new one, choose rings from well-known manufacturers made of high quality metal.
- Don't forget about care. Do not leave equipment and inventory on the street. Racks need to be removed to the house for the winter.
how to open? How to equip it?
Each of us can create a professional basketball court. However, this will require huge financial investments, hiring specialists and a large room.
This article is written for owners of schools, sports complexes and other similar establishments. And also for parents who have a huge house or cottage. Those who want to build a basketball court in them.
We will look at all aspects of creating a field for this sport. We will tell you where to place the judges and how to draw the markings. And also about many other things.
The International Basketball Federation has created uniform requirements for all sites for this sport. If you create a field that complies with the regulations, you will be able to hold professional competitions on it. And even rent out your space. Moreover, both for games and for tournaments.
How big should a basketball court be? The basketball field must be made in the shape of a rectangle. It must have a hard surface. The latter can be made from wood or other materials.
The basketball court must be free from unnecessary objects. Only 2 racks should be located on it. 2 shields. 2 baskets for balls. And also markup. Chairs, benches and other things on the site should not be.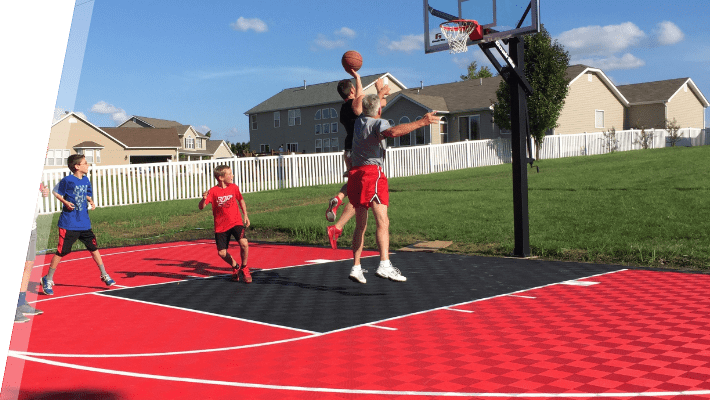
Basketball court size requirements
The Basketball Federation has uniform requirements for the dimensions of the court. According to them, the field must be 28 m long and 15 m wide.
The Basketball Federation also allows competitions to be held on smaller courts. With a length of 26 m. And a width of 14 m. Competitions for young athletes can be held on such sites.
Deviations from the established minimum dimensions (26 m long and 14 m wide) are not permitted.
If your court is less than 26 meters long and 14 meters wide, it will not be suitable for professional competition. The same applies to fields that are over 28 meters long and over 15 meters wide.
Height requirements for basketball courts
The room where the basketball court will be placed must be high. The ceiling must be at least 7 meters above the floor. If it is low, then it is not worth creating a basketball court in such a room.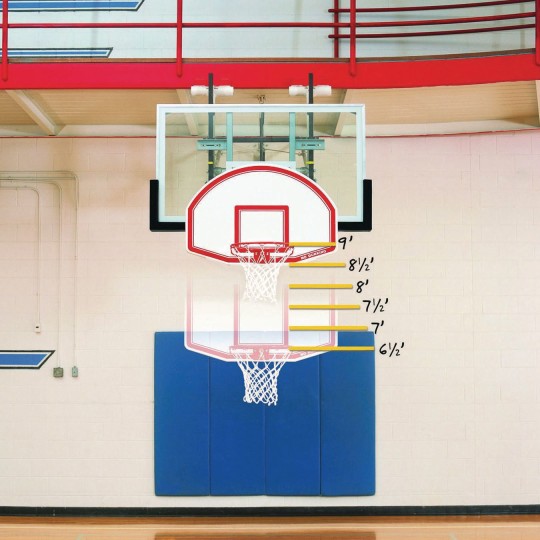 Because it will be unsuitable for professional games.
Basketball court lighting requirements
The area where you plan to place the basketball court must have good lighting.
Each part of the field must be highlighted. And it's equally bright. So that the players of both teams can see the baskets, the posts and each other. Otherwise, they will collide during the competition.
The light on the basketball court should not be too bright either. Otherwise, he will blind the athletes. And also prevent the referees from watching the game.
What lines should be on the basketball court?
Each basketball court must be marked. It is important that each part of the site is marked with the same color paint. Preferably white.
Each marking line drawn on the field must have the same dimensions. Its width must be at least 5 centimeters.
That is, it should not be so that in one part of the field the marking lines are "thick". And in the other they had a small width.
The marking lines must be clearly visible to the players and referees. If you do not draw them brightly enough, then it will be impossible to play on such a basketball court. It will not be allowed to be used for competition.
What should the front and side lines be?
The edges of the basketball court area behind the baskets must be marked with 2 front lines.
Field areas that are located along the length of the court must also have marking lines. They are called lateral.
As we have already said, there should be no foreign objects on the site. We are talking about tables for judges. As well as benches for spare players.
If you plan to place a bench of substitutes, then this must be done off the field. At a distance of at least two meters from its edges. The same applies to referee tables.
Where is the center line drawn and how is it drawn?
The central part of the basketball court must also have markings.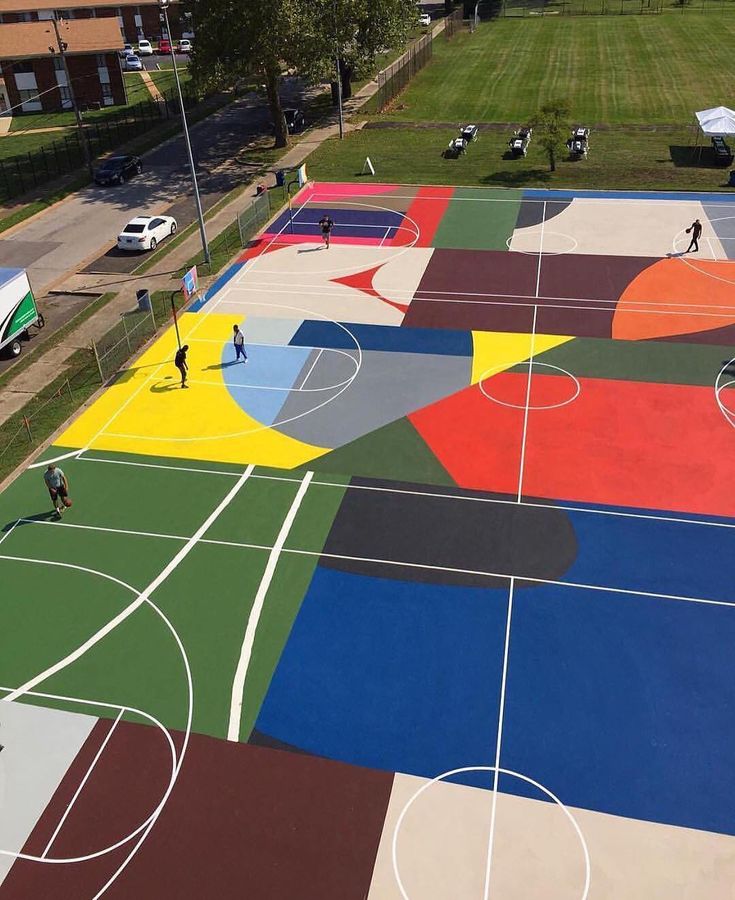 It must be drawn in the middle of the field.
The center line starts from the side lines and runs to the center.
It may protrude slightly from the side of the field. But no more than 15 centimeters.
What should the free throw lines be?
In the area of the zones with basketball baskets of both teams, a special area for free throws is drawn.
It must be located 5.8 meters from the left side of the field. The penalty area line must be at least 3.6 meters long.
For a free throw, the basketball player will stand in the middle of this area.
Restricted areas
Each basketball field has special "restricted areas". They are highlighted with special "front" marking lines. And also outlined by lines for free kicks.
Additional lines are drawn from the front marking lines in the restricted area. They go in different directions.
The front lines must be placed three meters from the penalty area.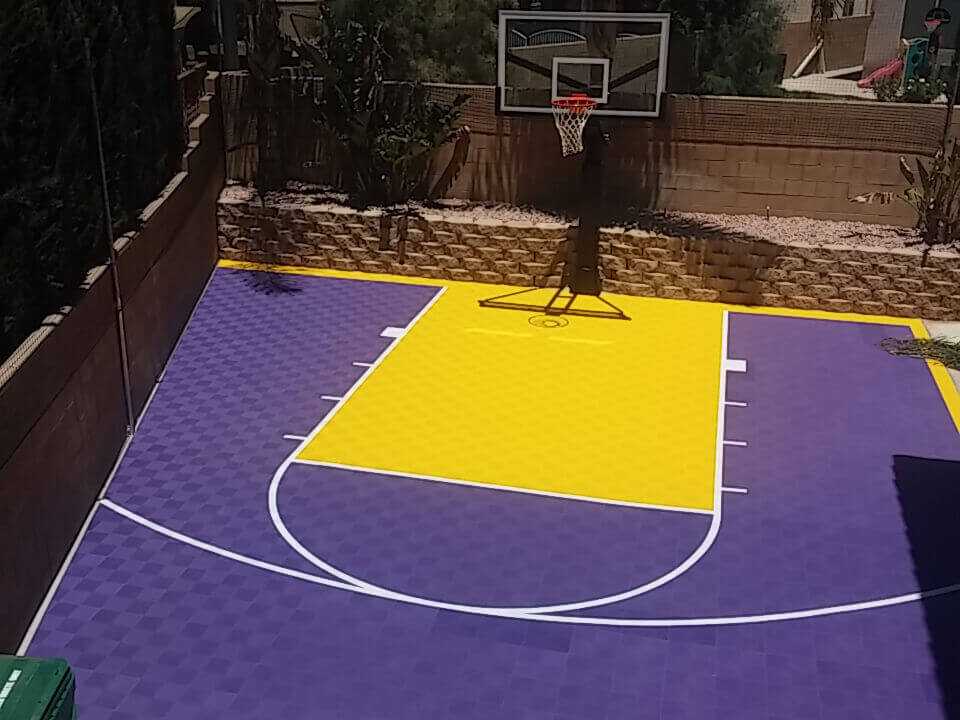
The front lines are part of the special restricted areas. They can be painted in different colors. However, the marking lines must match the hue of the circle that is drawn in the central part of the field.
More about free throw areas Free throw areas are also classified as restricted areas. on the basketball court they are deliberately increased. Semicircles of marking are placed next to them, the radius of which is 1.8 meters.
After that, a dotted line is drawn in the circles. They outline the inside of the penalty area.
In the picture below you can see the penalty areas. Players shoot for the basket in these areas.
How should the center circle be marked?
A circle must be marked in the center of the basketball field. Its radius must be at least 1.8 meters.
The circle must be the same color as the bounded areas.
3-Point Shooting Area
Basketball players can shoot 3-point balls from almost anywhere on the court.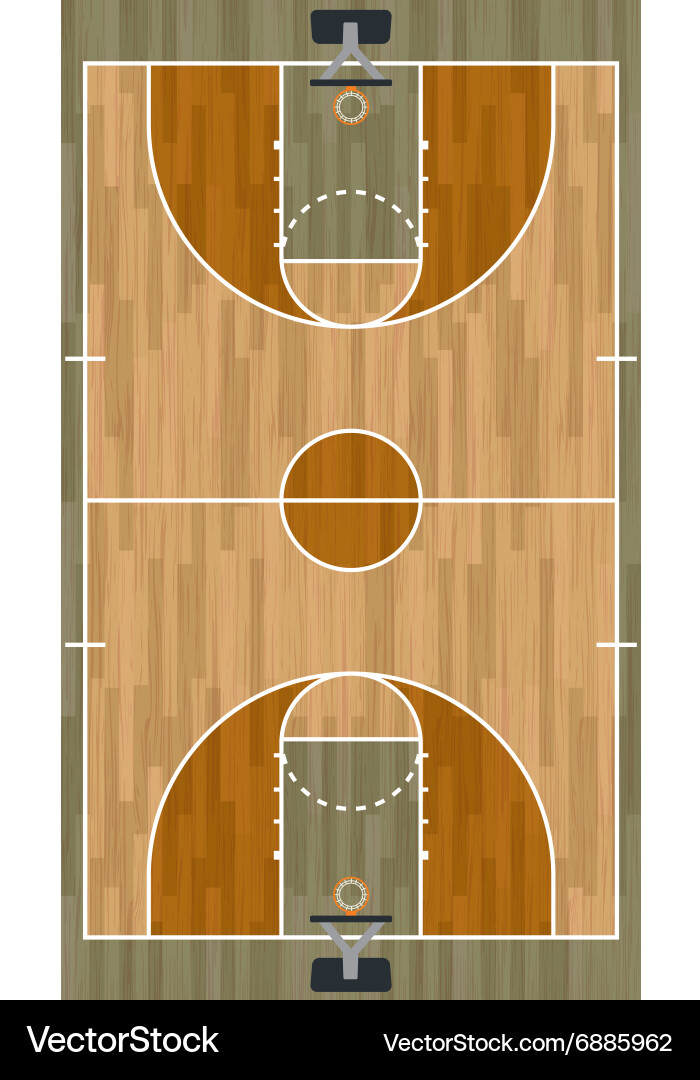 Except the one next to the basketball hoop.
2-Point Shooting Area When athletes shoot balls into the opponent's basket from next to it, the team is awarded two points. The area next to the opponents' ring is also classified as restricted.
The area around the teams' basketball hoops has 2 marking lines. They are placed parallel to each other.
The 2-point zone is next to the players' team's basket. In the area that is opposite the zone with the ring of the second team.
The 2-point zone is located 6 meters from the center line of the field.
Also, the area for a two-point shot is limited by a special circle. Its radius is 6.25 meters. When a player enters this zone, his goals are classified as two-point goals.
On successful throws from outside this area, the team receives 3 points.
In the picture you can see the areas of the field where the shots are classified as three points.
If a player throws the ball from the central and side zones, he brings the team 3 points.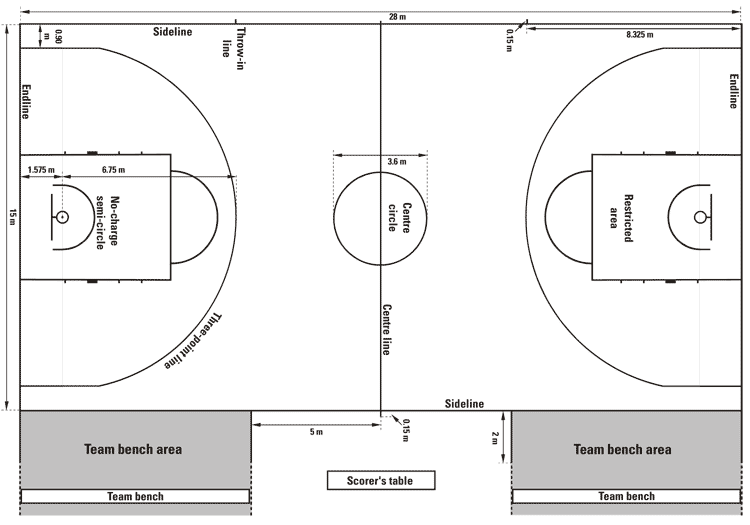
What should be the bench areas?
Players from both teams are allowed on the basketball field. However, not on the site itself, but outside it.
You need to place a shop for players in a special area. It should be highlighted with a special white line. And be outside the field of play.
The length of the markings for the players' bench must be two meters. And the width is 5 meters.
Outline the team bench so that all players can see where people are sitting. And did not encounter them during intensive movements across the field.
Where should substitute players sit?
Athletes preparing to change players must sit between the team benches. Replacement basketball players must sit on special chairs.
Seats should be small. And do not stick out during the games. Otherwise, it will interfere with the teams on the field.
Substitution rules have been developed by the International Basketball Federation.