Home »
Misc »
How to teach a motion offense youth basketball
How to teach a motion offense youth basketball
5-Out Motion Offense - Complete Coaching Guide
The 5-out motion offense is a fantastic primary offense for basketball teams at any level, but especially youth basketball teams.
It’s a positionless offense that relies on spacing the floor and a set of rules that assists players to determine their movements and actions.
Due to players making decisions and reading the play of their teammates and defenders, the 5-out motion offense is great for teaching players how to play basketball.
Who Should Run the 5-Out Motion Offense?As a positionless offense, I highly recommend the 5-out motion offense for all youth basketball teams since it allows all players on the team to develop into well-rounded basketball players.
This is important because it’s impossible to know which players will grow in height and which players won’t.
Countless times I’ve seen players who have matured and grown early in life get assigned to the post position only to have their teammates who developed at a later time quickly catch up to them.![]()
When this happens the player who developed early has had barely any practice at dribbling, shooting from the outside, etc.
So it’s imperative that all youth coaches use a positionless offense like the 5-out motion offense.
But with that said (sorry for the rant), it’s especially a great offense for teams that lack height and want to run a fast offense with a lot of movement.
Strengths:• Creates positionless players – All 5 players on the court are required to pass, cut, dribble, shoot, screen, etc. This is imperative for a great youth basketball offense.
• Can be used as a delay offense – If your league doesn’t have a shot clock and you want to hold up the basketball, the 5-out motion offense will provide movement and keep the defense honest while not looking at scoring options.
• Players learn how to play basketball – Don’t overlook this benefit. Players learn to read their teammates and defenders and make decisions accordingly. This is an important process that players won’t learn from running set plays all game.
• Every player contributes – When running this offense, one or two players can’t dominate the basketball. All players will be involved and must contribute to the team’s offense.
• Requires great spacing – If players are all in the correct positions, your team will always have great spacing at all times. This opens up driving lanes and makes it difficult for defenders to help each other.
• Difficult for opposition teams to scout – Since there are no ‘set’ passes or actions, teams won’t be able to work out a specific action they can stop to disrupt the offense.
• The opposition can’t crowd the key area – All defenders on the opposition team will be required to guard all areas of the floor. This prevents them from keeping their biggest players on the inside.
• Easy to teach due to progressions – One of the best things about the 5 out motion offense is that it can be taught in progressions. Players aren’t forced to learn the complete offense all at once which will overwhelm them.
Weaknesses:• Not great for teams with one dominant player – If you have one or two dominant players that contribute the bulk of your team’s scoring, this might not be the offense for you if you want your team to continue to play that way. All players must contribute in the 5 out offense. Even the weaker players.
• Players can get stuck in the motions of the offense – When you first implement this offense with your team, you’ll find that they’re so focused on running the offense properly, that they forget to look for scoring opportunities.
• Sometimes difficult with a shot clock – Similarly to the above point, if your players aren’t constantly searching for scoring opportunities, the shot clock can play a factor and force your team to rush a shot with a few seconds left.
• Can take some time for players to master – While your players can quickly pick up the actions and movements of the 5 out, it does take time for players to learn how to quickly read the game and make smart decisions on the court.
5 Out Motion RulesThe 5 out motion offense is governed by 5 rules that players must follow at all times for the offense to run smoothly.
1. If your being denied and the player with the ball looks at you, back cut immediately – Never hesitate. This assumes you’re only being denied one pass away from the basketball.
2. If you believe you can attack the basket and score on your defender, do it – Players must understand their own abilities and the abilities of their defender. If a player thinks they can attack, they should do it immediately on the catch.
3. Players must square up to the rim when they have the basketball – A player can’t telegraph what they’re going to do by facing a certain direction. By squaring up, players can shoot, pass, or dribble.
4. Every action must be performed with purpose – If you cut, cut hard. If you’re screening, focus on setting a great screen.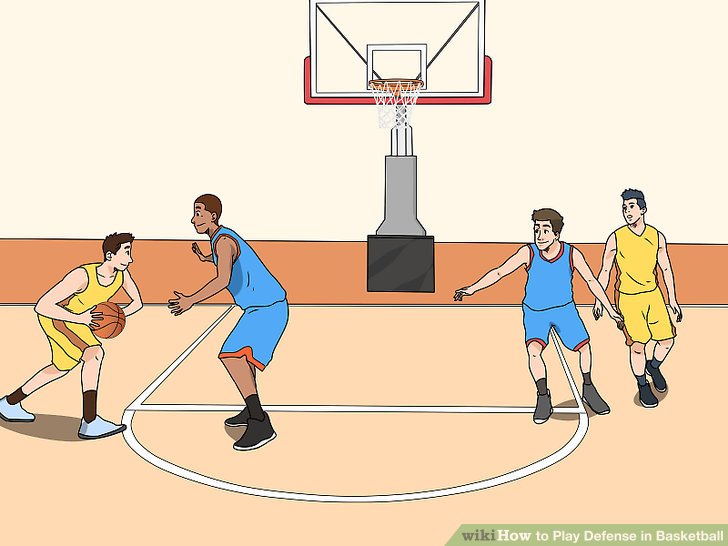 Never pass and stand still.
5. Spacing is always on the NBA three-point line – The NBA three-point line is about 2 feet behind the normal three-point line.
Setting Up the 5 Out Motion Offense‘5 out’ simply means that all offensive players on the floor are starting outside the three-point line.
There are 5 spots that must always be filled unless players are performing an action like screening or cutting.
The five spots are:
1. Left corner
2. Left wing
3. Top
4. Right wing
5. Right corner
These spots should be on the NBA three-point line which is about 2 feet behind the regular three-point line used by all other levels.
When teaching the 5-out motion offense to your team for the first time, I highly recommend you use cones to mark these 5 spots on the floor to allow players to get used to where each position is.
How to Run the 5-Out Motion OffenseThere are 4 progressions that you gradually introduce one by one into the continuity of your 5-out motion offense.
All coaches must make sure they start with progression one and move up without skipping steps.
This allows the players to gradually learn the concepts of the 5-out motion offense without being overwhelmed with the entire offense all at once.
These are the 4 progressions:
Progression 1: Basic cutting
Progression 2: Screening away
Progression 3: On-ball screen
Progression 4: Dribble at
Let’s go through each of the progressions in more detail…
Progression #1 – Basic CuttingThe easiest way to begin teaching your team the 5-out offense is to start with the basic movements of passing and cutting in a 5-0 situation.
Start by setting out 5 cones at the 5 fill spots on the court. Let your team know that when they’re not cutting, they must be in one of these 5 positions.
Now it’s time to teach the cuts…
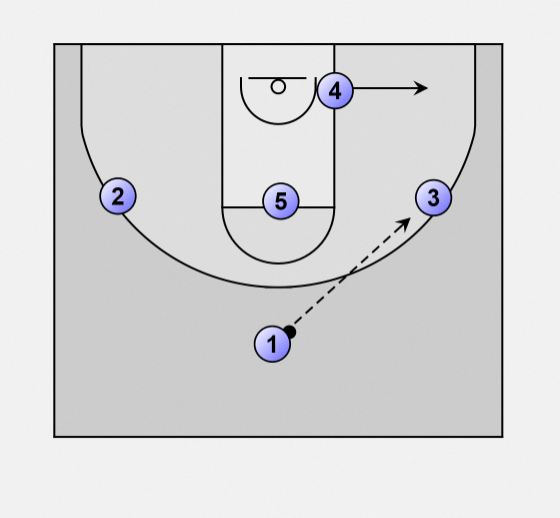
There are 4 passes and cuts that can be made during progression 1.
1. Top to Wing Pass
On a top to wing pass, the passer basket cuts all the way through the key and fills the opposite corner.
Once 1 has cut, 3 and 5 must fill up the positions closer to the basketball.
2. Wing to Corner Pass
On a wing to corner pass, the passer also basket cuts all the way through the key and fills the opposite corner.
Once 2 has cut through, 3, 5, and 1 must all fill up the positions closer to the basketball.
3. Corner to Wing Pass
On a corner to wing pass, the passer basket cuts and replaces themselves.
The other 4 players wait in the same spot for the next action.
4. Wing to Top Pass
On a wing to top pass, the passer basket cuts and then fills the corner of the same side they cut from.
On 3’s cut, 4 fills up closer to the basketball and then 3 replaces them in the corner. The other 3 players wait for the next action.
Progression Practice:Have your players practice this progression until they’re comfortable with the passes and cuts.
This simple progression can be a great offense for a youth basketball team by itself. It will provide great spacing and get your players reading the play and making decisions.
Coaching points when teaching progression #1:• Remind your players that if they’re being overplayed, they must back cut immediately when the player with the basketball is looking at them.
• To set up the defender and get open on a front cut, after passing the player should take one step away from the ball and then explode to the ball-side of their defender on the cut to the rim looking for the basketball.
• If the defender ‘jumps to the basketball’ taking away the front cut, the passer should back cut and try to step in front of their defender to open up the passing angle.
• Always watch the basketball on cuts. If a shot is put up, they need to know immediately to establish rebounding position.
• Cut hard on all cuts to the rim. Doing so will make the cutter a threat to score which will force weak side defense to help.
Progression #2 – Screen AwayOnce your team is comfortable with the cutting phase (making the correct cut 80% – 90% of the time), it’s time to introduce the action of screening away after a pass instead of cutting.
This action can be performed on any top to wing, wing to corner, or wing to top pass. The only pass it can’t be performed on is the corner to wing pass.
Before implementing this action, you must decide whether you want the player being screened to always curl, or whether you’ll give them the option of cutting to the top or curling.
I recommend all youth basketball teams (below high school) get this player to curl off the screen every time so that there’s no confusion.
For high school teams and higher, you can allow them to read the defense and perform the most appropriate option.
Option 1 – Screened player always curls off the screenHere’s how it works on a top to wing pass…
1.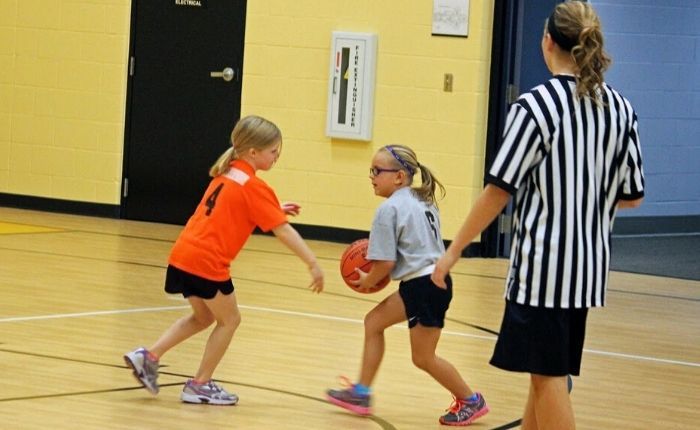 1 makes the pass to 2 on the wing. Instead of cutting, 1 decides to set an away screen.
Note – It’s important that 2 waits while this screen is being set so that the curling option is not missed due to passing to 4 too quickly.
2. 1 screens for 3 making sure that they set the screen at an angle that allows the 3 to cut to the rim.
3. 3 can either front cut or back cut towards the rim depending on how quickly the defense reacts to the screen. But they must cut to the rim since they were screened.
4. After 3 has used the screen, 1 pops back out to the same spot that they set a screen from. If 1’s defender attempts to help on the cut from 3, you’ll find that 1 will often get an open shot from the top of the key.
5. After the cut, 3 fills the weakside corner position since 5 has filled 3’s previous position on the wing.
Then all players are back in position for the next action to be made.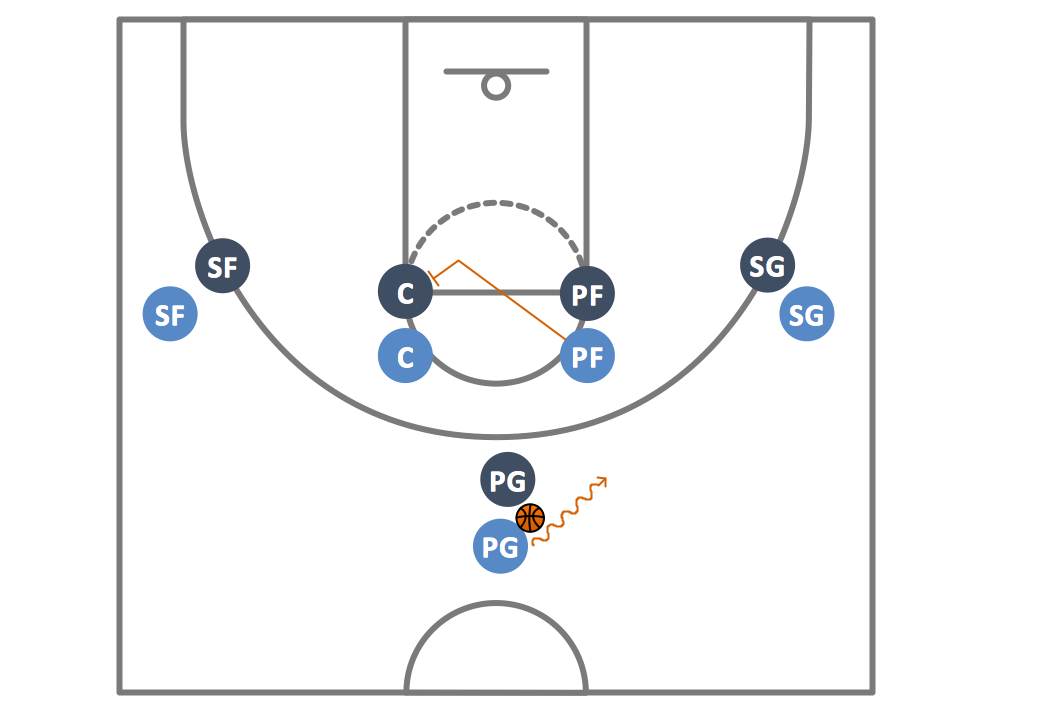
Option 2 – Screened player has the choice of curling or popping outIf you’re coaching an experienced basketball team, you can give the player being screened the option to curl or to pop out to the perimeter and receive the pass.
The difference when using this option is that the screener must go the opposite direction to the cutter.
If the cutter decides to pop out to the perimeter, the screener will cut to the rim and then fill the corner.
If the cutter decides to curl, the screener will pop out to their original position.
Here’s an example of a top to wing pass using option 2…
1. 1 makes the pass to 2 on the wing. Instead of cutting, 1 decides to set an away screen.
Note – It’s important that 2 waits while this screen is being set so that the curling option is not missed due to passing to 4 too quickly.
2. 1 screens for 3 making sure that they set the screen at an angle that allows the 3 to cut to the rim.
3. 3’s defender cheats and goes under the screen so 3 pops out to the top perimeter position to catch and look for the open shot.
4. Reading this, 1 cuts to the rim because they must go the opposite direction of the cutter.
5. 1 then fills the corner position as 5 has filled 3’s previous spot on the wing.
I’ve found that inexperienced teams can struggle with option 2 so I recommend starting with option 1 and then progressing to option 2 if you think your players are capable.
Coaching points when teaching progression #2:• Players must be setting screens on the correct angle. This means the screener’s bum should be facing somewhere between the player with the basketball or the basket. Too often youth players will set screens too high that allow the defender to quickly slip under it.
• The player setting the screen must make the player being screened aware with a verbal cue and a visual sign.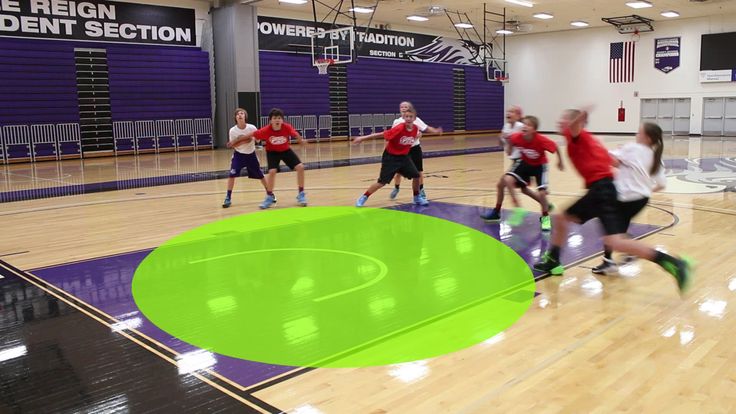 I recommend you teach the screener to hold their arm up in a fist and call out the player’s name before setting the screen.
Progression #3 – On-Ball ScreenOnce your players are comfortable with cutting and screening away, next up is the action of setting on-ball screens.
This action of the pick and roll is often very effective because the offensive players are spaced out well.
The on-ball screen can be used after any pass in the offense.
Here are two examples of setting an on-ball screen in the 5-out motion offense:
Example #1 – Top to Wing Pass On-Ball Screen1. 1 passes from the top to 2 on the wing and then sets an on-ball screen on their defender.
2. 2 uses the on-ball screen and drives hard to the rim surveying the options that are presented.
3. Depending on how the defense reacts, 2 can pass to any of the perimeter players or make the shot in the key.
If the basketball is kicked out and the shot isn’t immediately taken, all players must find one of the 5 fill spots and the 5-out motion offense starts again.
Example #2 – Wing to Corner Pass On-Ball Screen1. 4 passes to 2 in the corner and then sets an on-ball screen on their defender.
2. 2 uses the on-ball screen and drives hard to the rim surveying the options that are presented.
3. Depending on how the defense reacts, 2 can pass to any of the perimeter players or make the shot in the key.
A lot of coaches who run the 5-out motion offense make it a rule that on each pass to the corner the passer sets an on-ball screen. So if it works for you, consider incorporating it as a rule into your offense!
Coaching points when teaching progression #3:• As with the previous progression, it’s super important that players are setting the on-ball screen at the correct angle that allows the player with the basketball to attack the rim.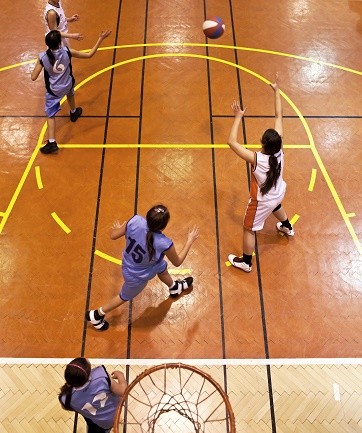
• The three players not involved in the pick and roll should do their best to move into open positions where they can catch and shoot or catch and drive.
• Start to introduce to the players that they must take into account each player’s skill set before making an action. For example. Your team should not set an on-ball screen for player that can’t dribble the basketball well.
• Just like in the screening away progression, players must be giving a visual and verbal cue to the player they’re about to set an on-ball screen for by saying their name and holding up a fist.
Progression #4 – Dribble AtAnother action to add to this continuity offense is the ‘dribble at’ action.
This can be used when a player with the basketball is being heavily pressured and the only options to pass are being denied well by the off-ball defenders.
In this scenario, the player with the basketball may decide to dribble towards another player at a different spot.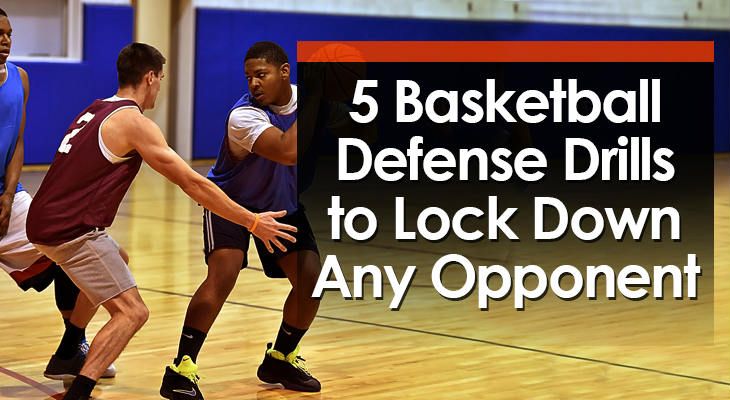
When this happens, the two offensive players involved (the dribbler and the player they’re dribbling towards) have two options.
1. BackcutIf the player without the basketball is being denied, they can make a hard back cut looking to receive the basketball for a layup.
If they don’t receive the pass, they fill the weakside corner, the other players rotate towards the basketball, and the next action begins.
2. Hand-offThe other option is to perform a hand-off between the two players.
This is similar to the pick and roll where the other 3 players on the court should hold their positions and wait.
The player that receives the hand-off should attack the rim and kick out to shooters if the defense slides over to help.
Coaching points when teaching progression #4:• When performing hand-offs, the player with the basketball should rotate their hands so that they’re on the top and bottom of the basketball.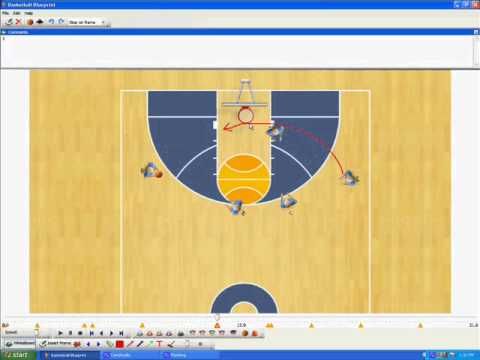 This allows the player receiving the hand-off to grab the basketball on the sides.
• In my opinion, I don’t like hand-offs for youth basketball. For my youth teams, I have them automatically back cut on a dribble at.
Piecing the 5-Out Motion Offense TogetherOnce your players have learned the basic 4 progressions of 5-out motion offense, you’ve established a fantastic primary offense that will teach them how to read and play the game of basketball.
Now that they can confidently perform all the actions, the next important step is for players to work out what actions work the best for them and their teammates.
For example:
• Players will work out that the best players to set on-ball screens for are the quick guards who make great decisions.
• The best players to away screen for are those that cut hard to the rim and can finish the layup or close shot.
• The bet shooters on the team should primarily set away screens so that they’re cutting back out to the basketball for the open shot.
While a lot of this knowledge will develop with experience, I believe it’s important for the coach to talk to the team and each player individually about what they’re good at and what they need to improve on.
Doing so will help their decisions when running the 5-out motion offense during the game.
AdvancedFlex Action ProgressionOnce your team has mastered the basic progressions of the 5-out motion offense, you can choose to add a more advanced flex cut progression.
This is best used on a pass from the wing to the top of the key and can potentially give you an open layup off the flex cut or an open jump shot off a down screen.
Here’s how it works:
1. 2 makes the pass to 1 at the top of the key.
2. After making the pass, 2 will basket cut as usual. But instead of filling to the same side, 2 sets a flex screen for 5.
3. 5 uses the flex screen and cuts through looking to receive the pass for the layup. If 5 isn’t open, they simply cut all the way through to the corner as 4 has moved up the wing to replace 2’s spot.
4. 3 then sets a down screen for 2.
5. 2 uses the down screen and pops out to the perimeter looking to receive the basketball for the jump shot.
6. 3 can reverse pivot and seal 2’s defender if they have a mismatch inside. If not, 3 fills the closest corner.
Even if the offense doesn’t get a great look from the flex option, you will notice now that all five spots are now filled and the team can move on to the next action of the offense.
Variation – Cutting Through the NailAnother variation of this offense I wanted to share with you is the option to ‘cut through the nail’ every time a player cuts to the top of the key.
This is most commonly seen in Bob Huggins’ Open Post Motion offense.
Instead of filling to the top spot just like any of the other 4 spots, players are required to L-cut through the nail.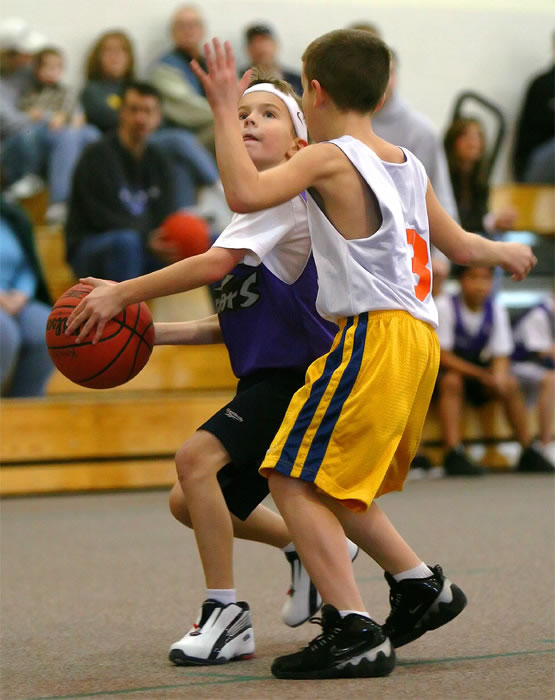
Note – The ‘nail’ is the spot at the very middle of the free-throw line.
When players cut through the nail, they’re required to decided whether to back cut or to pop out to the top spot depending on how their defender is playing them.
If the defender is denying them from receiving the basketball, the player must immediately back cut and then fill the weak side corner.
If the defender is playing off them, the player cuts out to the top spot to receive the pass.
By implementing this variation to the 5-out motion offense you will achieve two things…
1. It will take away the defenders ability to get a deflection which leads to the opponent’s fast break.
2. It can lead to some easy scores off the back cuts.
Getting the Basketball to the PostThe best way to get the basketball inside to players who have a mismatch is to allow those players to establish quick post up position after every through the key.
The player posting up is only allowed to hold this position for 1 – 2 seconds before clearing out if they don’t receive the pass.
This ensures that the 5-out motion offense continues to run smoothly.
To take advantage of this mismatch, it’s important that players with the basketball are looking at cutters to take advantage of the 1 – 2 seconds that they secure inside position.
Posting up isn’t restricted to your biggest players. Any match up on the floor with an advantage in the post can use this technique.
Transition Defense and ReboundingOne thing a lot of coaches will find confusing is that since all our players are standing outside the three-point line, who’s going to rebound!?
The answer to this question will depend more on the personnel on your team and how aggressive you want to be rebounding the basketball.
I’ll give you three options. Pick the one you like the most depending on your coaching style and players on your team.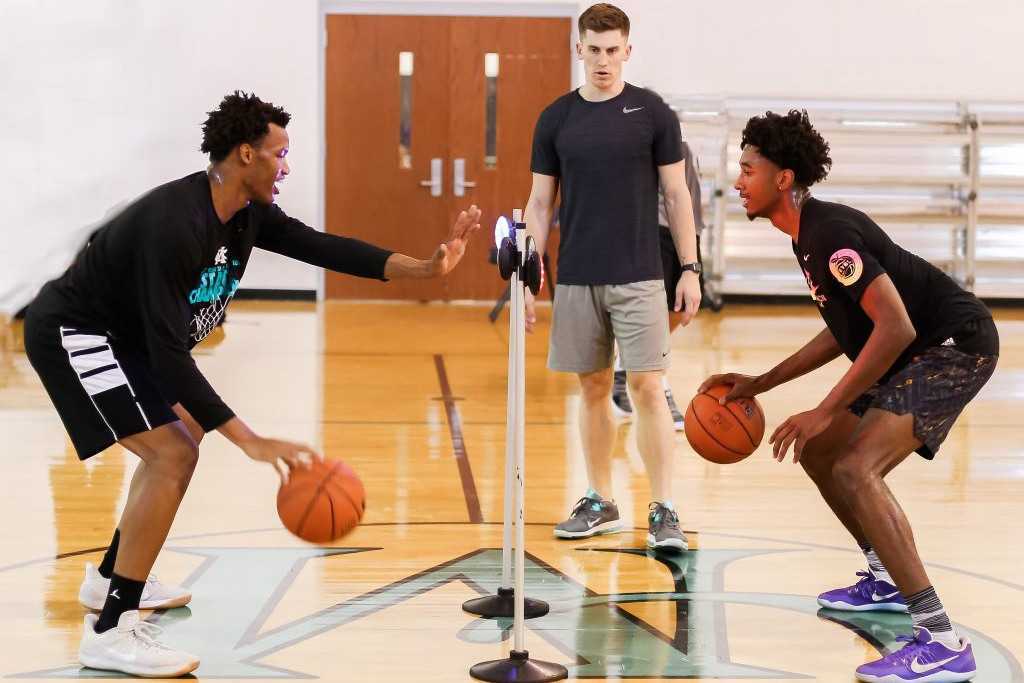
1. The point guard always plays safety. The other four players crash the boards.
2. The point guard and shooting guard always play safety. The other three players crash the boards.
3. Everyone below the free throw line rebounds. Everyone above the free throw line plays safety.
What you’ll quickly realize is that the 5-out motion offense can lead to a lot of offensive rebounds as long as your designated players are willing to work hard for them.
By starting on the perimeter when a shot is put up, it’s incredibly difficult for the defense to box out an offensive player with a running start.
If you have any tough and athletic players on your team, expect them to grab a lot of offensive rebounds!
ConclusionThe 5-out motion offense is a great offense for any basketball coach to learn and implement with their team.
Being a very common offense, even if you don’t use it with your own team, it’s important for all coaches to learn about so that they know how to defend when playing against it.
It allows players to practice all skills, gets the whole team involved, and can be easy to teach as long as you’re using the right progressions and not trying to implement the whole offense at once.
Any basketball coach who uses this offense will know they’re improving their players!
4-Out 1-In Motion Offense - Complete Coaching Guide
The 4-out 1-in motion offense (also known as ’41’) is one of the most popular and versatile basketball offenses in today’s game at all levels.
As the name suggests, this offense consists of 4 players spaced out behind the three-point line and 1 post player inside.
In this article I will mostly focus on breaking down the version of the zone that keeps the post player on and below the low post as this is the best version for youth basketball as it keeps the lane open for dribble penetration.
Similar to the 5-out motion, the 4-out 1-in motion is run using a set of rules that assist players in making their own decisions while reading the defense.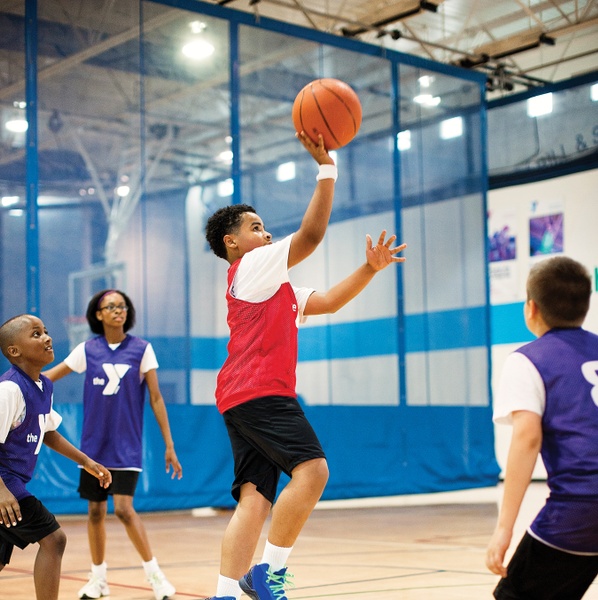
This allows players to learn how to play the game of basketball (develop basketball IQ) instead of running an offense with predetermined actions that force players to play like robots.
The most recent example of a coach successfully using the 4 out 1 in motion is Jay Wright at Villanova who led the Wildcats to the championship in the 2015 – 2016 season.
Who Should Run the 4-Out 1-In Motion Offense?The 4-out 1-in motion offense can be run by any team. It’s a fantastic base offense with a lot of different options out of it depending on the skill levels of your players.
I highly recommend this offense for teams with a strong post player as the spacing on the court makes it hard to trap the post.
This spacing also provides your team with many opportunities to drive to the rim and will lead to many open shot opportunities as it’s hard to help and recover.
StrengthsTeaches Players How to Play Basketball – This is the most important trait I look for when choosing a youth basketball offense. A decision-making continuity like the 4-out 1-in motion offense develops basketball IQ and will assist players to be the best they can be in the future.
Perfect Spacing – Many coaches claim that the 4-out 1-in motion offense has ‘perfect’ spacing. When in the wing and slot spots, the players will be about 18 feet apart. This is close enough that the offensive team can make sharp and direct passes, but far enough away that one defender can’t guard two players.
Can Adjust to Any Skill Level – Due to the progressions of this offense, the 4-out 1-in can be as complex as you want or as simple as you want. It can be a great offense for a youth team simply running cuts, or a great offense for a professional team by utilizing all the different actions and reads.
Can Adjust to Any Team’s Talent – With so many actions available, this offense can be adjusted to suit any team. If you’ve got a tall and athletic team, the offense can focus on curling off screens and back cuts. If you’ve got a quick team that shoots a high percentage, the offense can focus on flare screens and on-ball screens.
Easily Exploits Mismatches – You can exploit mismatches anywhere on the court. It’s difficult for the defenders to help or trap because the offensive players are so far apart.
Open Driving Lanes – Due to the great spacing of the offense, as long as your post player and perimeter players don’t get confused, there will be many opportunities to attack the rim off the dribble.
Difficult to Scout – As this offense relies on players reading the defense and making decisions, it’s difficult for the opposition to predict what your team is going to do.
WeaknessesCan Be Difficult to Learn – This has always been the biggest criticism coaches have about the 4-out 1-in motion offense. But by using the progressions in this blog post, I don’t think it’s difficult for any team to learn!
Reading Others on the Court – While I believe it is easy to learn if taught correctly, it can be difficult for young players to execute during games because the offense relies on players reading the other 9 players on the court and making decisions.
Can Be Difficult If Your Players Can’t Shoot – As with any offense, if you’re competing against an experienced coach and one of your players can’t shoot well, the opposition will often sag a defender in the lane which cuts off dribbling, cutting, and passing lanes as well as makes it difficult for players to post up. Fortunately, not many youth coaches will do this.
4-Out 1-In Motion General Rules1. Keep Great Spacing – This is the most important rule of the offense. Perimeter players should always be about 18 feet away from each other.
2. Cut With a Purpose on Every Cut – Players must look like they’re going to receive the basketball on every cut towards the hoop. This involves showing target hands and calling for the basketball.
3. Never Pass and Stand – After a perimeter player makes a pass, they should never stay in the same place. What action they make will depend on what progression you’re up to and the actions you choose to use.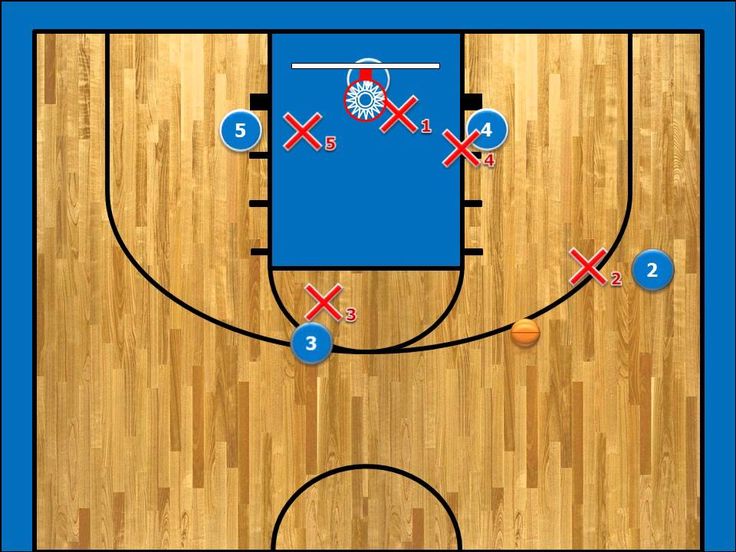
4. Watch the Cutters! – I’m not a fan of players holding the basketball for too long, but since this offense relies so much on cutters and off-ball screens, it’s important that the player with the basketball see the cutters and is ready to make the pass if it’s open.
5. Always Catch Looking to Shoot – Players must keep the defense honest throughout the entire possession. Always catch the basketball ready to shoot if the defense isn’t quick enough.
6. No Excess Dribbling – Don’t allow players to catch and put the basketball on the floor without thinking. Save the dribble. Only dribble when penetrating to the rim, using an on-ball screen, or improving a passing angle.
Figuring Out How Your Team Will Run The OffenseThe 4-out 1-in motion offense is incredibly versatile so it’s important that you figure out how your team will best suit this offense before introducing it to your players.
It’s impossible for teams to run every action, so you must figure out which actions work best for your team and focus on them.
For example if your post player is the best player on your team, you’ll want them flashing to the ball-side more. If they’re not, keep them mostly on the weak side of the floor.
Following on with this, the starting point for deciding how to run your offense begins with deciding how you’ll use the post player.
Let’s start by talking about that…
How to Use the Post PlayerThe most common reason the 4-out 1-in motion offense isn’t always effective at a youth basketball and high school level is because the coach doesn’t know how to use the post player effectively.
Many coaches simply allow their post player to move anywhere they feel like inside and around the paint. This will never work!
The post player must have rules they’re required to follow.
If you have decided to run the 4-out 1-in motion offense with your team, the very first thing you must decide is how you’re going to use the post player.
Here are the 4 post player options ranked in the order I recommend…
1. Post player must stay on the weak side but can flash to the post (Recommended)This is my favorite way to utilize the post player when running the 4-out 1-in and will be the option I refer to throughout this article.
It involves the post player staying on the weak side of the floor but giving them the opportunity to flash to either the low or high post if they see an opportunity to do so a certain number of times per possession.
The benefits to keeping the post player on the weak side of the floor for the majority of the possession are:
• The lane to the rim will stay open for driving, cutting, and passing by the perimeter players.
• Your post player will have great position to secure offensive rebounds.
• There will be many drive and dish opportunities.
When your post player does flash to the basketball and establishes position, they’re allowed to hold their position for a maximum of 2 – 3 seconds before they must quickly retreat to the weak side again.
Be patient when first implementing this offense as it will take time for the post players on your team to learn which opportunities are best to take.
I recommend you begin by allowing them to flash to the basketball one time per possession.
When they’re a little more experienced at reading the defense and knowing when to flash to the basketball, you can increase this to two flashes per possession.
2. Post player must always stay on the weak side the entire possession.For this option, we remove the post players opportunities to flash to the basketball throughout the possession.
I want to make it clear that using this option will not result in the post player being left out of the offense completely. There will still be plenty of drive and dish opportunities as well as offensive rebounding opportunities.
The two main reasons a coach might decide to use this option are:
a. You don’t have a post player on your team capable of creating their own shot or a shot for another player from the post.
b. You want to keep the lane open to the ring for drives, passes, and cuts for the entire possession.
3. Post player must always stay on one side of the floor the entire possession.The theory behind this post option is to take advantage of a post player who is more effective on one side of the floor while keeping the other side open for drives to the rim.
There can also be pre-determined actions that can only be run on specific sides of the floor. For example flare screens on the post player’s side of the floor and back cuts on the open side of the floor.
I’ve seen this run successfully by a few teams but it makes the offense too restricted and predictable. I don’t recommend it.
4. Post player always stays in front of the basketballThe only time this is the best method to use is when you’ve got a post player who is by far the best player on the court and you plan to feed the basketball into them on every single possession.
Since players like this are incredibly rare, I’d advise against using this method.
So, which post option should you choose?To recap, here are the two post options I recommend:
1. Keep your post player on the weak side of the floor and allow them to flash to the basketball a certain amount of times per possession.
2. Keep the post player on the weak side of the floor at all times.
Both options fit perfectly with the 4-out 1-in motion offense I’m about to show you.
To decide which option is best, I recommend evaluating each player on your team who will play in the post and decide which option is best for each post player individually.
Don’t be afraid to allow your starting post player to flash to the basketball while keeping your backup post player exclusively on the weak side when they’re in the game.
Post players must earn the right to be allowed to flash to the basketball and create a shot for themselves or a teammate from the post.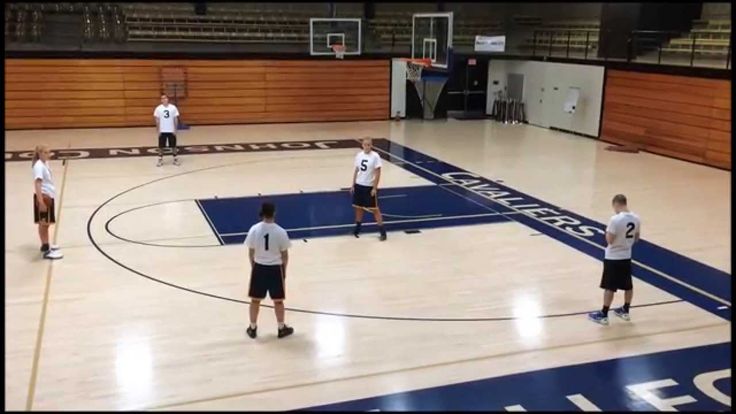
For those you don’t believe are ready, keep them on the weak side and encourage them to improve their post game.
Also, ensure that all players on your team understand how to play the post position. You never know when you’re going to get a mismatch and want to take advantage of it inside.
This is also a great strategy to use when one of the opposition players gets in foul trouble. Send the offensive player they’re guarding into the post!
Filling Around the PerimeterThe other thing you should understand before we get into the heart of the offense is how players must fill around the perimeter.
When filling spots around the perimeter players must read their defender and make one of two cuts.
If the defender is within one step of the line to the basketball, the player must v-cut to get themselves open on the perimeter.
If the defender is two steps or further away from the line of the basketball, the offensive player should blast cut towards the basketball.
Rick Majerus calls these the ‘blast cut’ and the ‘fill cut’.
Setting Up the 4-Out 1-In Motion OffenseFor the perimeter players, there are 4 spots around the three-point arc that are primarily used in the 4-out 1-in motion offense.
We call them the slots and the wings.
(The corners are used occasionally but aren’t primary spots.)
These perimeter spots should be a step outside the three-point line to maintain ideal spacing.
For the post player, there are 4 spots around the paint they can move to depending on whether on how you decide to use them within the offense.
These are the two low blocks and the two elbows.
When first teaching the 4-out 1-in motion offense to your team, I recommend putting flat cones on the perimeter spots so that players have a guide.
Teaching the Base 4-Out 1-In Motion OffenseI have broken the 4 out 1 in motion offense down into 7 progressions to teach a team the offense from scratch.
The reason we teach in progressions is because it makes the offense far easier to understand and also because it allows players to start learning the basics of a complex offense from a young age.
If you were to teach a young team a complete offense immediately, they’ll have no hope of understanding it. There’s simply too much information for them to process.
Instead, use this method and only advanced to the next progression when your team can complete the current progression with minimal mistakes.
Once your players understand the complete offense, there are also many additional actions that you can choose to implement based on the skill level of the players on your team. I’ll show you these in the ‘advanced actions’ section of the article.
Let’s get started!
Progression 1 – Pass, Cut, and FillThe first progression involves basic passing, basket cuts, and filling the spots around the perimeter.
This is the simplest way to teach players the different positions on the court and get them used to the different cutting movements involved in the offense.
There are two things that happen during this progression:
- Every time a player passes the basketball, they must cut.
- On each cut, all players must fill towards the basketball.
The post player should stay on the weak side during this progression if you’re using them how I recommended at the beginning of the article.
Let’s break down the 3 types of passes that are involved in this progression…
Slot to Wing Pass1. 1 passes from the slot to 3 on the wing.
2. 1 will then basket cut making sure they step within the charge and then replace 2 on the weakside wing.
3. 2 and 4 will both fill towards the basketball using a blast cut or v-cut.
4. 5 stays on the weak side of the court.
Wing to Slot Pass1. 3 passes to 4 and then cuts towards the rim.
2. Since the only spot left to fill is their own, 3 cuts back out to the ball-side wing.
3. Everyone else holds their positions since there are no spaces to fill.
Slot to Slot Pass1. 4 passes to 2 and then cuts through the paint to the rim and then out to the weak side wing.
2. Since there is a spot to fill closer to the basketball, 3 v-cuts and replaces 4.
3. 5 cuts across the lane to continue being on the weak side of the floor.
Coaching Points:• Allow your players to run this progression for as long as it takes them for the movements to become almost automatic. Sometimes this is a few weeks, sometimes it takes a few months, but don’t rush this progression.
• This first progression alone can make for a great youth basketball offense.
• Once your players have used the cuts a couple of times, allow the post player to flash to the basketball once per possession.
• If the post player flashes towards the low block and there’s a slot to wing pass, the slot player must always cut behind the post player.
• Players must cut all the way through the charge circle on each cut while looking at the basketball. If you don’t have a charge circle on your court, instruct the players to run under the rim.
• On any basket cut, a perimeter player can post up for about 2 seconds if they feel like they have a mismatch on the inside and the post player hasn’t flashed towards the basketball.
• Remember that when filling spots around the perimeter players should be using either blast cuts or v-cuts.
Progression 2 – Add Back Cuts to Pass, Cut, and FillThe next progression will be much quicker than the first since it involves the same cutting and filling strategies as progression 1.
For the 2nd progression, we’ll be teaching players to back cut when they’re being overplayed by their defender.
Explain to your players that any time their defender has a hand in the passing lane whilst the player with the basketball is one-pass away and looking at you, you must back cut immediately.
And never hesitate. No exceptions.
Here’s how the back cuts work from each position.
Overplaying a Slot to Wing Pass1. 3 is being overplayed by their defender so they cut immediately without hesitation.
2. If 2 doesn’t receive the pass from 1, they pop back out to the same position.
3. All other players stay in their spots since there are no spots to fill.
Overplaying a Wing to Slot Pass1. If 4 is being overplayed by their defender, they immediately back cut looking to receive the pass from 3.
2. If they don’t receive the pass, 4 replaces weak side wing.
3. 1 and 2 then fill cut towards the basketball.
Overplaying a Slot to Slot Pass1. If 2 is being denied by their defender, they must back cut through the paint looking for the pass.
2. If they don’t receive the pass, they exit on the weak side wing replacing 1.
3. 1 fills towards the basketball replacing 2.
Coaching Points:• You can teach this by adding defenders and getting them to play ‘dummy defense’ switching between normal denying or overplaying the passing lane.
• Constantly stress to your player that they must never hesitate. If the defender is denying the pass, back cut immediately!
Progression 3 – Dribble PenetrationOnce your players understand the basic cutting and filling movements, it’s time to add dribble penetration to the offense.
One of the perimeter rules is: If you think you can beat your defender off the dribble and get to the ring, do it!
With all the movement in the offense, the defenders will be constantly closing out late. This provides the offense with a great opportunity to attack the ring and create shots off dribble penetration.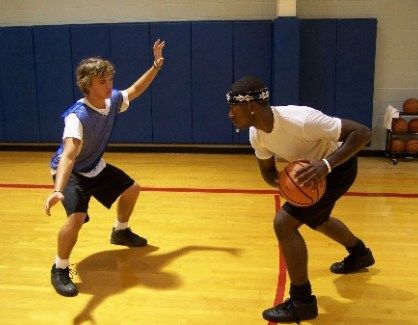
This is the main reason why it’s important to keep your post player on the weak side of the floor for the majority of the possession.
If the offensive player is always between the ball and the basket, it’s going to be very hard for your perimeter players to penetrate and get a high percentage shot which is where most shots will come from in youth basketball.
Each time there’s a drive, the post player must read their defender (who will help on the drive) and find an opening on the weak side anywhere from the baseline to the elbow. Create a passing lane.
The only deviation from this is on a baseline drive from a wing player. When this happens, the post player must get to the front of the rim. This creates the best passing opportunity to the post player and also open up the hammer pass to the opposite baseline corner.
Apart from those specific rotations, it’s not effective to tell perimeter players exactly where they should rotate to…
Each player must read where their defender is and create a passing lane so they can receive the kick out pass for the open shot.
If the player penetrating passes out and the shot isn’t open, all players must communicate and adjust to the original 4-out 1-in positions.
With that said, here’s how the rotations might look on different drives:
Baseline Drive from the Wing1. 3 receives the basketball and elects to drive towards the baseline.
2. 5 steps to the middle of the paint to create a better passing angle.
3. 1 slides down to the corner to open up the hammer pass.
4. 2 and 4 read their defender and get themselves open on the perimeter.
Middle Drive from the Wing1. 3 receives the basketball and elects to drive towards the middle of the floor.
2. 5 rotates under the rim to open up the passing angle.
3. 1 and 2 cut down to get themselves open for the pass.
4. 4 stays at the top of the key to play safety.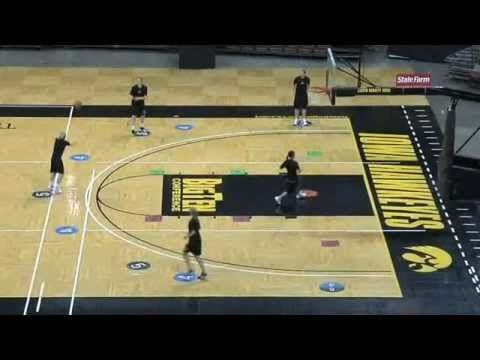
Baseline Drive from the Slot1. 2 receives the basketball and elects to drive towards the baseline from the slot position.
2. 1 slides down to the corner to get open if their defender helps on the drive.
3. 5 slides up the key to open up the passing lane since their defender must help.
4. 3 and 4 attempt to get open on the weak side and also play safety.
Middle Drive from the Slot1. 2 receives the basketball and elects to drive middle from the slot position.
2. 1 and 3 both slide down to the corner to open up the passing angle for the three-point shot.
3. 5 stays low and reads his defender who must help on the drive.
4. 4 steps back and plays safety.
Coaching Points:• All players must catch the basketball on the perimeter ready to attack the basket.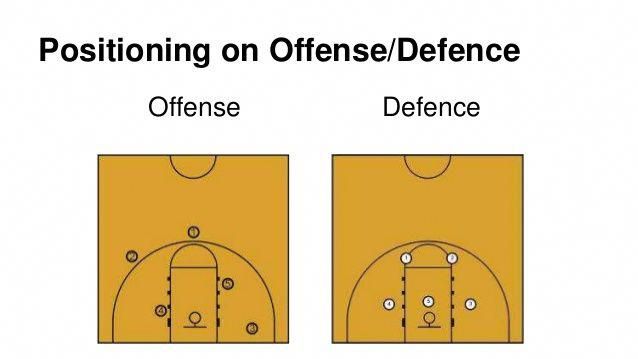
• Players should be driving past their defender in as straight of a line as possible. This means attacking just outside of the defenders hips which keeps the dribbler in their lane and keeps great spacing.
• Make sure your players are practicing making a ‘floater’. If they get into the lane they’ll be using that shot a lot during this offense.
Progression 4: Away Screen – Curl Cuts OnlyThe next step in the offense is to give players a second option after passing the basketball in addition to cutting to the basket…
Giving players the option to screen away.
For this progression, the player who receives the screen must always curl off the screen to the basket and the player who sets the screen must always pop back out to their original position after screening.
This screen can occur on a slot to slot pass or a slot to wing pass. The only time this can’t happen is on a wing to slot pass as there’s no perimeter player the opposite direction to screen.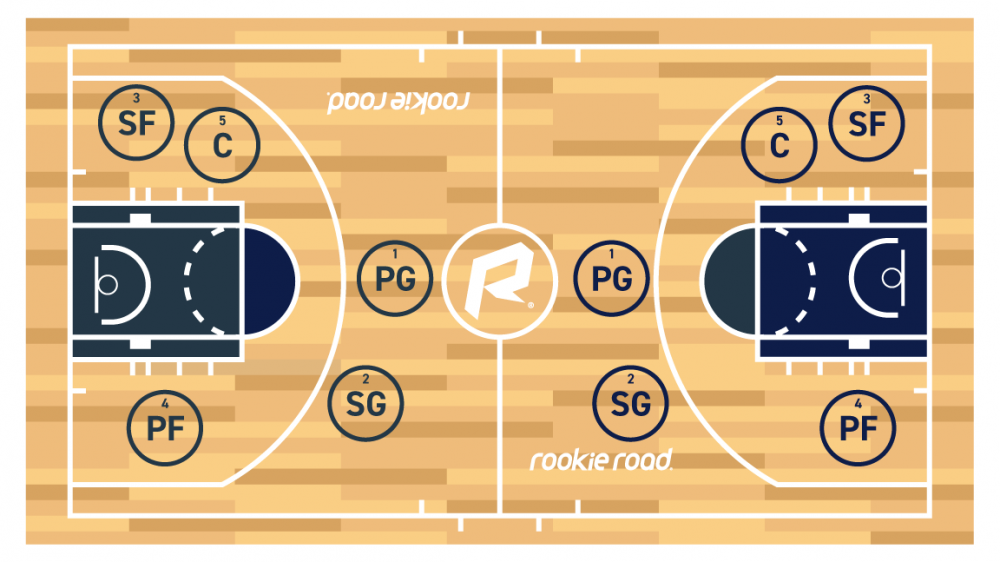
Here’s how it will work from different positions on the floor…
Away Screen on a Slot to Wing Pass1. 1 passes to 3 on the wing.
2. Instead of basket cutting, 1 decides to set an away screen for 4.
3. 1 sets an away screen on 4’s defenders back hip and 4 quickly cuts off the screen to the basket looking for the pass from 3.
4. 1 pops back out to the same position.
5. 2 fill cuts to the slot from the wing.
6. 4 fills out to the weakside wing.
Away Screen on a Slot to Slot Pass1. 1 passes to 4 on a slot to slot pass.
2. Instead of cutting to the basket, 1 decides to set an away screen for 3.
3. 3 uses the away screen and cuts to the basket looking to receive the pass for the easy layup.
4. 1 then pops back to the basketball.
5. 3 then fills out to the weak side wing (the position they started in).
Coaching Points:• It’s important that the player who receives the pass holds the basketball for a second or two to see if either of the players involved in the screen get open.
• For the player setting the screen, it’s important that the screen is set on the correct angle. This means the screeners back should be facing towards where the cutter wants to go (the rim). Since players are only curling off the screen, the screen should be set on the back hip of the defender.
• If the defender anticipates the screen and cheats over, the player receiving the screen can back cut to the rim.
Progression 5: On-Ball ScreenThe fifth progression involves giving players a third option to perform after they have passed the basketball to a teammate.
Setting an on-ball screen.
When a player makes any pass during the offense, they can step up and set an on-ball screen for the player with the basketball.
When they do this, the player screening must call out the player with the basketball’s name and also hold their arm up in a fist to indicate they’re about to set an on-ball screen.
For the screen to be effective, the player with the basketball must be patient and wait until the screen is set before using the screen.
The post player should immediately find a good passing angle when their defender rotates to help on the player with the basketball.
Here’s how the on-ball screen option will work from different areas on the floor:
Slot to Slot On-Ball Screen1. 4 passes to 1 and then sets an on-ball screen on 1’s defender.
2. 1 waits until 4 is set and then attacks the rim off the on-ball screen.
3. 2 and 3 both slide down to the corners to open up passing angles.
4. 5 stays low to be open for the dump-down pass.
5. The screener stays behind to play safety.
Slot to Wing On-Ball Screen1. 4 passes to 2 and then sets an on-ball screen on 2’s defender.
2. 2 waits until the screen is set and then attacks them rim.
3. 1 and 3 slide down to open up passing angles for the three-point shot.
4. 5 swings under the hoop for the drop-down pass.
5. 4 plays safety after setting the screen.
Wing to Slot On-Ball Screen
1. 4 passes to 2 and then sets an on-ball screen on 2’s defender.
2. 2 waits until the screen is set and then attacks them rim.
3. 5 steps high to open up the hammer pass and also open up a passing lane.
4. 3 and 1 both slide down to be open for the three-point shot.
5. 4 plays safety after setting the screen.
Coaching Points:• Players must select their actions based on the other offensive players on the court. Never set an on-ball screen for a player that can’t dribble the basketball.
• Remember what was said about screening angles in progression 4. The screen should be set on the back hip of the on-ball defender so that they can’t slip under the screen.
Progression 6: Away Screen – Add the Straight CutNext, we give another cutting option to a player receiving an away screen.
The straight cut.
While the players will now be experienced with curling off an away screen, we will also give them the option to straight cut depending on how the defense reacts to the screen.
A straight cut will involve the player filling the spot that was occupied by the player setting the screen.
If this option is used, the screener cuts to the rim looking for the pass and then fills to the perimeter as normal.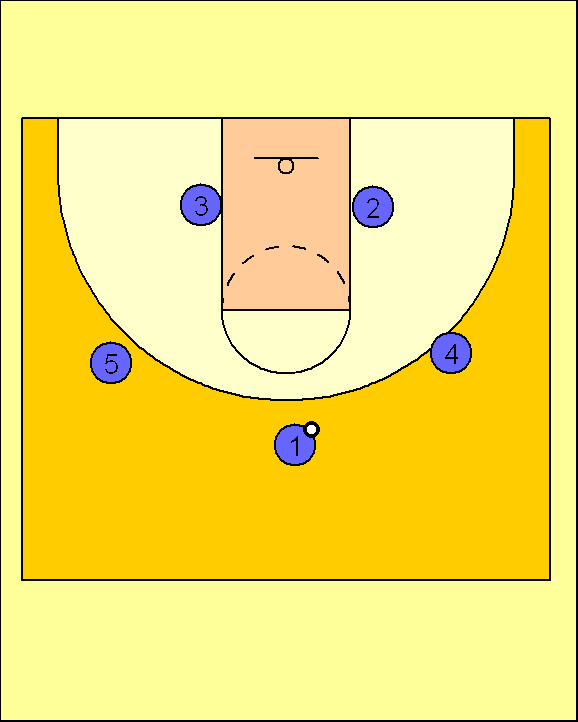
Here’s what you must remember: On an away screen, one player must fill the spot closest to the basketball and the other player must cut to the rim.
It’s up to the player receiving the away screen to decide which is used.
The screener must watch the cutter and go opposite.
Here’s how it will look from different positions during the game…
Away Screen on Slot to Wing Pass1. 4 passes to 2 on the wing.
2. Instead of cutting to the basket, 4 sets an away screen for 1.
3. 1 reads their defender and decides to straight cut to the ball-side slot position ready to catch and shoot.
4. Seeing this, 4 rolls to the front of the rim looking for the catch and layup.
5. If 4 doesn’t receive the pass, they fill to weak side wing while 3 fills to the next slot position.
Away Screen on Slot to Slot Pass1. 4 passes to 1 on the slot to slot pass.
2. 4 sets an away screen for 2 on the wing.
3. Instead of curling to the rim, 2 straight cuts to the slot position getting ready to catch and shoot.
4. Reading this, 4 cuts off the screen to the rim looking for the easy layup.
5. If 4 doesn’t receive the pass, they fill out to the weak side wing.
Coaching Points:• If you’re trying to delay the game while keeping possession of the basketball, get your players to perform straight cuts out to the perimeter on all away screens.
• Make sure your players understand how they should decide which cut to use. If the defender is trailing them, curl to the rim. If the defender cheats under the screen, straight cut.
Progression 7: Dribble AtThe ‘dribble at’ action can be used when the opposition team is putting on a lot of denial pressure.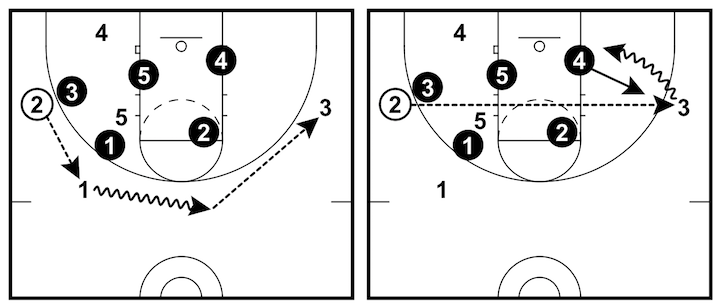
This action involves one player dribbling at another player which can cause one of two actions:
- A dribble handoff.
- A back cut
This is an efficient way to get the basketball around the perimeter when you want to get the basketball into a specific position.
For example, if you wanted to get the basketball into the low post from the wing but the wing is being denied.
The task for the coach is to decide which option/s your team is going to use.
For youth basketball, I recommend only using the back cut option every time one player dribbles at another.
For high school and above, feel free to use both options.
Here are a couple of diagrams to show you how they work…
Slot to Wing Dribble At Back Cut1. 4 dribbles towards 2 on the wing.
2. Noticing this, 2 immediately back cuts.
3. If the pass is open, 4 will pass to 2. If not, 4 continues dribbling to the wing position.
4. Since 2 doesn’t receive the basketball, they fill out to the weak side wing.
5. 3 and 1 also fill towards the basketball.
Slot to Wing Dribble At Handoff1. 4 dribbles towards 2 on the wing.
2. Seeing that there is no back cut opportunity, 2 steps forward and receives the handoff from 4.
3. 2 now has the option to attack the rim or dribble to the slot position.
Coaching Points:• If running a hand0ff, the other offensive players must read this and stay in their spots. If a back cut is run, all players must fill towards the basketball.
• Again, for youth basketball I recommend back cuts every time there’s a dribble at situation.
Piecing Together the 4-Out 1-In Motion OffenseCongratulations!
Once your team is comfortable with the 7 progressions of the 4-out 1-in continuity motion your team will have a very solid base offense with many options and also an offense that will develop basketball IQ.
Now that your players understand the offense, it’s important to keep improving it.
This occurs as players start to learn the strengths and weaknesses of their teammates and make decisions accordingly.
I think we can all agree that setting an on-ball screen for the power forward who isn’t a great dribbler is never a good idea!
This will take some time to get to the point where your players look fluid on the court.
Stick with the process and be patient. It will all come together.
But that’s not all…
Additional 4-Out 1-In Motion Actions:There are many additional actions that you can run out of the base 4-out 1-in motion offense that are optional inclusions.
Teach your players the base offense (the 7 progressions) first, and then adding these as ‘plays’ out of the base offense.
Call these actions out of time-outs, out-of-bounds, or when you need a basket in a crucial moment of the game.
Which of these actions you choose to implement into your offense will depend on the skill sets of the players on your team. Find the plays that take advantage of your best players’ strengths.
Here they are…
Slot to Slot Pass Additional ActionsFlare Screen for the Slot Player – “Fire”
1. 1 passes to 4 on the slot to slot pass.
2. 3 steps up and sets a flare screen on the blind-side of 1’s defender.
3. 1 takes 1-2 steps forward and then flare cuts off 3’s screen.
4. 4 takes 2 dribbles to improve the passing angle and then passes to 1 on the wing for the shot.
2. Flex Screen to Pin Down – “Flex”
1. 1 passes to 4 on the slot to slot pass.
2. 5 then sets a flex screen for 3 who cuts across the lane looking for the pass and open layup.
3. 1 then sets a pin down screen in a screen-the-screener action for 5.
4. 5 curls or straight cuts off 1’s screen depending on their skill set to receive the basketball for the open shot.
Slot to Wing Pass Additional Actions1. Staggered Screen for Weak Side Wing – “Stag”
1. 1 passes to 3 on the wing.
2. 2 and 4 set a staggered screen for 2.
3. 2 curls off the staggered screen to the ring looking for the basketball.
4. 1 then sets an immediate screen on 4’s defender.
5. 4 curls to the elbow looking for the catch and shoot. If it’s not open, they clear out to ball-side slot.
6. If 2 didn’t receive the pass for the layup they clear out to weak side wing.
7. After setting the second screen 1 clears out to weak side slot.
2.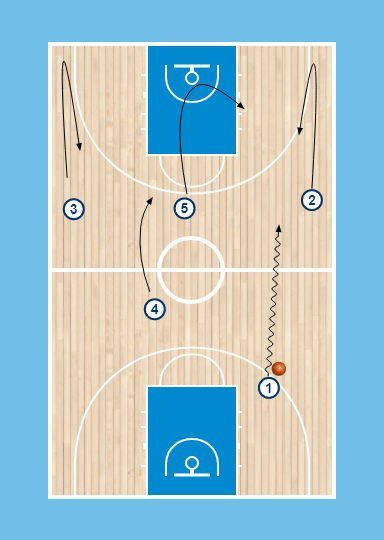 UCLA Screen to On-Ball Screen – “Celtic”
1. 1 passes the basketball to 3 on the wing.
2. 5 sprints up to set a UCLA screen for 1.
3. 1 cuts off the UCLA screen looking for the basketball for the open layup. If they don’t receive it, 1 clears to the corner.
4. 5 then immediately sets another screen for 3.
5. 3 waits until the screen is set and then attacks the rim.
6. 3 now has the option of finishing in the lane or kicking out to 3 shooters behind the three-point line.
Wing to Slot Pass Additional ActionsWeak Side Down Screen for Wing – “Down”
1. On a pass from 3 to 1, that triggers 4 to go and set a down screen on 2’s defender.
2. 2 then takes a few steps in and then bursts out to the perimeter looking for the catch and shoot.
3. 4 must hold this screen for as long as they can legally and then pop out to fill the wing.
4. This will often lead to a late close out by 2’s defender which means easy dribble penetration.
Weak Side Flare Screen For Slot – “Flag”
1. On the pass from 3 to 1, 4 sets a blind-side screen on 2’s defender.
2. 2 takes 1-2 steps forwards and then bursts out on the flare screen to the wing.
3. 1 takes 1-2 dribbles across to improve the passing angle and then makes the direct pass to 2 for the shot.
4. If 2 catches but the shot or drive isn’t open, 4 has popped out and you’re still in motion.
AdvancedOn a Pass Into the PostOn any pass into the low post, the ball-side wing player must cut to the weak side.
This forces the other defenders to focus on their player and make adjustments to their position instead of allowing them to double team or read the post player.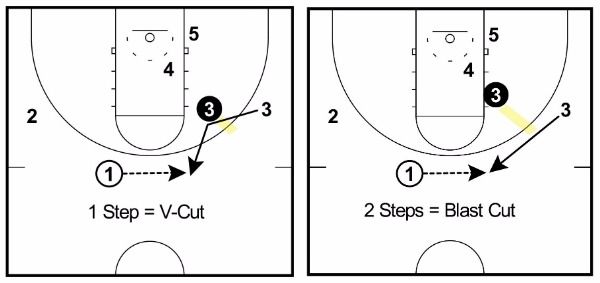
We want the low post player to receive the basketball with their low foot above the low block so that there’s space for the baseline cut and possible bounce pass for the layup.
If the low post player is on or below the low block, it leaves little opportunity for this cut to be effective.
When this happens, the alternative cut is to make a Laker cut. A Laker cut is a cut to the strong-side elbow and then through to the baseline corner.
Even though I haven’t discussed much about the post catching in the high post, the same rules exist. The wing player must cut baseline so that the help defenders must move and rotate out of position.
Rebounding and Transition DefenseEstablishing offensive rebounding position and transition defense is crucial if you’re going to run the 4-out 1-in motion offense well.
For this offense, we will rely on 2 or 3 players to fight for offensive rebounds depending on where the shot is taken from the outside.
If the shot is taken from inside the three-point line, encourage players inside the key to fight for offensive boards and those outside the three-point line to transition back on defense.
The post player always fights to the front of the rim on a shot from anywhere on the floor.
If the outside shot is taken from the wing, the weak-side wing player must sprint in to rebound on the weak-side while the post player fights for position in front of the rim. This leaves us with 3 players who must immediately transition back onto defense.
If the outside shot is taken from the top of the key, both weak-side wing players sprint in to rebound on their respective sides while the post player fights for position at the front of the rim. This leaves the two slot players to transition back on defense.
End of Clock SituationsTo keep players from going through the motions, it’s important that you have a specific action your team runs when the shot clock is winding down.
The best way to end a possession is with a ball-screen from your post player.
There are two ways to do this…
1. Straight Ball-ScreenSince the 4-out 1-in motion offense provides great spacing at all times, there’s always a great opportunity for a ball-screen.
The simplest thing you can do is get the basketball to your best playmaker or scorer, and then sprint your post player out to set an on-ball screen for them.
This can occur in either of the wing positions or slot positions.
I recommend you have a key word (I use ‘hot’) that you or the players can call out with 5 – 7 seconds left on the shot clock to trigger this action.
2. UCLA Screen to On-Ball ScreenThis advanced option can be a very effective if you have experienced players who can run this quickly and efficiently.
The first step is to get the basketball to one of the wing players.
Instead of the post player sprinting out to set an immediate screen on the player with the basketball, they first set a UCLA screen for the ball-side slot player who cuts through looking for the basketball and quickly pops out to the weak side.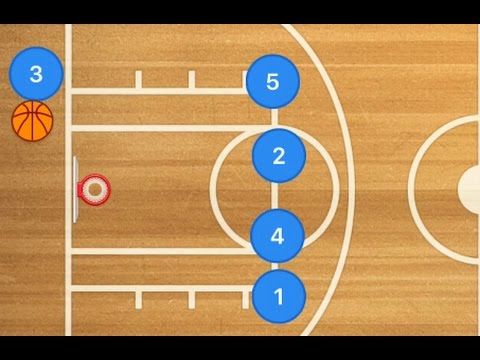
Immediately after setting this screen the post player takes a few short steps to the wing and sets and on-ball screen for the player with the basketball.
This advanced option does a few things:
1. If forces all defenders to rotate an extra position and stay with their player. If we only set a straight ball-screen the weak-side defenders will already be in help position.
2. Provides the offense with an extra opportunity via the slot player cutting to the rim off the UCLA cut.
Use a different keyword to trigger this option (I use ‘cold’) and once again call this out with about 5 – 7 seconds left in the shot clock.
For both of these options the post player must sprint to the screen to create separation between them and the post defender for best chances of success out of the ball-screen.
Zone Defense AdjustmentsWith a few adjustments the 4-out 1-in motion offense can easily be run against a 2-3 zone defense.
For it to be most effective and easy for the players to understand, we want to do our best to stay within the structure of our current offense with minimal changes.
Here’s a few ways to do it.
1. Post Seal the Middle of the ZoneAs the basketball is swung around the perimeter the post player should establish a deep post seal on the inside zone player.
This is a great opportunity to get the basketball inside from the wing.
2. Hook and LookWithin any 2-3 zone there is an area between the bottom line of defenders and the free-throw line that is usually left open for a majority of the possession.
To take advantage of this, any time a player basket cuts they must ‘hook and look’ when passing through that area of the paint.
The player cutting can hold this position for 1-2 seconds before continuing their cut to fill the perimeter.
It’s imperative that the perimeter players are watching these cuts and are ready to feed the basketball inside if it’s open.
Often the middle player of the zone will have to step up leaving an easy drop-down pass to our post player for the layup.
3. Post Player to Short CornerWhen playing against a zone you can often find a big advantage by changing the role of your post player and keeping them on the ball-side of the zone.
Especially if you’ve got a post player that can make the midrange shot.
Since we play the wing spots high on free-throw line extended, the bottom post player is often forced to rotate out and help to stop open shooters.
This leaves the short corner completely open for your post player to receive the basketball.
If the middle player of the zone steps out to help the middle of the zone will be open for cutters to receive the pass for an open layup.
4. Corner Cut – Zone OverloadAnother great option against a zone is to create a classic overload situation.
We accomplish this by running the slot player to the ball-side corner on a pass to the wing.
This forces 2 defenders to guard 3 players and puts the offensive team at a big advantage.
This action will often lead to an open three-point shot from the corner.
ConclusionAnd the 7,000 word 4-out 1-in motion guide has come to an end!
This is one of the most popular offenses at all levels of basketball for a very good reason.
It can be adjusted to suit any age and skill level, it can be run positionless (rotate the post player), and since it’s a decision-making offense it will develop your players’ basketball IQ.
To quickly recap the progressions, here they are:
1. Pass, Cut, and Fill
2. Add Back Cuts to Pass, Cut, and Fill
3. Dribble Penetration
4. Away Screen – Curl Cuts Only
5. On-Ball Screen
6. Away Screen – Add the Straight Cut
7. Dribble At
Along with the 5-out motion and read and react offense, the 4-out 1-in motion offense is one of my main recommendations for all youth basketball teams.
If you’re coaching a youth basketball team, use it!
5 Basketball Exercises to Move the Ball with Passes
There is nothing better than watching a team move the ball quickly and efficiently around the court without greed.
Overcoming the defense with smart passing the ball to each other, creating situations for open shots and passes is one of the great offensive techniques.
Want your team to do it?
Basketball passing exercises in this article will help you with this.
But first let me explain something very important...
There are two types of training exercises:
1. Technique for passing the ball.
2. Decision making during transfers.
Unfortunately, most coaches only focus on the "technical" aspect of training and forget how to train their team's decision-making ability when it comes to sharing the ball.
Your players will not improve their game passes by doing thousands of repetitions of chest passes.
While technical drills have their place, they are far less important than passing drills with decision making.
We must let the players learn how to read the defense and make the right decisions.
In addition, ball passing exercises are great for starting a workout to warm up your team and get them to communicate and work together.
5 ball passing exercises.
1. Advance
How the drill works:
Players form 3 columns evenly distributed along the end line. The two outside players start with the balls.
3 players advance across the court passing the ball back and forth to the middle player and then finish the exercise with two shots from under the basket.
Purpose:
A fun passing exercise that works on catching and passing without running, with communication, timing, and shooting from under the basket at game speed.
Formation:
Players form 3 columns behind the end line.
Two players on the outside lines have balls.
Instructions:
3 players (1, 2 and 5) begin to move forward on the court. The 1st outside player passes the ball to the 2nd player in the middle line.
Immediately upon receiving the ball, the center line player returns the ball to the same player on the touchline.
The 1st middle player then turns to the other side and receives a pass from the 5th outside player and immediately returns the ball to him.
Outside players may use 1-2 steps to avoid running.
The drill continues until the players reach the opposite 3-point line. When this happens, the two outside dribblers go to the basket and shoot.
The group then waits at the opposite end for the rest of the groups to complete the exercise before starting the exercise on the other side. On the right scheme at the top, the three players (4, 3 and 2) continue the exercise according to the scheme described above.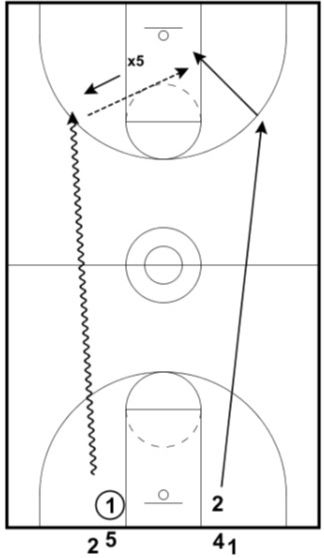
Options:
Medium or 3-point shots. Instead of ending with a run to the basket, players may end with mid-range shots or 3-point shots.
Back and forth - Instead of waiting at the other end, the troika can complete the drill both ways. Only now the threes are placed on both end lines and begin the exercise when the three from the opposite side return to their half of the court.
One Ball - If you are coaching very young players, you can run this exercise with one ball until the players understand how it works.
Coach's notes:
Passes must be passed on the move in front of the player using proper passing technique.
The receiver must hold his hands at goodie level, showing 10 fingers and calling for the ball to be passed to him.
The middle player must catch the ball and quickly pass the ball to a running partner. Don't run!
Shooting technique while moving from under the basket is very important in this exercise. Watch your footwork and make sure all players are doing it right.
2. Monkey in the middle
How the exercise works:
Players are divided into groups of three. Each group has one ball. The two transmitters lined up 12 to 15 feet apart. The third player in the group is the "monkey in the middle". He tries to hit or steal the ball. The two outside players must pass the ball to each other without using cross passes or dribbling. Simply turning and using feints to open up the passing line and pass the ball past the defender.
Goal:
A fun exercise that works on defense at the same time. This exercise will teach players how to use feints and turns to create a passing zone and also to protect the ball.
Lineup:
• Groups of 3 players.
• Each group has one ball.
• The passers are lined up 12-15 feet apart with the third player (back) in the middle.
Instructions:
1. The drill starts with the defender attacking the player who starts the drill with the ball.
2. The attacker uses feints and steps to pass to another attacker while the defender attempts to parry or intercept the pass.
3. After each pass, the defender rushes towards the ball carrier and tries to press the ball again.
4. When the defender recovers the ball or kicks the ball, the players change positions.
Variations:
Change after a certain time - Players can change positions
after a certain period of time (depending on the age of the players, their strength and stamina), and not after each interception and elimination. For example, 30-40 seconds.
One dribbling available. Let the attacking players hit the ball once to the floor to open up the passing corner. It will be tougher for the defender.
Only bounce passes allowed - in order to make it more difficult for attackers, allow them to only bounce passes.
Notes:
• It is very important for a defender to have active arms and legs at all times. This is the best way to intercept.
• Passing players must wait for the defender to recover before making the next pass. The purpose of the training is to learn how to pass and create passing angles.
• If there is no set time, the offensive player must not hold the ball for more than 5 seconds without passing the ball.
• No passing in an arc! They make the drill too easy for the attackers and will not lead to improvement.
3. Swing passes
How the exercise works:
The team is divided into 4 groups in the corners on half the court. The players make a pass to the player on the right, who start running along the sideline towards the endline. The sender then joins the end of the column into which he passed the ball.
Purpose:
A drill intended to be used primarily with young players or as a warm-up. This training will improve passing the ball on the move, as well as improve reception and passing without dribbling.
Lineup:
• The team is divided into 4 groups. One group located in each corner.
• The first player in one of the groups has the ball.
Instructions:
1. The drill is started by ball carrier 02 passing the ball 01 to the player on the right.
2. Before passing the ball, the receiver must start running in the direction of the next group, where he will make the next pass of the ball.
3. 01, having received the ball, passes it to player 05, who starts a dash towards 03.
4. After each pass, the passer joins the end of the group where the ball was passed.
5. The exercise continues according to the same scheme with passes and jerks of the players along the square in the same direction.
6. After a certain period of time, the coach changes the direction of the passes.
Options:
Turn on the second ball. If the players perform confidently, then you can enter the second ball in the opposite corner.
Various types of passes - The drill can be performed with one or two hand passes, bouncing, etc. One Dribbling - Players are allowed to make one dribbling before passing to the next player. This can be useful if you are passing with one hand.
TIPS:
• The receiver does not need to slow down or speed up to catch a transmission. Transfers must be accurate, timely and forward.
• The receiver must initiate the snatch in a timely manner with arms outstretched to assist the passing player in making a timely and accurate pass.
• It is very important that you do not make any mistakes during the exercise. Don't let them fall into this bad habit.
• Begin the exercise at medium speed at the beginning until the players understand it. Then increase the intensity.
4. Bronze gears.
How the drill works:
Starting at the end line at the edge of the penalty area, pairs of players pass the ball back and forth using different passes as they run across the court to the other end line.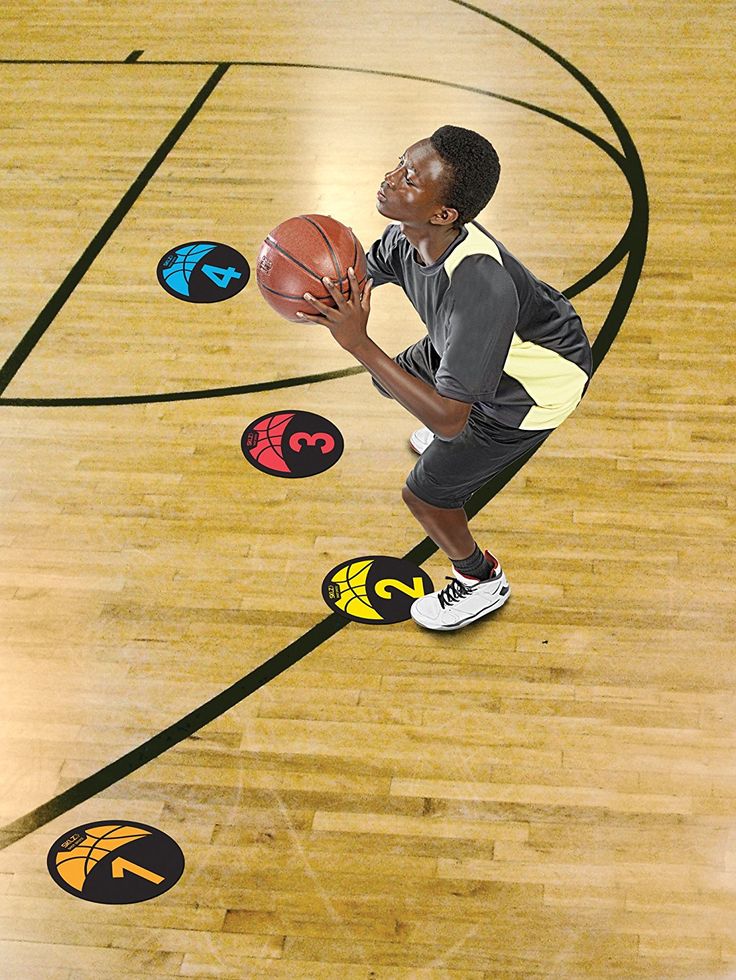 When they get there, they move closer to the touchline and come back using various passes over the players in the middle of the court.
Purpose:
An excellent warm-up that provides many passes in a short amount of time. Including passes of various lengths and types for players in training.
Line-up:
• All players find a partner.
• Each pair has one ball.
• Pairs split into two columns behind the endline at the edge of the SR.
Instructions:
• 1. The first pair move to the opposite side at a slow pace in the middle of the court, passing the ball from the chest to each other.
• 2. As soon as the first pair is closer to the 3-point line, the next pair starts.
• 3. When the first pair of players reach the opposing endline, they move to the touchlines and return, passing the ball over the pairs of players moving in the middle of the court.
• 4. When the players return to their starting position, they rejoin the pairs in the middle of the court and continue continuous training.
• 5. Every couple of minutes, change the type of passes players make for middle pairs and outside pairs.
Options:
Gears for pairs in the middle. For the mid lanes, there are several types of passes that I recommend: from the chest, with a rebound, one-handed from the chest, and one-handed with a rebound.
Outline Passes - For outside lines there are several types of passes that I recommend: chest passes, overhead passes, one hand passes.
Remember to consider your team's age, strength and skill level when deciding which passes they should use during practice.
Tips:
• Follow the pace of the exercise; especially if it is used as one of the warm-up exercises. Walking should not be allowed, but too much traffic should also be avoided. Accurate transmission is the main focus of training.
• Players on the outside lines must not make too many passes in an arc and with a very high trajectory on their passes.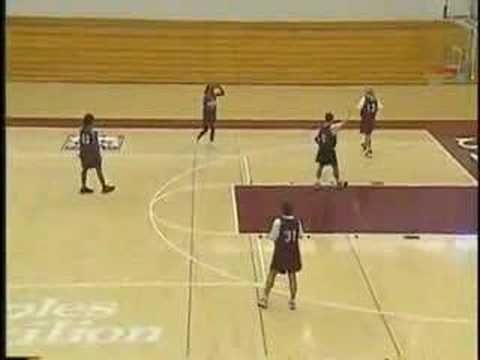 They should be at a height that is safe enough not to hit the midlines, but straight enough to reach your partner quickly.
• The ability to pass the ball with either hand is an important skill to develop. Expect mistakes when your players first perform a drill, but make sure you train them properly.
• Footwork is very important during this workout. Players must be able to catch the ball and pass back to their partner in two steps. If you are training young children and they cannot pass the ball at speed yet, slow down the pace of the exercise.
• After each run around the court, the players must switch to the sides so that they practice passing short and long passes from both sides of their body.
5. Netball
How the exercise works:
regular battle without dribbting the ball is allowed at any time. Games can be played 3 on 3, 4 on 4, or 5 on 5.
Target:
An excellent exercise that improves not only passing the ball, but also moving without the ball, positioning, jerking, etc. This exercise will lead to less use of dribbling in games and fewer losses.
Lineup:
• Divide the players into two teams based on the number of players available for training.
• Try to make teams of the same height and skill level.
• Only one ball is needed for training.
Instructions:
1. Teams play normal full game - no dribbling!
2. The exercise is performed within the time specified by the trainer.
3. Start with the arrangement shown in the diagram.
Point system:
• The game is played up to either 5 or 11 points.
• Each 2-point roll is worth 1 point.
• Each 3-point roll is worth 2 points.
• Must win by 2 points.
• In the event of a shooting foul, the offensive player throws one free throw for 1 point.
Variations:
One Shot Allowed - Players are allowed 1 dribbling when they gain possession of the ball. This is not a requirement, just an option.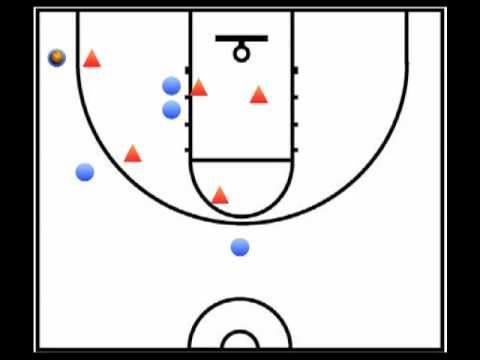
Only bounce passes allowed - Restrict your players to only use bounce passes.
3 teams. The exercise starts by dividing your team into 3 groups of 3 to 5 players. Two teams start defense in each half. The third team is in the middle of the court on offense. The offensive team chooses one side and tries to score the ball without dribbling. Same scoring system as above. After a goal is scored or the possession of the ball is changed, the defensive team receives the ball, attacks in the opposite direction. The previous offensive team may play defense up to the center line of the court. Play until one team reaches 5 or 11 points.
Tips:
• It's very important to give players instructions on how to set up wide and run smart to get the ball.
• If you need to step in to make adjustments or re-emphasize the most important points of the exercise (distance, snatches), step in but keep it short.
• All passes must be at least 3 feet long. Don't let the players run up and pass the ball from each other's hands.
• Footwork is important in this exercise. Make sure the players are not running and that they are using turns correctly.
• Players must speak and use raised arms when rushing to the basket to receive the ball.
V. Melnichuk
- Pryskalin Roman Ashotovich, teacher of physical culture
Sections: Sports at school and children's health
A pass in sports is the passing of the ball or pucks to a teammate. Pas is one of the most important tactical actions, which leads the team to success.
Conducting tactical training in early school age (9-10 years), we faced with several difficulties, one of which, to teach the child to play the pass. Us It is known that at certain stages of development the child occurs enhanced or delayed growth of certain physical qualities, level thinking, etc. Aged (9-10 years) tactical child's actions are not at their peak and our the task is to develop a methodology for strengthening its development, in particular to teach the child consciously play pass.
The presentation presents a simplified visual and informational material of the methodology learning to play the pass at an early school age. Observing children aged 9-10 years, it is clear that children listening to teacher or coach about collective game actions *, often used individual game actions*. In a team there will always be someone who is different in his development of physical or technical data from others, who will play more individually. The goal of our methodology is to make all players on the team to play in compliance game techniques * collectively in the pass.
Having studied and practically tested many methods different specialists, analyzing them positive and negative sides, I was developed a special technique that should be very simple considering the age children, how to teach a child to play the pass.
One of the main tasks in this technique is get the child to quickly accept the right decision in the game in a short time to achieve goals. Our task is to artificially create such terms. The game is played on handball or mini football field. The players play the ball with their hands The goal of the game is to hit the opponent's goal. Player, the one who received the ball cannot move, he stands on place while he has the ball in his hands, by this we intentionally force him to give the ball to a teammate or throw it at the opponent's goal. To the team for in the first training sessions we put three players in order to reduce the number of options to take quick decision. Also to the player who received the ball, take three seconds to get rid of the ball. The goalkeeper in the team plays as a field setter player. The ball that went into touch is put in according to the rules basketball*. Players off the ball actively move in any direction, away from guarding of the opponent, open on the position of the finished accept transmission. By choosing the position of the players, by passing the ball to each other, the team advances forward to the opponent's goal and from a comfortable position attacks them.
Some of the adjustments. The attacking player must not throw the ball. on goals from the goalkeeper area or basketball 3 second zone. The attacking team can throw the ball at the opponent's goal only with someone else's half of the field. For a weak team in position the goalkeeper can be played by a teacher.
With good skills of the players, in the future training team can add up to (4-5) players. Explore different basketball and handball ball passes to apply them in game. Learn and apply in the game various tactical schemes*, tactical combinations* in defense and in attack. Basketball players can use a ring instead of a gate.
In conclusion, in addition to all these training processes in teams should attend a friendly atmosphere as well respect for the opponent.
Presentation .
TERMINOLOGY.
Sports games are things that take place within the rules of the confrontation between the two sides, directed to achieve an advantage measured by the number of achievements of the stipulated goal of the game.
Individual play activities are a set of motor actions used in game to solve this situation.
Collective game actions are conscious interaction of two or more players based on an adequate understanding tasks in a given game situation.
Combinations – well thought out and in advance learned player interactions.
Game actions - complex motor the player's reaction to the game situation.
Game situation - arrangements and actions playing in a particular period of time.
Playing techniques - specialized actions used by the players to achieve goals in the game.
Game technique - a set of special techniques used by players to achieve maximum score in the game.