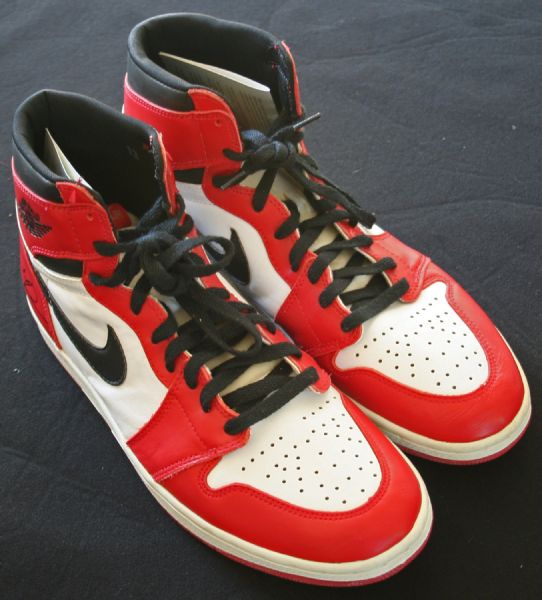
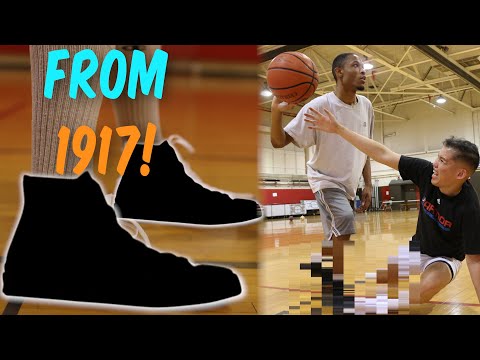
I was seven years old the first time I learned to tie my shoe by myself. It was one of the happiest days of my life because I felt I achieved something. It was my dad who taught me how to tie my shoe. The reason why he taught me to tie my shoe is that he was tired of bending his knees every time I loosen the tie on my shoe.
When I grew older, I realized that learning to tie my shoe is essential because this skill I’ve learned will be used every day in my life. I used this skill in many circumstances in my life, especially when I started to fall in love with basketball.
There are injuries that you can encounter because of improperly lacing up your basketball shoes. Knowing the correct way of lacing up your shoes will bring the best out of you. Plus, it will prevent you from getting some serious injuries.
What To Consider?
1 What To Consider?
2 Different Ways To Tie Your Basketball Shoes
3 How Tight Should Your Basketball Shoes Be?
4 Final Words
There are a few things you need to consider before picking what method you will use. These are things to consider:
How many minutes would you play?
Do you have wide or large feet?
Are you playing an organized game or a pickup game?
Do you feel any pain in your ankle lately?
Will you consider to play at your highest level?
These are a few things you probably need to consider before choosing what method you will use to tie your shoes. Lacing up your shoe isn’t just lacing up your shoe. Consider the lacing of shoes as your priority as well because mistakenly laced shoes can cause injuries.
Try our different methods below and see what your feet would feel. People have diverged preferences for how their shoes should feel, so we cannot come up with a conclusion on what your feet should feel when you try one of each method. Try experimenting some of these methods to see which of these methods works perfectly for you.
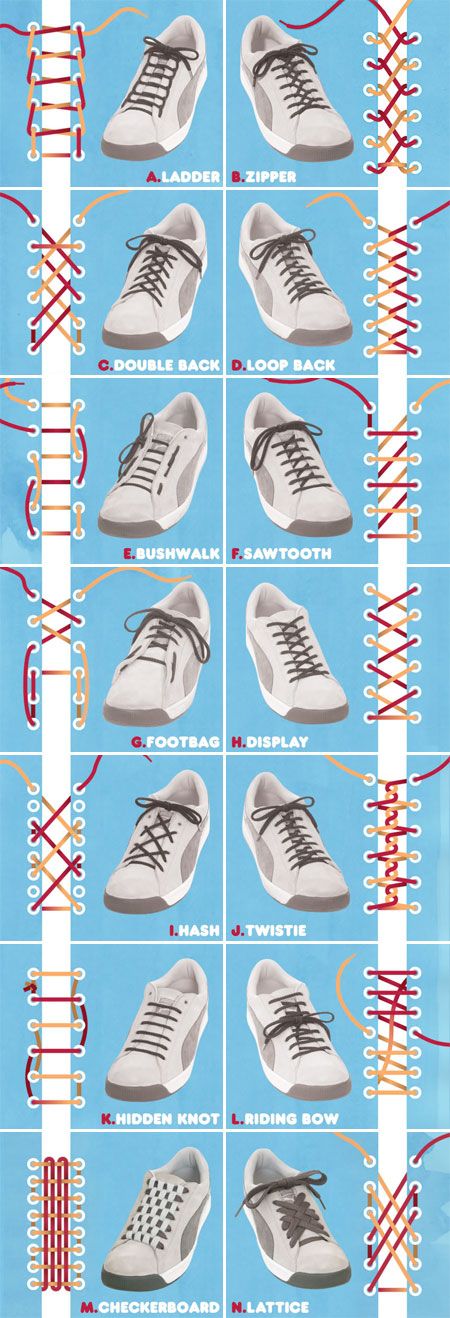
Different Ways To Tie Your Basketball Shoes
These are the different ways to tie your basketball shoes. Each distinct ways have different purposes. The first method we’ve featured was the basic and can be used in any situation but try to consider the other methods to see what works well for you.
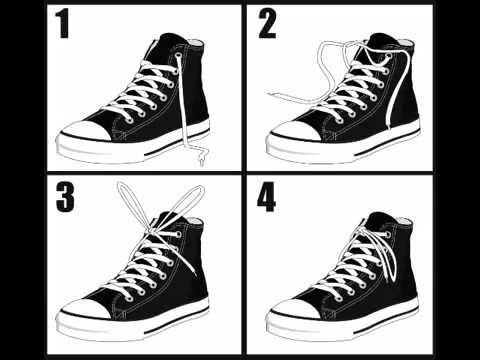
Method #1 – The Basic
If you wanted a simple method and easiest way to learn to tie your shoes, this method is the one you should consider. Probably this was the method taught by your mom or dad when you are a little kid. You can use this method in any situation and can compatible with any lace-up basketball shoes.
We called it “the basic” because the method is a piece of cake. All you need to do is to lace it in a crisscross pattern to the top of the shoe. Tie a basic knot and make a bunny ear with each lace. Crisscross the loops, tuck one under the hole that has been created, and then pull.
This method is adequate for street basketball games, pickup games, or when playing with your friends. You can use it in an organized game, but there are other best options below.
Check the video below if you have no idea what this method is:
Method #2 – Wide Feet Method
If you have wide and large feet, then this method is basically for you. You will lace them like the basic. Start at the bottom eyelets on the way to the top eyelets. The only difference here is you will skip one set of eyelets. Doing this method will give your large feet more room in the shoes.
Make sure to tie them in a comfortably tight manner. It should be tight so the knot won’t lose easily, but it should be also comfortable so your feet won’t get irritated while running on the floor.
Check the video below to see how this method was done:
Method #3 – The Ultra Lock
This method is for basketball players who play in an organized game. An organized game means playing in a 12 minutes quarter game. It could be a college basketball game, intramural games, or even professionally.
First is to tie them like in method #1, start at the bottom eyelets and lacing it in a crisscross pattern up to the top eyelets. When you get to the top, place it on the other side and pull it through, and you will have one bugs bunny ears, one on each side. Cross the laces, and put it through each bugs bunny’s holes.and then pull it nice and tight. Then tie the shoe like you normally do. This method will give you strong support and protection on your ankles. It will prevent you from getting severe injuries.
Check the video below for a concise instruction of this method:
How Tight Should Your Basketball Shoes Be?
A poorly tied basketball shoe can put you at risk of injuries. Basketball will test your physical strength. You will do a lot of jumping and changing direction at a very high speed. Plus, you will run around the court for many minutes.
Your basketball shoes must be properly laced up to prevent serious injuries. It should be enclosed and tight to ensure that your risk of getting an ankle sprain is lessened. Aside from making sure your lace is tight, consider making sure to tie your shoe where you are comfortable. In other words, lace your basketball shoe as tight as possible where you feel comfortable and safe at the same time.
Final Words
Never enter the court without correctly lacing your shoes. It will affect your game and prevent you from playing at your best. Improperly lacing up your shoe can cause you many unwanted injuries. Injuries could be severe or mild. Make sure to take time to tie your shoe before playing. It will keep your feet and ankles unharmed.
Do you have your unique way of tying your basketball shoes? If so, please let us know in the comments section below!
Spread the love
How to Tie Basketball Shoes
So you just bought a brand new pair of basketball shoes, and you laced them up and went straight to the court to play a few games. However, when you got back home you noticed your feet and ankles were sore and you had a few blisters on your feet.
These are all problems from having your basketball shoes improperly laced. Knowing exactly how and why you should lace your shoes properly for basketball can ensure you are playing at your peak performance, and also stave off injury.
Quick Navigation
First Things First
When you are looking for the best way to tie your basketball shoes, there are a few things to consider:
Are you playing in a sanctioned game or a pick-up game?
Does the way your shoes look matter to you?
Do you have wide feet?
These are all things that will matter in the final decision on how to tie your shoes and should be considered. While the first method on our list below will work for any of these situations, the other methods should be considered as well.
Trial and error to see how your feet react to different lacing and tying are paramount. Every person has a different preference for how their shoes should feel, so we suggest experimenting to find exactly what works for you.
Method #1 – The Old School
If you are looking for a good all-around way to tie your shoes, this is simple and decently effective. Your mom probably showed you how to tie your shoes this way when you were a little kid, and there is a good chance you still tie at least some of your sneakers this way today.
All you need to do is lace them in the normal crisscross pattern all the way to the top of the shoe. If you are wearing high tops, make sure you go all the way up to the top of the shoe, providing that extra ankle support.
This method works great for quick pickup games at your local park, or when playing with your friends. It could be used in a proper game situation, but there are better options.
Most people know how to lace and tie this knot, but if you don’t, this video will teach you how:
Method #2 – The Sasquatch
If you have extremely wide and large feet, this is the method for you. You will lace them exactly the same as the old school, starting at the bottom eyelets. The difference here is you will skip the next set of eyelets, giving you more room in the shoes for your larger feet.
You will still need to tie them as tight as you can comfortably, but this should provide an easier fit for your wider than average feet. Don’t forget to go to the top of your high tops. Don’t skip any sections on the high top upper, as you don’t want to run the risk of a sprained ankle.
Check out this video to see this lacing technique in action:
Method #3 – The Competitor
The last method is for those of you who play basketball competitively. This means at a high level, be it a church league, high school, college, or even professionally.
You will want to tie them as you did in Method #1, starting at the bottom and lacing up in a crisscross pattern. However, once you reach the top of your high top sneakers, you will want to lace the very top eyelet reverse (lace from outside to inside) and leave it loose. It should look like you have two bunny ears, one on each side.
After that, you will want to finish normally, except taking the criss crossed laces at the end through the bunny ears and pulling tight before tying. This will give you the absolute most support and protection against injuries.
To get a better understanding of this method, check out this video:
Tips and Tricks
Making sure the bottom of your shoes stay clean and clear of any debris is just as important as lacing and tying them properly. So after you leave the gym and head home, make sure you take the time to scrub the bottom with soap and water to keep your soles nice and clean to prevent injury.
The last tip we have for you is to always double knot your shoes. This will ensure that they don’t come loose and cause a tripping hazard. The knot is what holds the entire shoe firmly against your foot, giving you the most stability. Given its importance, make sure it is as strong as possible with a double.
Final Words
Don’t go into a game with your shoes laced halfway and tied loosely. You are just asking for a twisted ankle or worse. Take the time out to tie your shoes correctly and keep your feet and ankles in the best shape they can be.
Do you have a specific way you tie your basketball shoes? Let us know in the comments below!
How to lace up basketball shoes correctly
Not so easy: we'll tell you how to lace up your sneakers correctly.
It's not that easy: we'll show you how to lace your sneakers correctly.
Most people believe that if the foot is uncomfortable in a sneaker, then it's only about the shoes. It is enough to change the model, as the problem will disappear. This is partly true. But still it is worth paying attention to one more component - lacing. Wrong lacing can create a lot of trouble in training. And if you also have a non-standard foot, then lead to painful sensations.
Today we offer you several options for the correct lacing of basketball shoes. You will only have to choose the most suitable for you.
Classic
This is the most common type of lacing. Get sneakers "from birth" at the factory. Approximately 90% of buyers stay with her.
Classic lacing technique:
1. Pass the lace through the first holes.
2. Align so that the ends are the same length.
3. Cross through the following holes to the end.
4. Tighten and tie a bow.
Straight or Rectangular
Suitable for sneakers with 6 holes as an even number of holes is required. Gives shoes a very aesthetic look.
Straight lacing technique:
1. Pass the lace through the first lower holes inwards.
2. Pass the left end through the next hole on the same side. Then horizontally to the opposite.
3. Pass the right end through one hole on the same side. And then horizontally through the opposite.
4. Repeat all steps to the end.
Gossamer
It is also called “Grid”. At first glance, this type of lacing is very complicated. But the main thing is to remember the very beginning, and the rest will follow the knurled one. Here you will also need sneakers with 6 holes. Of the minuses, it can be noted that such lacing is difficult to tighten. But it looks very original.
Gossamer lacing technique:
1. We thread the lace into the first holes from the inside. Align the ends.
2. Thread each end of the lace into the 4th holes in a criss-cross pattern.
3. From the wrong side, return the ends to the second holes on the same side.
4. Cross again and thread through the 5th holes.
5. We return from the inside to the 3rd holes.
6. We pass through the 6th holes crosswise.
Back loop with 2 laces
This method will require you almost the skill of a spider. If you lace up incorrectly, lose the center of the plexus, then the pattern will not work. We'll have to start over this laborious task.
But your patience will be rewarded in full. This type of lacing is the most effective. Especially if you take 2 laces of contrasting color.
Back loop lacing technique:
1. First we thread 1 cord from the left side from the inside.
2. Bring the other end out and lift it up along the same side.
3. Create a spiral. You can leave the loops as the same length, and in decreasing order. The drawing will be even more interesting.
4. The second cord does the same, but on the right side. Only with each hole still passes through the loops of the first lace.
5. At the beginning, the ends of both laces can be tied together or simply hidden from the inside.
6. Do not overtighten! Otherwise, the drawing will be broken.
Lacing extra holes
High top sneakers usually have 2 extra holes that are slightly higher than all the others. We bet you, too, wondered “Why are they?” and “How to lace them?”.
The answer turned out to be banal. They serve as an additional fixation of the leg. And to achieve this goal, a special lacing was invented.
Lacing technique with add. holes:
1. In the first additional hole we thread the cord as usual, in the traditional way, crosswise.
2. Insert the end horizontally along the same side into the second one, leaving a loop. We do this on both sides.
3. Cross the ends and thread them into opposite loops.
4. Tighten and tie a bow.
Slamdunk.su
Slamdunk Journal :: How to lace basketball shoes
It is very important to properly lace up your basketball shoes.
It is very important to properly lace up your basketball shoes. The laces hold the shoes in place for optimal support. Improper lacing can lead to blisters, twisted ankles, and even foot injuries.
There are over five different types of lacing, all of which provide a comfortable fit for your foot type.
Butterfly Stitch
This style of lacing is ideal for people who have wider toes and a narrower back. Women who play basketball often find that this style will help them fit their shoes better.
For this type we use the standard criss-cross method until we reach the eyelet closest to the last shoe. In the penultimate eyelet, we will pass the lace through the top and make small loops on each side of the hole. Then we pass the second lace through these loops and pull the lace tightly.
This style of lacing creates a tight collar at the ankle so the shoe stays snug in place. When the laces are tight, you tie them in the standard way.
Double lace
This method is often used by women and men whose feet are wider in front than at the heel.
For this lacing we need 2 sets of laces. The short ones are perfect. One set to lace up the bottom of the eyelets and another for the top. The standard transverse lacing method is used on both the bottom and top of the shoe. Leave the bottom of the laces looser when you tie them to fit the width of your foot.
Tighten them at the top so that the ankle collar fits snugly.
Skip lace
The lace style is great for relieving pain in the top of the foot.
Using the standard crisscross lacing method, lace up the shoe from the beginning to the third hole. For the next two eyelets, move the laces straight up and through the holes without crossing them. From the fifth loop we continue the standard cross-lacing method.
Splay Lace
This is the ideal lacing technique for people with high arches.
Divide the string into segments of equal length. Start at the bottom and insert one end into the eyelet and then go straight through the shoe to the other hole. This will allow the lace to form a straight line on the shoe.
Now use another piece of string and draw a stripe on the eyelet just above the last one used. Then we move the lace straight to the next hole without crossing the shoe. Move this lace to the next hole without crossing the shoe. Now we continue to create stripes, alternating one lace after another.
When we get to the end, we'll just tie it up as usual.
Trouble Spot Lacing
If you have hammer toes or similar foot problems, this lacing method can relieve pressure in those areas of the foot.
Take two-thirds of the cord length in one hand and one-third in the other. Using the longest part of the lace, we create a strip of the desired diagonal by threading it into the opposite eyelet so that it is over the tongue and in reverse order, but already under the tongue strip. Repeat this system until you reach the top. Then we will tie, as usual.
How tight do you tie basketball shoes?
Shoes should be laced tight enough to feel close to your foot. It should not allow your heel to move up and down when walking, running or jumping.
How to tie basketball shoes without showing the laces?
Tie the shoes in the usual way and tuck the laces under the tongue of the shoes so that they are not visible. Always tie your shoelaces in a double knot so they don't come undone.
What is the best way to lace up basketball shoes?
Traditional lacing is the best way to lace up your shoes. We cross one lace over the other until we reach the top of the shoe, and then we tie them with a double knot so that they do not come undone.


 Each distinct ways have different purposes. The first method we’ve featured was the basic and can be used in any situation but try to consider the other methods to see what works well for you.
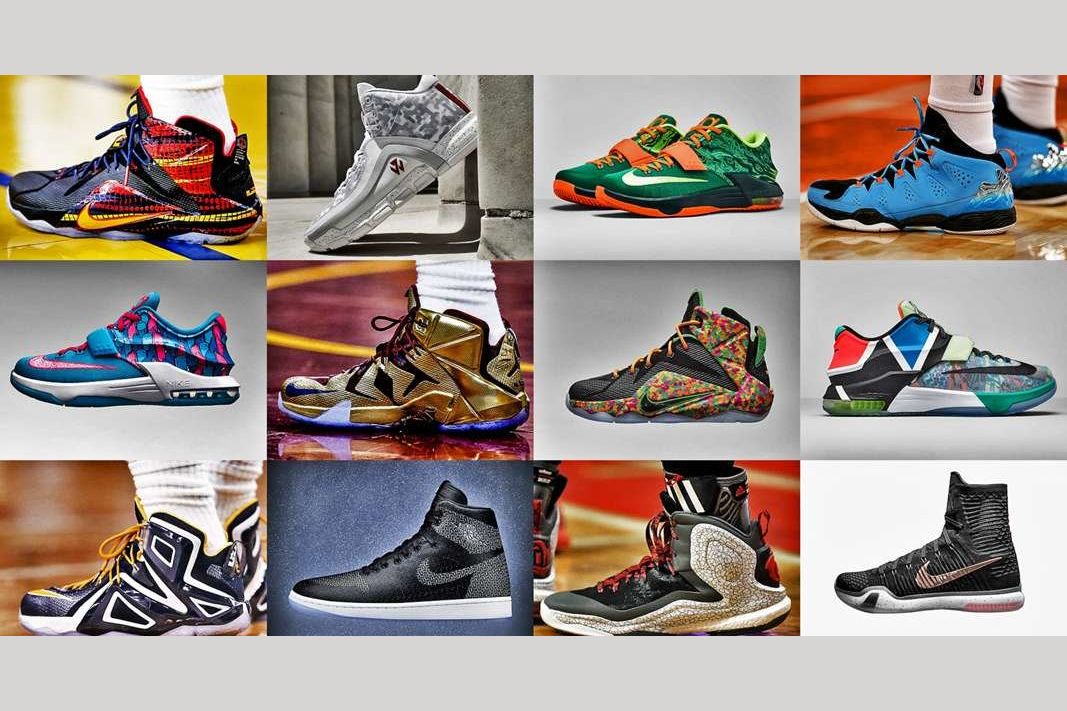
 When you get to the top, place it on the other side and pull it through, and you will have one bugs bunny ears, one on each side. Cross the laces, and put it through each bugs bunny’s holes.and then pull it nice and tight. Then tie the shoe like you normally do. This method will give you strong support and protection on your ankles. It will prevent you from getting severe injuries.
 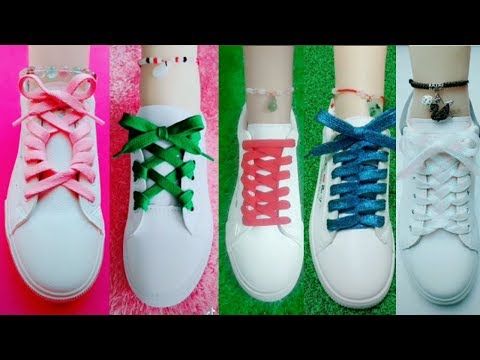 In other words, lace your basketball shoe as tight as possible where you feel comfortable and safe at the same time.
 It should look like you have two bunny ears, one on each side.
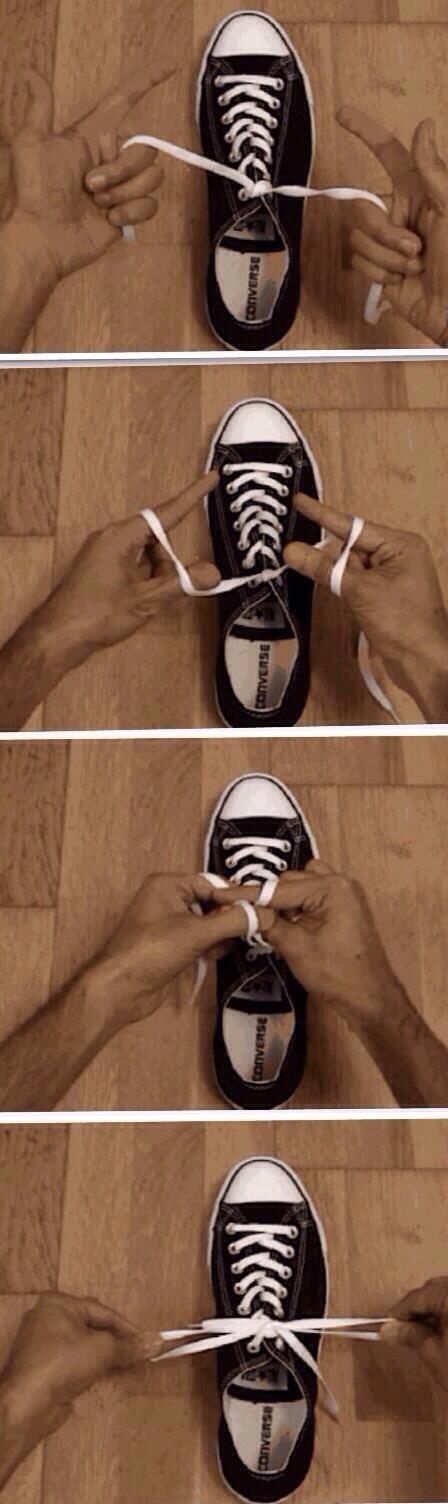 This will ensure that they don’t come loose and cause a tripping hazard. The knot is what holds the entire shoe firmly against your foot, giving you the most stability. Given its importance, make sure it is as strong as possible with a double.
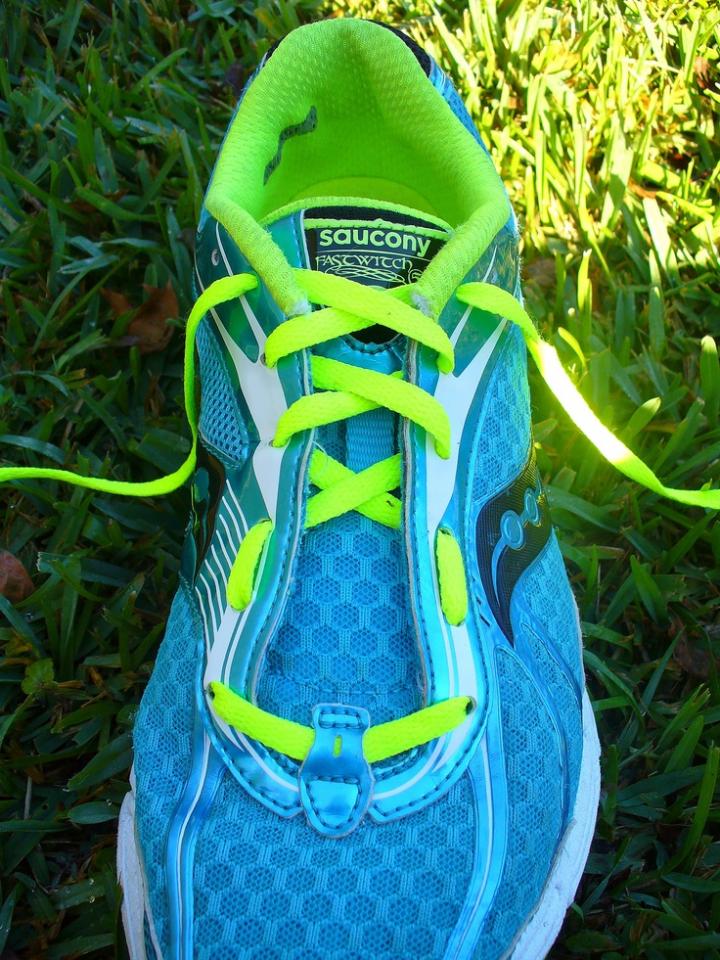 But still it is worth paying attention to one more component - lacing. Wrong lacing can create a lot of trouble in training. And if you also have a non-standard foot, then lead to painful sensations.
 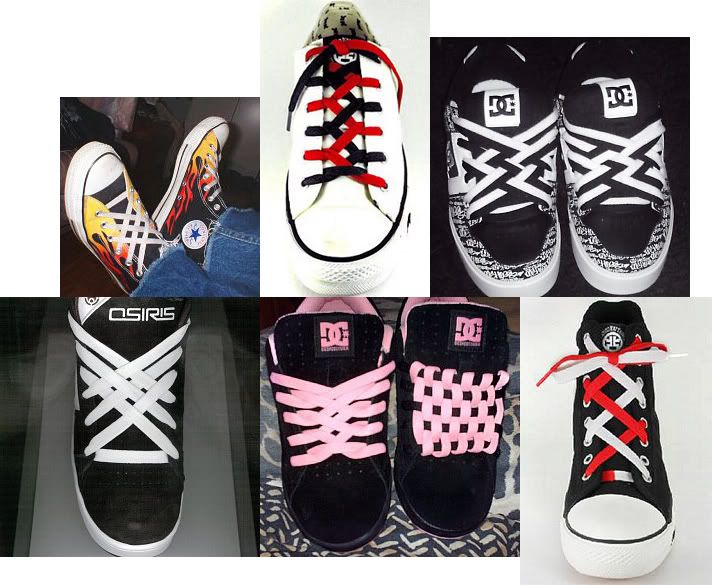 Pass the lace through the first lower holes inwards.
  From the wrong side, return the ends to the second holes on the same side.
  The drawing will be even more interesting.
  We do this on both sides.
 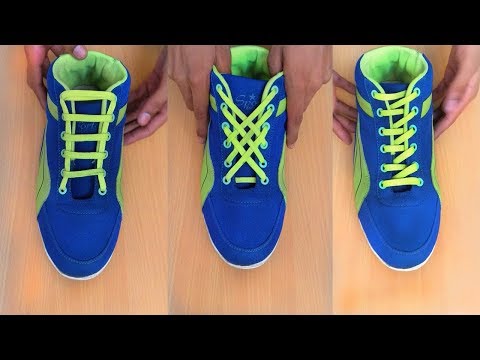 Then we pass the second lace through these loops and pull the lace tightly.
  From the fifth loop we continue the standard cross-lacing method.
  Using the longest part of the lace, we create a strip of the desired diagonal by threading it into the opposite eyelet so that it is over the tongue and in reverse order, but already under the tongue strip. Repeat this system until you reach the top. Then we will tie, as usual.