Basketball Cake Tutorial {Easy Round Layer Cake with M&M Candies}
Learn how to make a basketball cake from orange and brown M&M candies. This easy 2 layer round cake is perfect for a basketball theme party.
Whether it is for March Madness, a birthday party or a basketball season year end party, this easy basketball cake is fun for kids to make and colorful to serve at a party.
M&M Basketball Cake
Although there are many ways to decorate a basketball cake, one of the easiest ways is with M&Ms. Start with your favorite chocolate cake and vanilla frosting, then use orange and black M&Ms to “draw” the lines on the cake and fill them in. No special cake decorating skills required! Here are some hints to make the cake.
Favorite Layer Cake Recipes
If you are short on time, use your favorite box cake mix brand to make a 2 layer round cake. If you’d like to make a from scratch cake, here are our favorites:
Dark Chocolate Cake
White Cake
Yellow Cake
Gluten Free Chocolate Cake
Favorite Frosting Recipes
We think that vanilla frosting tastes best on this cake. You can color it orange if you’d like to give a more solid orange background.
Here are our favorite recipes:
Vanilla Buttercream
White Chocolate Frosting
Cream Cheese Frosting
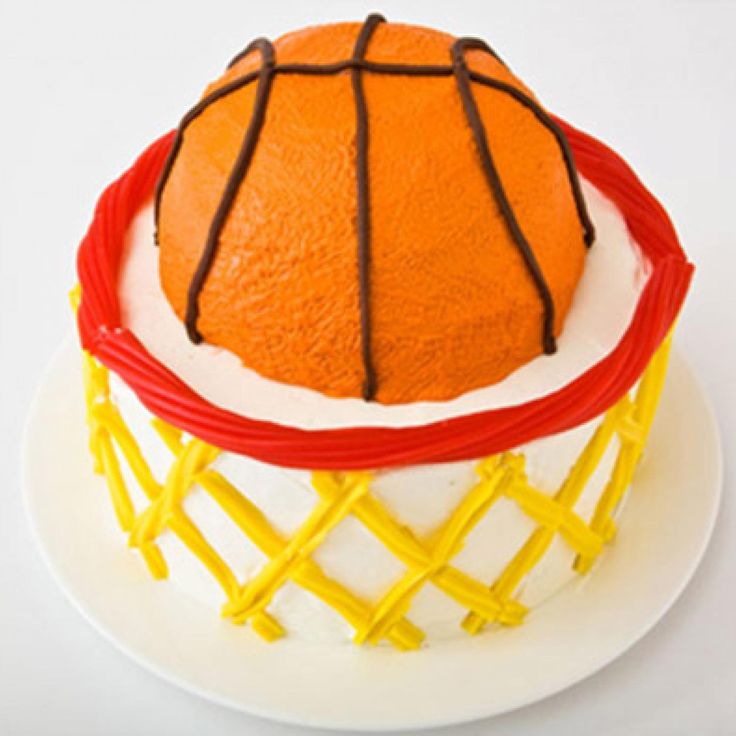
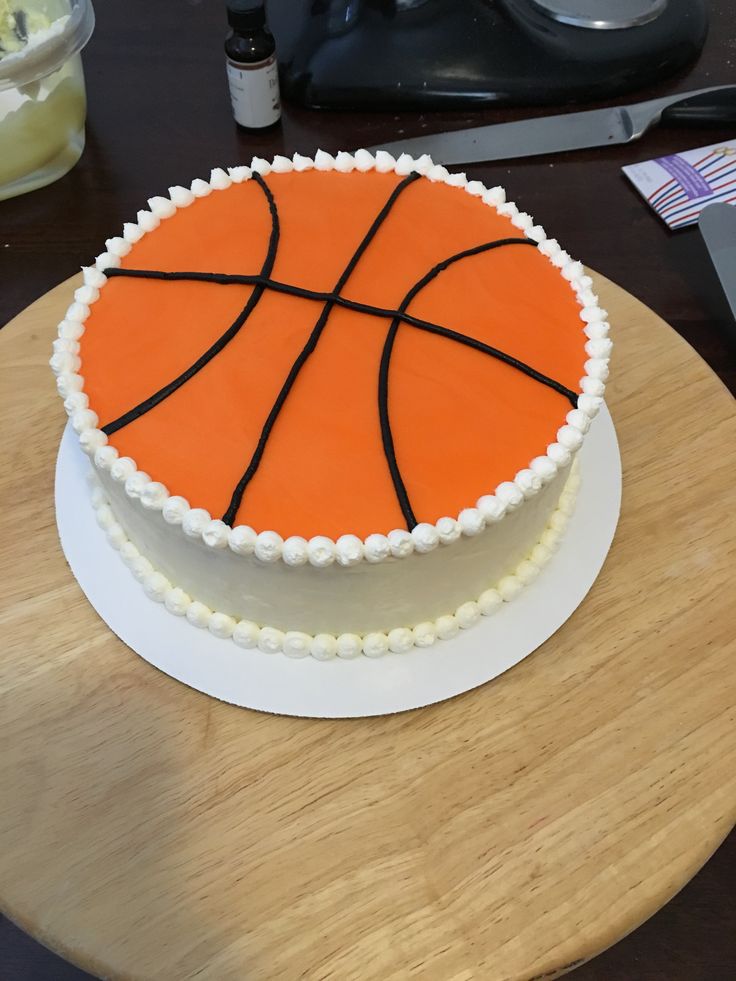
How to Make a Basketball on a Cake
Let your cake cool and frost with white frosting.
Use the brown M&M’s to make a vertical line down the center of the cake and a horizontal but slightly curved line across the cake.
Now make one vertical curved line with the brown M&M’s on each side of the straight vertical line to create the basketball lines.
Fill in the remaining areas on the top of the cake with orange M&M’s.
And that’s it! You’ll end up with a cake looking something like this. If you have more M&Ms you could decorate the sides or put an M&M border around the bottom edge of the cake.
Do I have to refrigerate cake?
Once the cake is fully covered in frosting, it is best if you do not refrigerate the cake. The frosting will act as a seal to keep that cake moist.
After the cake is cut, store it in an airtight container.
Where to Buy Colored M&Ms
To make sure you have enough M&Ms, you’ll need to purchase a 42 ounce bag of M&M candies (purchase here).
Another option is to purchase all brown and all orange M&Ms. This is a more expensive option, but you won’t have as much waste. (As if M&Ms were a waste! 🙂 )
Purchase orange M&Ms or brown M&Ms.
Servings 15
Prep Time 30 minutes
Cook Time 30 minutes
Total Time 1 hour
2 round white or chocolate cake layers (baked)
4 cups Favorite white frosting
42 ounces bag of M&M’s candies (to make sure there’s enough orange and brown)
Bake your favorite cake in 2 8″ or 9″ round cake pans. Turn the cakes out onto a wire rack to cool completely.
Place one cake layer on a cake plate. Top with frosting.
Place the second layer of cake on top.
Frost the top and sides of the cake with frosting, making it as smooth as possible.
Use the brown M&M’s to make a vertical line down the center of the cake. Then make a horizontal but slightly curved line across the cake.
Now make one vertical curved line with the brown M&M’s on each side of the straight vertical line to create the basketball lines.
Fill in the remaining areas on the top of the cake with orange M&M’s.
Store the cake at room temperature.
Once the cake has been cut you’ll need to store it in an airtight container.
Home » Recipes » Cakes » How to Make a Personalized Sphere Basketball Cake
Leave a Comment · As an Amazon Associate I earn from qualifying purchases.
You are most likely here because you are wondering how to make a personalized sphere basketball cake. You have come to the right place. This is a step-by-step tutorial so you can make a basketball cake for your team or player.
This sphere ball cake is mostly covered in frosting, although there are fondant elements.
Cake making is a hobby of mine, and I love to try and replicate real life objects. You might enjoy seeing my banjo cake, Ninjago cake and firefighter cake if you enjoy the art of cake design.
However, that’s not your main purpose for being here, is it? You are wondering how to make a personalized sphere basketball cake. Let’s get started.
How to Make a Personalized Sphere Basketball Cake
As with any project, it’s important to gather your supplies. Being prepared for the cake decorating experience is half the battle.
Materials Needed to Make a Personalized Sphere Basketball Cake
Note: Amazon affiliate links are provided for your convenience. Anything you purchase goes to support the free resources I provide at Meaningful Mama. Thank you for your support.
Black Fondant (I would not consider making your own. You want to buy it black. Trying to make black from white is impossible. You use loads and loads of black food coloring, and in the end it looks purple.)
2x 8″ glass bowl or 8″ cake sphere pan
8 inch cake pan
Cake Recipe: red velvet, white velvet or chocolate are classics. I did 1.5x the red velvet recipe (coloring it orange instead), to fit my two glass mixing bowls and one 8″ cake pan.
Frosting Recipe: My favorite vanilla buttercream is amazing and pipes out beautifully. If you don’t want a frosting that contains cream for allergy reasons orbecause the cake will be sitting out for prolonged period of time, this is a great alternative.
Orange and Copper Food Coloring
8 inch cake board
Bubble Tea Straw – I always use wide bubble tea straws or wide smoothie straws to dowel my cake. They are easier to cut than the wooden dowels and are just as strong. I’m not convinced this cake needed a center support, but I still did it as precaution.
Decorating Tip Number 7
Coupler
Pastry Bag
Cake Spatula
Serrated Knife
Pizza Cutter
Fondant Roller
Fondant Mat
Yard Stick or alternate straight edge
Small Plastic Tupperware
Parchment Paper
1.5 inch Letter Cookie Cutters – I got mine from this 100 piece cookie cutter set, which I have loved having on hand
Powdered Sugar
Fat Daddio's PHA-8 Cake HemisphereFondarific Buttercream Fondant, Black, 8Wilton Performance Aluminum Pan 8-InchFOYO 8-inch Round Tempered GlassWilton 610-205 Icing Gel, 1-Ounce,Wilton Copper Icing Color Pattern,Wilton 8-Inch Cake Circle, 12-PackALINK 100 Extra Large PlasticWilton #7 Round Decorating TipWilton 411-1989 Coupler Set, STD,Ateco 4712 Disposable Decorating Bags,Wilton Icing Spatula, 13-Inch, AngledJ. A. Henckels International 16906-201 ForgedOXO Good Grips 4-Inch PizzaWilton Large Fondant Roller withNon-slip Silicone Pastry Mat ExtraSwanson Tool AE141 36-Inch Yardstick,
Step-by-Step Instructions for Making a Perfectly Round Sphere Cake
The first goal is to make a sphere cake. Mine was not a perfect sphere. The bottom was flat for two reasons. I wanted it to stand secure. The glass bowl I used was flat bottomed.
The final step in this making a sphere cake tutorial shows how to trick the eye so that the cake appears perfectly round.
To make this sphere ball cake I used two 8 inch glass mixing bowl and one 8 inch circular cake pan.
Prepping the Cake
Grease pans and bowls and then dust with flour.
Cut out parchment paper the size of the bottom of your bowl. Do the same for your circular pan. Put these pieces of parchment paper in the bottom of the bowls and circular pan. These first two steps ensure your cake doesn’t stick.
Fill your bowls and cake pan with batter. One whole red velvet recipe was poured into the two bowls. 1/2 recipe was poured into the circular cake pan. I baked these separately because I knew they’d cook at different rates. The bowl takes longer to cook. I would not fill it completely because to cook a half a bowl of cake would take too long and much of the cake would taste burned.
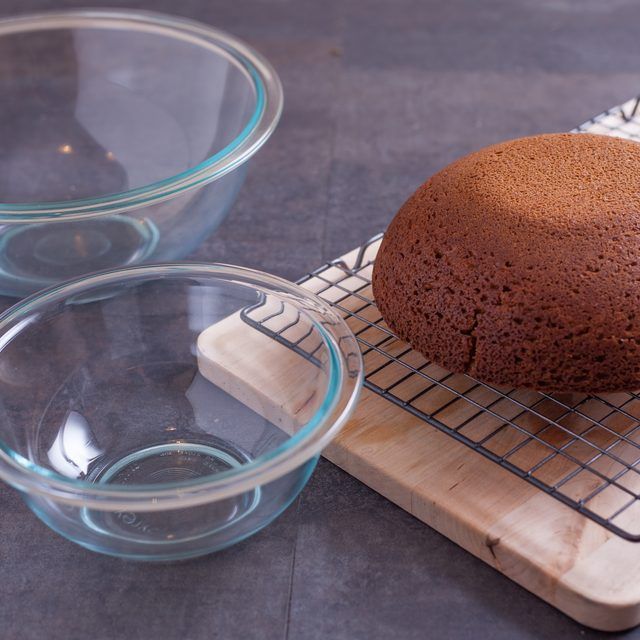
Once baked and cooled, remove your cake from the cake pan.
Stacking the Sphere Cake
Using a serrated knife, level off the dome shape of your cake. Reserve one of the domes to be the top of the ball since your baking bowl had a flat spot.
Cut a cake circle to the size of the bottom of your cake. Add one of the half circle cakes to the cardboard cake circle, wide side up.
Stick one of your straws in the center as a dowel.
Make frosting, and add it to the first layer. I added a combination of orange and copper food coloring to get my end color.
Stack as follows – small cardboard cake circle, half bowl cake (wide side up), frosting, cardboard cake circle cut slightly smaller than 8 inch round, 8 inch round cake, frosting, half bowl cake (wide side down), small amount of frosting, top dome piece you had cut off your cake to level. Now you have a ball shape.
Using a serrated knife, trim off some of the 8 inch circle and shape top of the cake to make it into a perfect ball.
Frosting a Sphere Ball Cake
Every good frosted cake starts with a crumb coat. Read my Cake Making 101 post to read more. Follow up with my Cake Making 201 post if you plan to use fondant on your sphere cake or just want to learn more about cake decorating.
A crumb coat is a real thin layer of frosting (pictured upper left) that basically grabs the crumbs and adheres them to the side so that you don’t have crumbs in your outer layer.
To make a crumb coat, take your cake spatula and apply frosting, in a thin layer, to the outer edge of your cake.
Pro tip: Separate the crumb coat frosting from the batch of frosting so you are not dipping your crumb-coated spatula into all of your frosting.
You will see cake and crumbs in your crumb coat. That’s OK. Stick your cake in the refrigerator to solidify those crumbs into that first layer of frosting.
Once set, pull out the cake and do your second layer of frosting. You’ll be covering the cake with piped dots, so this doesn’t have to be perfect, but just try and make the ball look evenly round. I had a plastic frosting smoother that bent so I could go around the ball more evenly with the curves.
Decorating a Personalized Sphere Basketball Cake
Cover your work surface in a light layer of powdered sugar. Take a piece of black fondant and roll it into a snake. Then, using your fondant roller with the purple band setting, roll out the fondant into a long strip. The bands help ensure you are rolling to an even level.
Using a clean straight edge and pizza cutter, cut one side of the fondant straight.
Use your straight edge to make sure the cut side remains in a straight line.
Measure 1/2 inch from that edge in a few different places and make with a toothpick.
Use your straight edge again, laying it in line with the toothpick holes. Take your pizza roller and make another cut.
Use your strips to make a line all the way around the center of your cake. I went over the top first and then used two different pieces for the two different sides.
Use the back of a butter knife to try and make these initial lines as straight as possible.
Quick side note: Sorry for the discrepancy in the coloring in the photos. Different lighting yielded different results. Your coloring will be dependent on both lighting and color of frosting. Our final result was more orange than all of these prep-photos suggest.
Cut more black fondant strips for the four curved lines on the basketball.
I just used my eyes as well as a ruler at points to try and get the curves even on both sides. Cutting out a template is another option.
Using letter cookie cutters, cut out the name of your child. I cut my end two letters shorter by hand so they’d fit. Do their name on both sides of the ball.
Time to do dots, dots and more dots. Using a size 7 tip, add dots to all of the parts of the cake basketball that is not covered in black fondant.
Pro Tip: To shine up black fondant so that the powdered sugar disappears, use a little bit of shortening on a paper towel and very lightly rub on the fondant.
Once all the dots are done, put the cake in the refrigerator to let the frosting stiffen a bit. Pull it out, wash your hands and use your finger to press down all of the dots so they look a bit flat rather than like little Hershey kisses.
The question of the hour: How long did it take to do all those dots?
How long does anything take as a mother? Probably twice as long as it needed to. I tried to keep track, but there were interruptions. My guesstimate would be 2 1/2 hours to do the dots.
The final step, which I promised to reveal, was how to make a sphere cake with a flat base look perfectly round. The way to trick the eye is creating a base or a stand. I used a plastic piece of Tupperware and covered it in fondant. You could also use something like a container for shredded parmesan or goat cheese.
There you have it – Instructions about how to make a personalized sphere basketball cake.
After you have read all the instructions, you might be ready to jump in and tackle a fun but challenging project.
However, you might feel overwhelmed and have decided you’d like an easier project. If that’s the case, maybe this is your solution:
Basketball Cupcakes
While my son wanted the cake for his birthday, we made these basketball cupcakes for his classroom celebration.
This is his first year playing basketball, and he is pretty excited about it.
Decorating these cupcakes were fairly simply. The edible basketball cupcake topping I bought at Hobby Lobby. An alternative would be to stick in plastic basketball rings instead. I applied the black sprinkles in a swirl pattern using my Wilton sugar writer. These cupcakes were baked in black and white cupcake liners.
Below showed some of the products used or an alternative. The Wilton Sugar Writer was a Christmas gift from my husband. The 3-tier cupcake carrier has been so wonderful to have on hand. These would make great gifts for the baker in your life.
CakeSupplyShop Black and White StripeWilton 710-762 Black Sugar Sparkles,Basketball Cupcake Rings - 24Wilton Sugar Writer Sanding SugarBest Choice Products 3-Tier Cake
Want More Cake Inspiration?
Cute Snowman Cake
Superhero Cake
Race Car Birthday Cake
Filed Under: Cakes
ABOUT JODI
Wife of the perfect partner for me. Mother of Three. Lover of fun, creativity, cooking, adventure, puzzles, games, family but most importantly Jesus. I run the blog Meaningful Mama. The heart of my blog is the character development series for teaching kids. The icing on the top consists of parenting tips, crafts, recipes, cakes and more. Read more...
Become a part of the Meaningful Mama community to receive encouragement, ideas, tips and tricks.
Soccer ball » CakeMade.club - recipes for sweets with step by step photos and videos
Soccer ball cake is a great gift for a boy or a man of any age and for any occasion. With this cake you can congratulate the winning team of a football match. By the same principle, you can make a cake in the form of a volleyball or basketball.
Calories
NAN kcal Per 100 g
0 kcal Total
Required 2 hours min
Ingredients
Cake - Soccer ball video recipe
Cake - Soccer ball step by step photo recipe
For the chocolate biscuit, beat the eggs with the sugar for about 10 minutes. You should get a thick white mass.
Sift cocoa and mix from bottom to top with a spatula.
Combine flour with baking powder and add to the dough. Mix carefully.
Grease a round form with a diameter of 20 cm with butter and sprinkle with flour, put a circle of parchment on the bottom. Pour the dough and bake at a temperature of 180 degrees for 30-35 minutes.
We take the biscuit out of the mold and leave it on the wire rack to cool completely, and cut it into three parts.
Let's make meringue. Beat egg whites with a pinch of citric acid, gradually add sugar and continue to beat until persistent peaks. Then sift the icing sugar and mix with a silicone spatula.
Put the thick mass into a piping bag and pipe the meringues. It is advisable to make them in different sizes in order to fill the voids of the cake layer with small bezels. We bake at a temperature of 100 degrees for about an hour and a half.
Let's do caramel cream. Beat softened butter and gradually add boiled condensed milk. Thoroughly mix everything with a mixer until a thick homogeneous mass without lumps. Don't forget to set aside 3-4 tablespoons of the cream.
We will collect the cake in a round bowl, covering it with cling film. The diameter of the bowl on top should be equal to the diameter of the biscuit. Take the cake, cut out a triangle and connect the edges of the cake. We spread on the bottom of the bowl, soak with sugar syrup.
Put the cream on the bottom biscuit, distribute it evenly, sprinkle with nuts. We spread the meringues and cover with a layer of cream.
We cut off the second cake a little, but we do not remove the trimmings anywhere. We put it on the cream, soak it with syrup, spread the cream. Nuts, meringues and cream again. At the very end, lay out the third cake soaked in sugar syrup. Cover the cake with cling film and refrigerate for 3-4 hours or overnight.
Lightly grease the cake base with cream, turn the cake plate over and take it out. The top of the cake is not perfectly flat. We mix the trimmings of the cake with the cream, put on top of the cake and align.
Finished cream should be covered with mastic cream. We will make chocolate ganache. To do this, melt the chocolate with butter and apply on top of the cake. To achieve a smooth, even layer, use a piece of onboard tape or file. We work quickly as the chocolate hardens quickly.
Covering the cake with mastic. Trim the edges with a sharp knife.
Next, you need hexagons from white mastic, and pentagons from black mastic. We will glue the segments with water, starting from the top of the cake. We glue one black pentagon, and five white hexagons around it. We do the same with the rest of the segments.
It remains to apply a kind of seam pattern with a toothpick, and our cake will be ready.
In order to make the lawn on which our ball will lie, we color the coconut with green food coloring. Lubricate the cake base generously with liquid chocolate and sprinkle generously with green coconut flakes. Laying out the cake. Bon appetit everyone!
home
Cakes
Cake - Soccer ball
See more
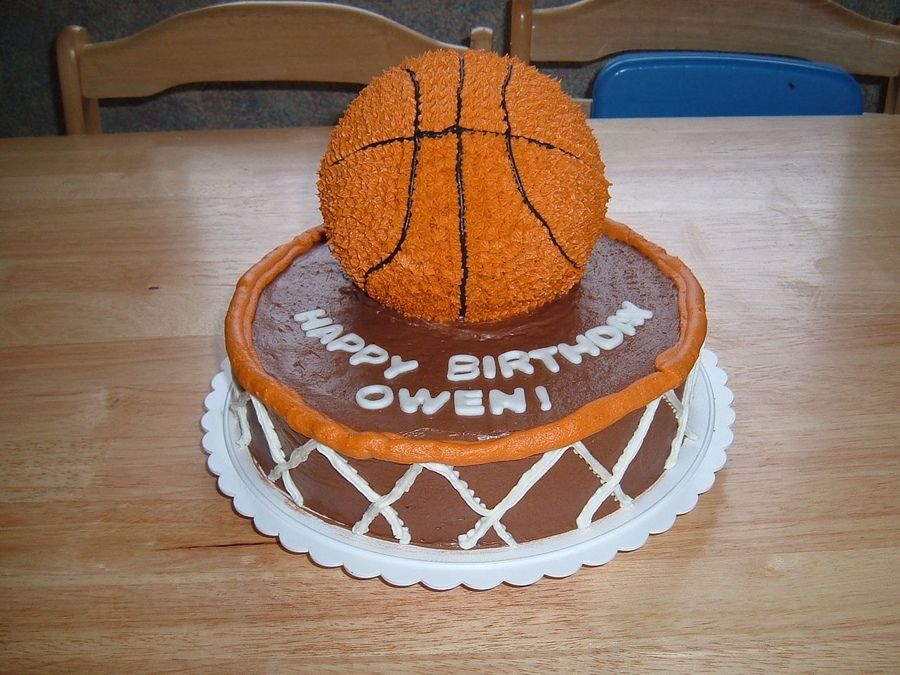
Basketball cake for real athletes
Basketball cake will be the perfect dessert for a winner in sports competitions, a birthday person or just a good person. You can prepare such a masterpiece yourself if you know a few secrets of decorating.
How to prepare cake layers for a "sports" cake
To prepare a dessert in the form of a basketball, you must first determine the type of cake layers and the principle of their preparation. Usually, a biscuit is used to make curly desserts. The dough is quickly prepared, it needs the most affordable products, it is very easy to work with biscuit cakes.
At the beginning of work, it is necessary to decide how the "Basketball Ball" cake will look like. Cakes can be cut to form a hemisphere. You can make the body of an ordinary cake, and draw a basketball on the surface of it, making a remarkable markup of sports equipment.
Especially skillful confectioners can form a full-fledged sphere, which is supported on the dish with the help of other elements. The work consists in cutting out suitable shapes from ordinary biscuit cakes.
Variants of the initial decor
First you need to place the cakes correctly, and then smear them with cream and impregnation. According to the possible techniques, there are 3 options:
Assemble a regular round cake. It is necessary to grease the tray with a small amount of cream and lay the first cake. Then you need to soak the strip, and only then grease with cream. Do this for each element.
A hemisphere is very easy to make from square or round cakes. It is necessary to make a kind of nesting doll from flour blanks. First, the largest cake is laid down, and then in descending order. Each element is impregnated and smeared with cream. Use a knife to flatten the shape.
A full sphere can be made according to the same principle as a half. But in this situation, a support is needed that will hold the flour structure. It is possible to form a tablet from scraps of biscuit, where there will be a commemorative inscription or “count” of years.
In any case, the cake will be complete after the final decoration.
What materials can be used for decoration? This color palette can be created in three ways:
Any version of the cream that will have a good texture and hold its shape can be dyed orange. The procedure can be carried out using natural or synthetic, but food coloring.
A very popular option for decorating confectionery is mastic. You can prepare the material yourself or buy it at a candy store.
Covering the surface with cream or mastic can be dispensed with. Cakes can be initially orange if you add a dye of the appropriate color to the dough. A cream for demarcation can be made brown based on chocolate.
Features of decorating the cake
You can create a Basketball ball cake with your own hands for any suitable holiday. It does not require any special products or cooking technologies. It is enough to make a high-quality finishing decoration:
If a cream is used as a finish, then several options for its application can be used. You can use a variety of nozzles for a pastry syringe. A simpler option would be to apply the cream on the surface of the workpiece with a spatula or spoon. With the help of melted dark chocolate, it is easy to mark the ball.


 The frosting will act as a seal to keep that cake moist.
 Anything you purchase goes to support the free resources I provide at Meaningful Mama. Thank you for your support.
  They are easier to cut than the wooden dowels and are just as strong. I’m not convinced this cake needed a center support, but I still did it as precaution.
 A. Henckels International 16906-201 ForgedOXO Good Grips 4-Inch PizzaWilton Large Fondant Roller withNon-slip Silicone Pastry Mat ExtraSwanson Tool AE141 36-Inch Yardstick,
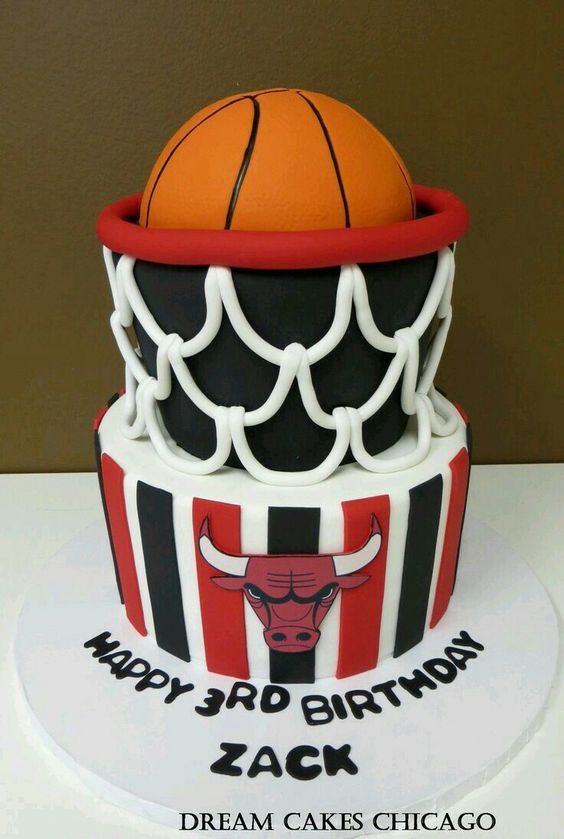
 Now you have a ball shape.
 Take your pizza roller and make another cut.
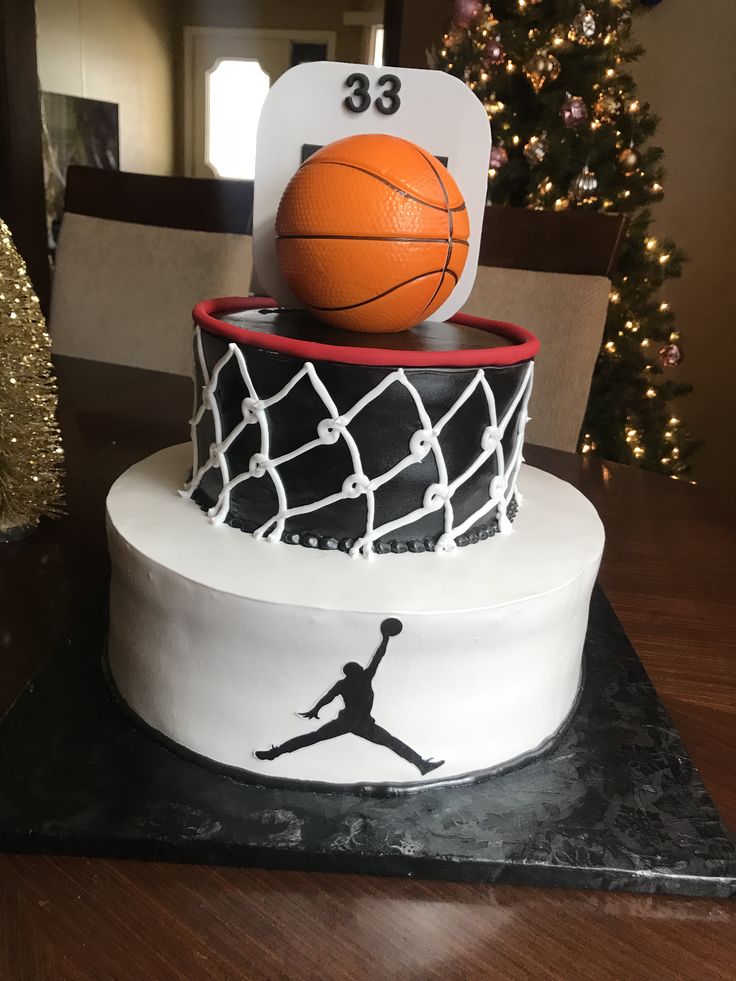
 I used a plastic piece of Tupperware and covered it in fondant. You could also use something like a container for shredded parmesan or goat cheese.
 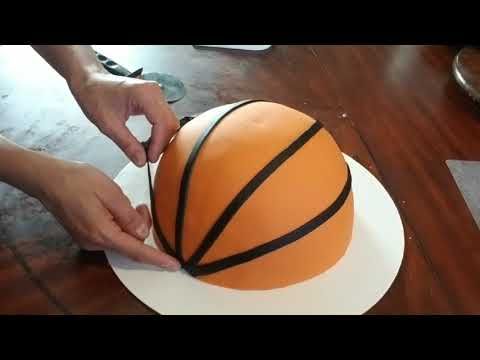 These cupcakes were baked in black and white cupcake liners.
 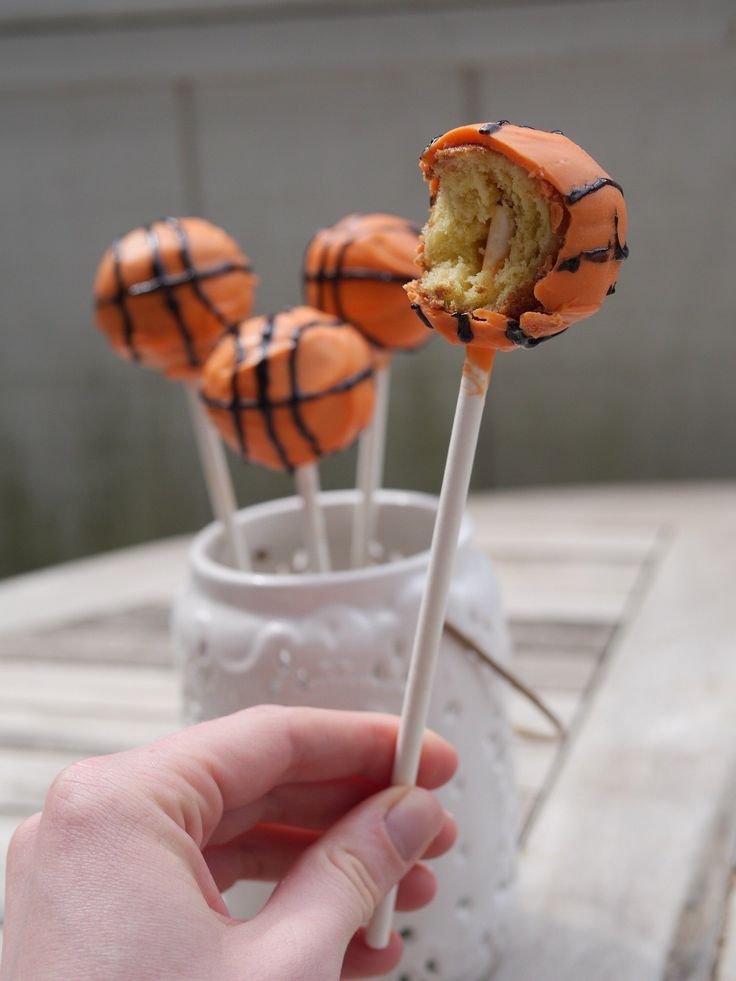 Read more...
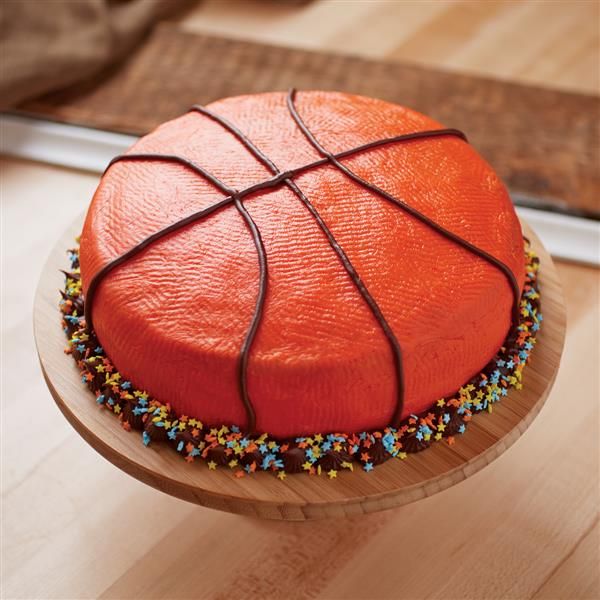 You should get a thick white mass.
  We bake at a temperature of 100 degrees for about an hour and a half.
  Nuts, meringues and cream again. At the very end, lay out the third cake soaked in sugar syrup. Cover the cake with cling film and refrigerate for 3-4 hours or overnight.
  We glue one black pentagon, and five white hexagons around it. We do the same with the rest of the segments.
 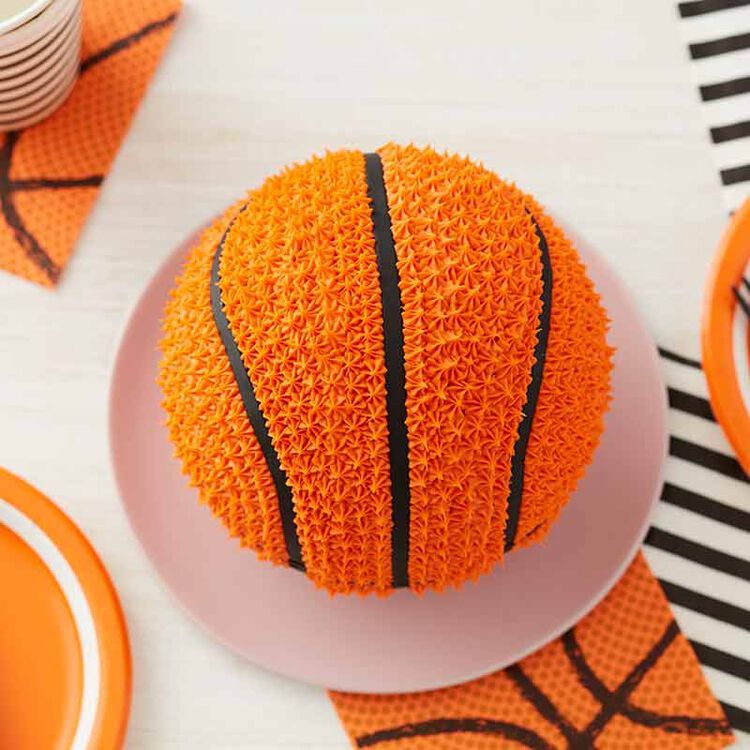 You can prepare such a masterpiece yourself if you know a few secrets of decorating.
 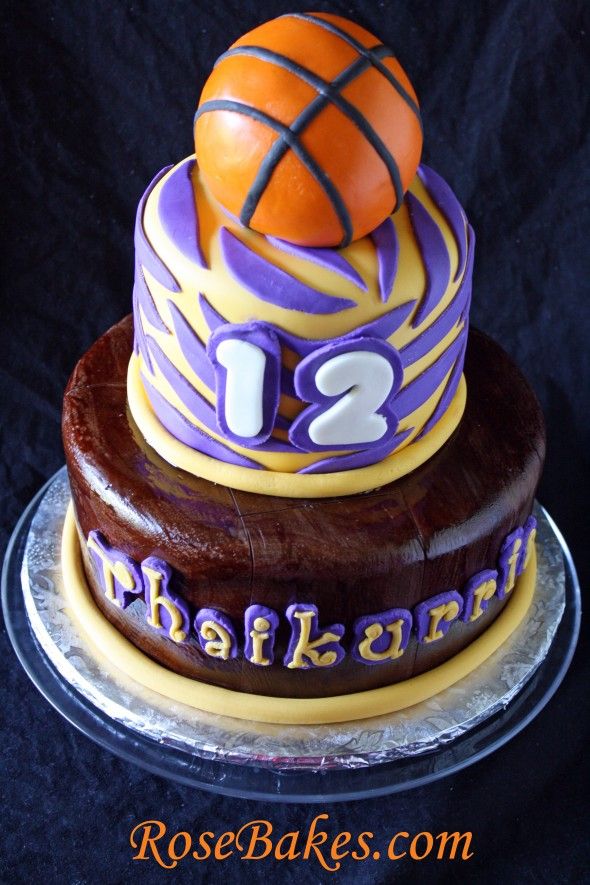 According to the possible techniques, there are 3 options:
 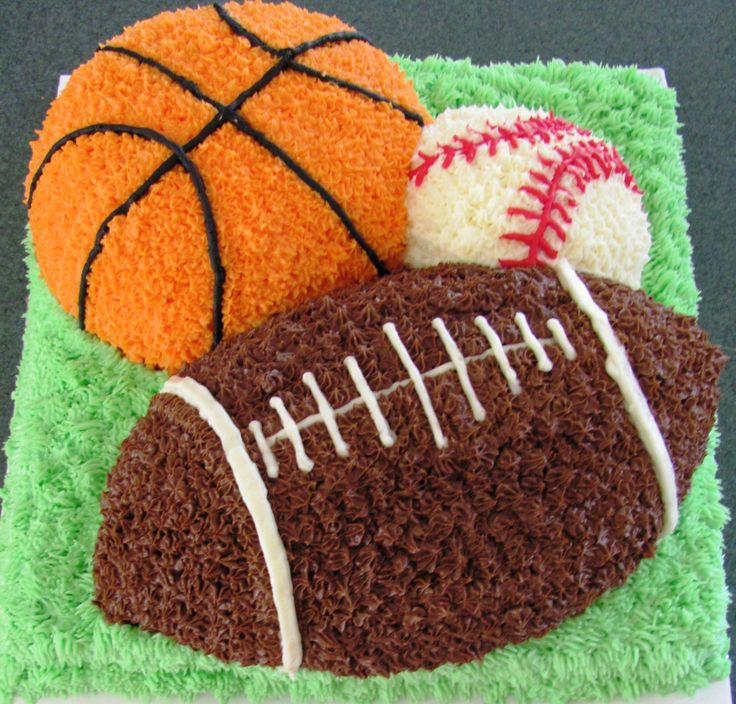 The procedure can be carried out using natural or synthetic, but food coloring.