Home »
Misc »
How to get a faster first step basketball
How to get a faster first step basketball
3 Keys for Developing a Fast First Step in Basketball
Skip to content
“He has a quick first step!”
You hear it all the time from coaches who’ve just watched their defense get burnt to a crisp. Having an unstoppable first step in your arsenal will make it really hard for defenders to guard you. But as valuable as a lightning-quick first step can be, few players have one. Through my experience, there are a few common issues that often prevent players from having a fast, aggressive first step. After fixing these issues and making some changes to your training, the ability to explode with your first step levels up. Let’s break down each of these keys.
1. Clean-Up Pronation for a More Efficient First Step
When being ready to explode with that first step, a stable base is a must. To generate as much power as possible, you have to be able to push off the balls of your feet. Too often do I see a player making moves where one of their ankles gets pronated (falls inside).![]() Along with the ankle, the knee will likely collapse inward, as well. This puts greater pressure on the knee ligaments and also leaves the player in an unstable, un-explosive position. As a player, you have to keep in mind that this position makes it extremely hard to push off that pronated foot to explode forward.
Along with the ankle, the knee will likely collapse inward, as well. This puts greater pressure on the knee ligaments and also leaves the player in an unstable, un-explosive position. As a player, you have to keep in mind that this position makes it extremely hard to push off that pronated foot to explode forward.
In the following graphic, note the difference between the “A” positions and the “B” positions:
The A positions see the foot planted in a stable position, minimizing injury risk and allowing the player to use his whole leg to push off the court. The B positions see the ankle fall inward, creating a less stable position where your weight is inefficiently distributed and your risk of injury is increased.
Adding drills with or without the ball where you focus first and foremost on the starting position and the way you push off is a good start to improve the efficiency of your first step.
2. React Fast
After you mastered the skill of executing an efficient first step without any outside distraction, it’s time to add a reaction component to make the skill more game-specific.
Below are some examples I use with Aaron Jackson, former Euroleague champion and now current CBA player, of how you can incorporate reaction into the drills to make them more game-like. Besides reaction, you can also see the focus on a fast, efficient push-off:
View this post on Instagram
A post shared by Basi Prokofyev (@basi.pro)
In the second part of the video, you can see how Aaron’s ankle turns inward. However, he was able to keep the knee lined up and prevent it from collapsing in. This is what allowed him to still execute a powerful push-off.
3. Create Separation with the Off Hand
After utilizing an efficient push-off with the correct timing, you’ll likely have created some separation. One key to enhancing this separation is by using your off hand to protect the ball and ward off the defender. By off hand, I mean the hand you’re not using to dribble the ball. When blowing by a defender, your off hand has two jobs:
- Protect the ball.
- Create momentum by pushing off the defender’s body to get an extra 5-10 inches of separation.
For a young basketball player, working on simple tennis ball catches with the off hand while dribbling the ball with their other hand can be a good start for improving hand-eye coordination and understanding how to use the off hand. The next step is to add a defensive presence, passive or active, depending on the player’s level of ball control. This will help a player understand how and when the off hand should be used. While tennis ball drills improve off-hand quickness and coordination, adding a defensive presence improves a real game skill.
This video shows the combination of a powerful push-off, a smart defensive read and reaction, and effective work by the off hand:
The key to improving your basketball game is to learn simple skills before training them in game-like situations.-Step-11.jpg/aid8503602-v4-728px-Do-a-Euro-Step-Layup-(Basketball)-Step-11.jpg) Follow these three keys and you’ll soon find your first step is faster than ever.
Follow these three keys and you’ll soon find your first step is faster than ever.
Photo Credit: vm/iStock
READ MORE:
- 5 Drills to Improve Your Lateral Quickness for Basketball
- 4 Basketball Quickness Drills to Help You Get Faster and More Explosive
- 5 Tips for Better Basketball Ball Control
Share This Story!
MOST POPULAR
“He has a quick first step!”
You hear it all the time from coaches who’ve just watched their defense get burnt to a crisp. Having an unstoppable first step in your arsenal will make it really hard for defenders to guard you. But as valuable as a lightning-quick first step can be, few players have one. Through my experience, there are a few common issues that often prevent players from having a fast, aggressive first step. After fixing these issues and making some changes to your training, the ability to explode with your first step levels up. Let’s break down each of these keys.
1. Clean-Up Pronation for a More Efficient First Step
When being ready to explode with that first step, a stable base is a must. To generate as much power as possible, you have to be able to push off the balls of your feet. Too often do I see a player making moves where one of their ankles gets pronated (falls inside). Along with the ankle, the knee will likely collapse inward, as well. This puts greater pressure on the knee ligaments and also leaves the player in an unstable, un-explosive position. As a player, you have to keep in mind that this position makes it extremely hard to push off that pronated foot to explode forward.
In the following graphic, note the difference between the “A” positions and the “B” positions:
The A positions see the foot planted in a stable position, minimizing injury risk and allowing the player to use his whole leg to push off the court. The B positions see the ankle fall inward, creating a less stable position where your weight is inefficiently distributed and your risk of injury is increased.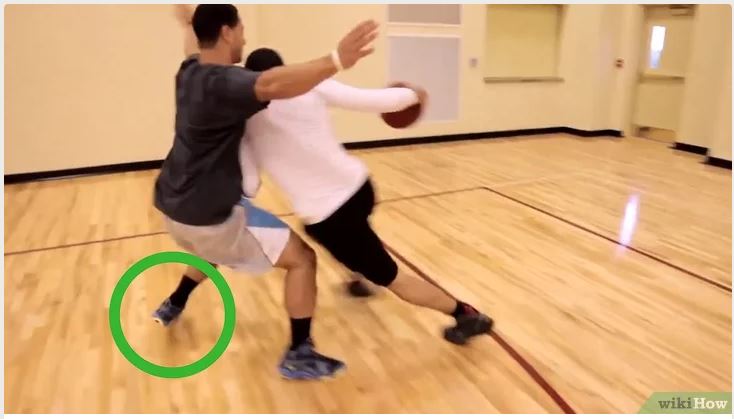
Adding drills with or without the ball where you focus first and foremost on the starting position and the way you push off is a good start to improve the efficiency of your first step.
2. React Fast
After you mastered the skill of executing an efficient first step without any outside distraction, it’s time to add a reaction component to make the skill more game-specific.
Below are some examples I use with Aaron Jackson, former Euroleague champion and now current CBA player, of how you can incorporate reaction into the drills to make them more game-like. Besides reaction, you can also see the focus on a fast, efficient push-off:
View this post on Instagram
A post shared by Basi Prokofyev (@basi.pro)
In the second part of the video, you can see how Aaron’s ankle turns inward. However, he was able to keep the knee lined up and prevent it from collapsing in. This is what allowed him to still execute a powerful push-off.
3. Create Separation with the Off Hand
After utilizing an efficient push-off with the correct timing, you’ll likely have created some separation. One key to enhancing this separation is by using your off hand to protect the ball and ward off the defender. By off hand, I mean the hand you’re not using to dribble the ball. When blowing by a defender, your off hand has two jobs:
- Protect the ball.
- Create momentum by pushing off the defender’s body to get an extra 5-10 inches of separation.
For a young basketball player, working on simple tennis ball catches with the off hand while dribbling the ball with their other hand can be a good start for improving hand-eye coordination and understanding how to use the off hand. The next step is to add a defensive presence, passive or active, depending on the player’s level of ball control. This will help a player understand how and when the off hand should be used. While tennis ball drills improve off-hand quickness and coordination, adding a defensive presence improves a real game skill.
This video shows the combination of a powerful push-off, a smart defensive read and reaction, and effective work by the off hand:
The key to improving your basketball game is to learn simple skills before training them in game-like situations. Follow these three keys and you’ll soon find your first step is faster than ever.
Photo Credit: vm/iStock
READ MORE:
- 5 Drills to Improve Your Lateral Quickness for Basketball
- 4 Basketball Quickness Drills to Help You Get Faster and More Explosive
- 5 Tips for Better Basketball Ball Control
Share This Story!
Page load link
4 Drills For Building an NBA-Style Explosive First Step
Skip to content
With regards to basketball training, a lot of attention seems to be placed on vertical jump or vertical power development. However, a crucial component that is often overlooked is horizontal power development, i.e. the first step!
What do Russell Westbrook, De’Aaron Fox and John Wall have in common? Not only are they among the elite in the NBA, but they all possess an explosive first step. The more explosive your first step, the harder it is for a defender to stay in front of you. Without a solid first step, all the dribbling moves in the world still won’t make you a very intimidating offensive player.
An explosive first step isn’t just about taking that one step quickly, however. It’s about taking that step quickly and then accelerating at a rapid pace. The quicker you can reach top speed or something close to it, the more deadly you’re going to be on the court.
Before we look at my top four first-step development exercises, let’s lay down the basics on acceleration. Acceleration is the rate at which speed of an object is changing. From 0-10 yards is where the majority of acceleration takes place. After running for approximately 10 yards, the acceleration will give way to maximum velocity, thereby reaching top speed.
Observe the image of John Wall below:
Notice both the angle of his body and his shin angle. The ideal shin angle is approximately 45 degrees. The shin angle can closely mimic the body angle. Too far forward in either your shin angle or body angle (less than 45 degrees) and it will be difficult to generate optimal knee drive and maintain your balance. Too upright, and we will not get the proper angle to generate optimal horizontal velocity. In terms of eye line, I believe looking at a point on the ground 3-4 feet ahead of you can help achieve better shin and body angle.
During a sprint, ground contact time—meaning how long your foot is actually on the ground during each step—is longest during the acceleration phase. Furthermore, the initial steps of acceleration are shorter than the steps you take at top speed. Now that we understand some of the key body mechanics for a dynamite first step, let’s dive into four of my favorite moves for building better first-step explosiveness.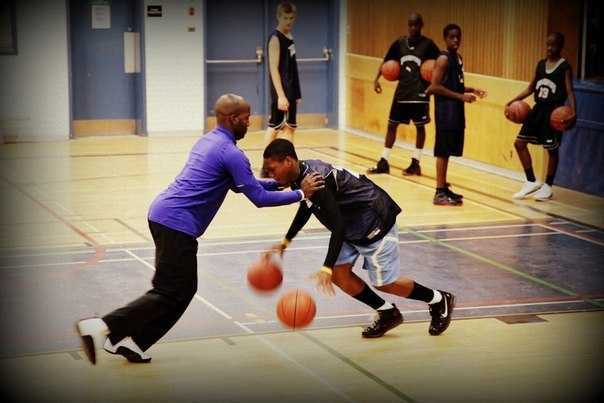 When integrated into a sound strength and conditioning program, these moves can help you blow by the competition. They’re each demonstrated/explained in this video, with additional details found below:
For privacy reasons YouTube needs your permission to be loaded. For more details, please see our Privacy Policy.
I Accept
Exercise 1: Stomp Step-Up Knee Raise
This move is demonstrated at :33 in the above video. Select a box height that flexes your knee to no more than 90 degrees when you have one foot on top of the box. While the true angles of acceleration for your first step are only approximately 45-60 degrees of knee flexion, we want to ensure you are able to accelerate out of any position on the court.
Begin with the foot on the box flat-footed and arms in a “lip/hip” position. Lift the top foot about 2-3 inches above the box and ‘stomp’ your foot on the box. Use this stomp to propel you into a step-up. Keep your knee in a flexed position with your ankle dorsi-flexed and your hip flexed at the top of the movement. Minimize pushing off the back leg to place training emphasis on the top leg. Return to start position, with your top foot remaining on the box. Repeat for 6-8 reps then switch feet.
To progress the movement, add a band. Step on the band and wrap over your shoulders/around your neck (see pics below for details). Repeat the above steps and overcome the resistance of the band. This movement is demonstrated at :47 of the above video. A further progression is to add a jump at the top of the movement, shown at 1:17 in the above video.
Exercise 2: Single-Leg Broad Jump
This movement is demonstrated at 1:41 in the above video. Begin in a single-leg stance with your arms in the opposite arm, opposite leg position. Simultaneously, quickly drop down to load the training leg, swinging the opposite leg back to preload your movement. Explosively swing your knee up and jump forward as far as possible while sticking the landing. Repeat the movement for 6-8 jumps per leg, 3-4 sets.
You can progress this movement by adding a 6-inch (intermediate) or 12-inch (advanced) hurdle (see the 2:12 mark of the above video). Assume the starting position in front of the hurdle and hop over the hurdle. Upon landing, quickly explode forward as far as possible and control the landing. Walk back to the hurdle and repeat. Repetitions: 6 per leg, 4 sets.
Exercise 3: Pre-Loaded Accelerations
This move is demonstrated at 2:50 in the above video. Begin in an athletic stance. Hop backward approximately 12-18 inches into a split athletic stance and accelerate out for 3-5 powerful strides. Repeat the drill 5 reps per side. Feel free to alternate your feet or look to train your ‘weaker’ side first.
To progress this drill, add a basketball to train your first step with ball handling (see 4:33 in the above video). Repeat the overload acceleration drill as described.
Exercise 4: Banded Overload Accelerations
This overload drill requires a band and a partner or a fixed and sturdy object to be the anchor to properly execute.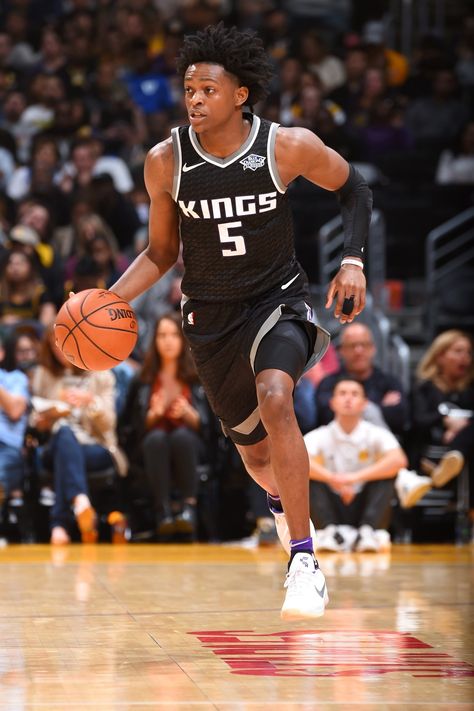 It’s demonstrated at the 5:06 mark of the above video. The band will be attached to the fixed object or partner, while the other is looped into the other end of the band.
The back partner should be similar in body weight to the front partner and assume a strong and athletic position. Wide foot base, low and planted into the ground. Do not allow the front partner to pull you out of position.
The front partner will lean forward to take the slack out of the band (there will be minimum tension on the band but the band should not be stretched to its end point). On command, the athlete will explosively accelerate out until the end point of the band, focusing on powering “out of the gate” and exerting maximal effort with each stride. At the end point of the band, they will allow the band to pull them back to start position. Upon returning to starting position, immediately explode out again to the band’s end point. While it may seem like the workout is about resisted accelerations, it really is about overloading the return step and then overcoming the load to accelerate out again. Repeat this for 3-5 plants/foot or for timed repetitions (<15sec/set).
Add a ball to incorporate ball handling to your banded overload first step training session, as seen at 7:42 in the above video.
Mix Up Your Angles of Attack
Due to basketball’s 3D nature, you will have to consider training in different angles. Most often, a basketball player’s first step will be diagonally, not straight ahead. Most of the outlined drills can be executed in multiple directions to improve your first step in all directions which can improve your ability to not only execute several offensive breakdown moves but also enhance man-to-man defense. Simply follow exercises 2, 3 and 4 with the listed progressions, sets, reps and training the appropriate angles.
Photo Credit: Ned Dishman/Getty Images, Brian Rothmuller/Getty Images
READ MORE:
- How De’Aaron Fox Became the NBA’s New Fastest Man
- 4 Basketball Quickness Drills to Help You Get Faster and More Explosive on the Court
- 3 Keys for Developing a Fast First Step in Basketball
Share This Story!
MOST POPULAR
With regards to basketball training, a lot of attention seems to be placed on vertical jump or vertical power development. However, a crucial component that is often overlooked is horizontal power development, i.e. the first step!
What do Russell Westbrook, De’Aaron Fox and John Wall have in common? Not only are they among the elite in the NBA, but they all possess an explosive first step. The more explosive your first step, the harder it is for a defender to stay in front of you. Without a solid first step, all the dribbling moves in the world still won’t make you a very intimidating offensive player.
An explosive first step isn’t just about taking that one step quickly, however. It’s about taking that step quickly and then accelerating at a rapid pace. The quicker you can reach top speed or something close to it, the more deadly you’re going to be on the court.
Before we look at my top four first-step development exercises, let’s lay down the basics on acceleration. Acceleration is the rate at which speed of an object is changing. From 0-10 yards is where the majority of acceleration takes place. After running for approximately 10 yards, the acceleration will give way to maximum velocity, thereby reaching top speed.
Observe the image of John Wall below:
Notice both the angle of his body and his shin angle. The ideal shin angle is approximately 45 degrees. The shin angle can closely mimic the body angle. Too far forward in either your shin angle or body angle (less than 45 degrees) and it will be difficult to generate optimal knee drive and maintain your balance. Too upright, and we will not get the proper angle to generate optimal horizontal velocity. In terms of eye line, I believe looking at a point on the ground 3-4 feet ahead of you can help achieve better shin and body angle.
During a sprint, ground contact time—meaning how long your foot is actually on the ground during each step—is longest during the acceleration phase. Furthermore, the initial steps of acceleration are shorter than the steps you take at top speed. Now that we understand some of the key body mechanics for a dynamite first step, let’s dive into four of my favorite moves for building better first-step explosiveness.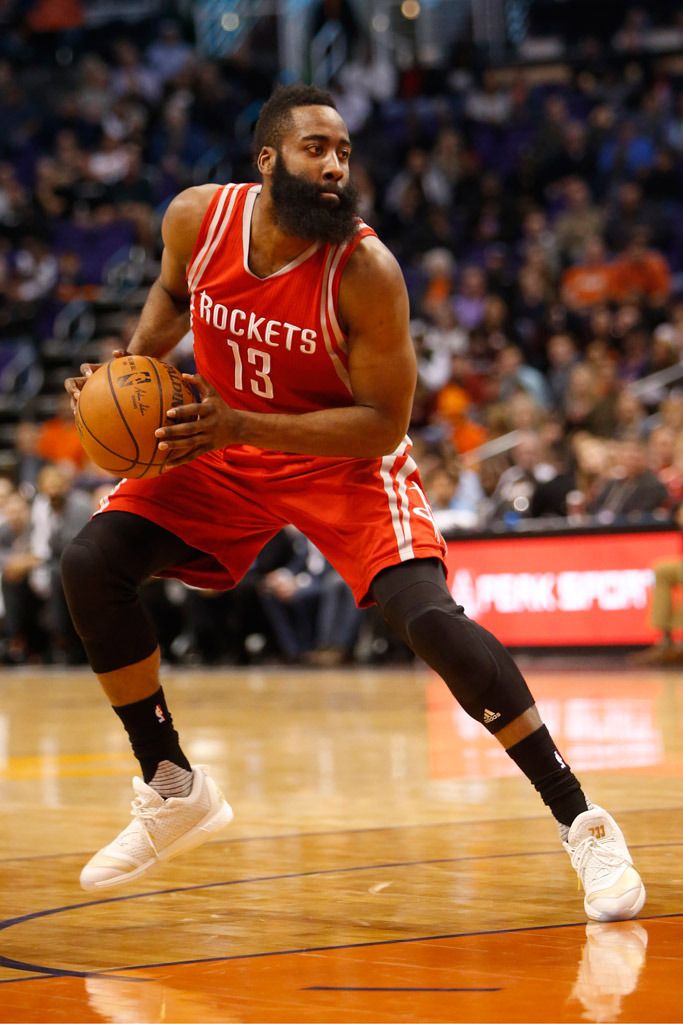 When integrated into a sound strength and conditioning program, these moves can help you blow by the competition. They’re each demonstrated/explained in this video, with additional details found below:
For privacy reasons YouTube needs your permission to be loaded. For more details, please see our Privacy Policy.
I Accept
Exercise 1: Stomp Step-Up Knee Raise
This move is demonstrated at :33 in the above video. Select a box height that flexes your knee to no more than 90 degrees when you have one foot on top of the box. While the true angles of acceleration for your first step are only approximately 45-60 degrees of knee flexion, we want to ensure you are able to accelerate out of any position on the court.
Begin with the foot on the box flat-footed and arms in a “lip/hip” position. Lift the top foot about 2-3 inches above the box and ‘stomp’ your foot on the box. Use this stomp to propel you into a step-up. Keep your knee in a flexed position with your ankle dorsi-flexed and your hip flexed at the top of the movement.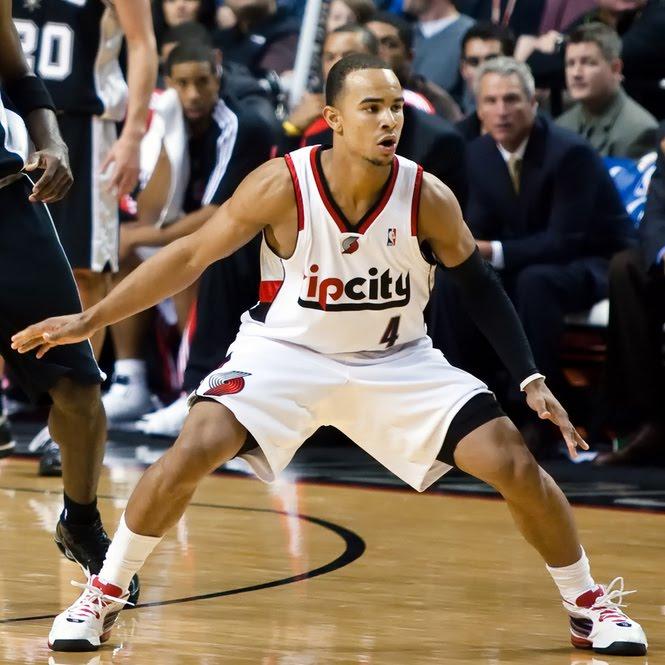 Minimize pushing off the back leg to place training emphasis on the top leg. Return to start position, with your top foot remaining on the box. Repeat for 6-8 reps then switch feet.
To progress the movement, add a band. Step on the band and wrap over your shoulders/around your neck (see pics below for details). Repeat the above steps and overcome the resistance of the band. This movement is demonstrated at :47 of the above video. A further progression is to add a jump at the top of the movement, shown at 1:17 in the above video.
Exercise 2: Single-Leg Broad Jump
This movement is demonstrated at 1:41 in the above video. Begin in a single-leg stance with your arms in the opposite arm, opposite leg position. Simultaneously, quickly drop down to load the training leg, swinging the opposite leg back to preload your movement. Explosively swing your knee up and jump forward as far as possible while sticking the landing. Repeat the movement for 6-8 jumps per leg, 3-4 sets.
You can progress this movement by adding a 6-inch (intermediate) or 12-inch (advanced) hurdle (see the 2:12 mark of the above video). Assume the starting position in front of the hurdle and hop over the hurdle. Upon landing, quickly explode forward as far as possible and control the landing. Walk back to the hurdle and repeat. Repetitions: 6 per leg, 4 sets.
Exercise 3: Pre-Loaded Accelerations
This move is demonstrated at 2:50 in the above video. Begin in an athletic stance. Hop backward approximately 12-18 inches into a split athletic stance and accelerate out for 3-5 powerful strides. Repeat the drill 5 reps per side. Feel free to alternate your feet or look to train your ‘weaker’ side first.
To progress this drill, add a basketball to train your first step with ball handling (see 4:33 in the above video). Repeat the overload acceleration drill as described.
Exercise 4: Banded Overload Accelerations
This overload drill requires a band and a partner or a fixed and sturdy object to be the anchor to properly execute.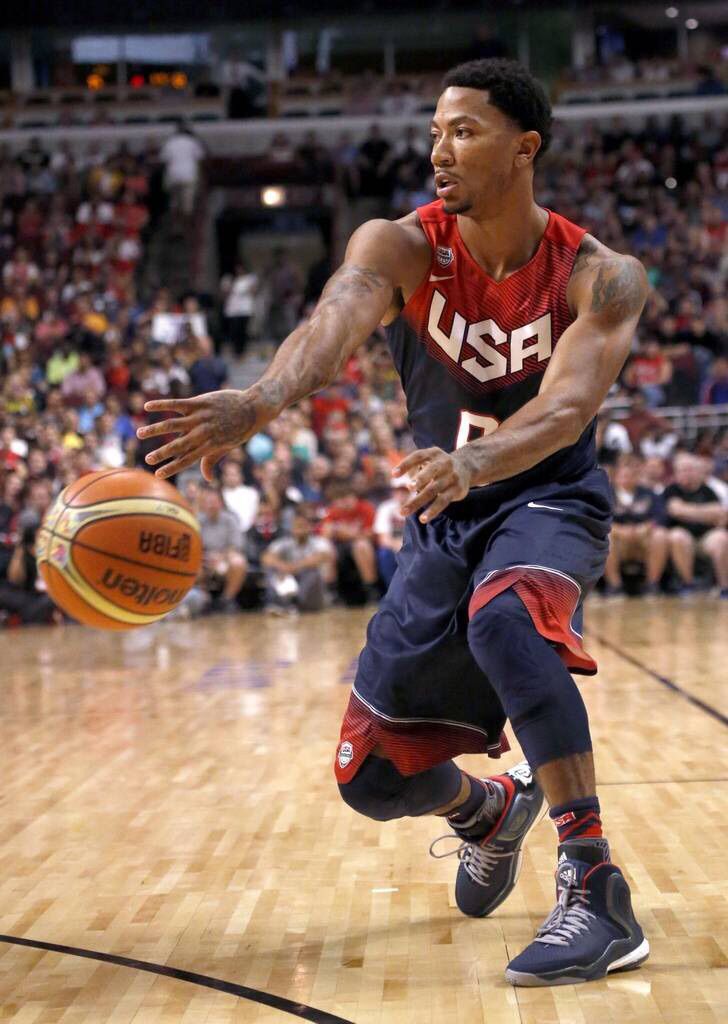 It’s demonstrated at the 5:06 mark of the above video. The band will be attached to the fixed object or partner, while the other is looped into the other end of the band.
The back partner should be similar in body weight to the front partner and assume a strong and athletic position. Wide foot base, low and planted into the ground. Do not allow the front partner to pull you out of position.
The front partner will lean forward to take the slack out of the band (there will be minimum tension on the band but the band should not be stretched to its end point). On command, the athlete will explosively accelerate out until the end point of the band, focusing on powering “out of the gate” and exerting maximal effort with each stride. At the end point of the band, they will allow the band to pull them back to start position. Upon returning to starting position, immediately explode out again to the band’s end point. While it may seem like the workout is about resisted accelerations, it really is about overloading the return step and then overcoming the load to accelerate out again. Repeat this for 3-5 plants/foot or for timed repetitions (<15sec/set).
Add a ball to incorporate ball handling to your banded overload first step training session, as seen at 7:42 in the above video.
Mix Up Your Angles of Attack
Due to basketball’s 3D nature, you will have to consider training in different angles. Most often, a basketball player’s first step will be diagonally, not straight ahead. Most of the outlined drills can be executed in multiple directions to improve your first step in all directions which can improve your ability to not only execute several offensive breakdown moves but also enhance man-to-man defense. Simply follow exercises 2, 3 and 4 with the listed progressions, sets, reps and training the appropriate angles.
Photo Credit: Ned Dishman/Getty Images, Brian Rothmuller/Getty Images
READ MORE:
- How De’Aaron Fox Became the NBA’s New Fastest Man
- 4 Basketball Quickness Drills to Help You Get Faster and More Explosive on the Court
- 3 Keys for Developing a Fast First Step in Basketball
Share This Story!
Page load link
Development of leg speed and speed at home
Hello, dear visitors of the website basketball-training. org.ua ! The idea of writing this article came to me during one of the last games. It so happened that in it I had to defend against a rather fast opponent, for whom I absolutely did not have time with my feet. The problem was this: in fast breaks I could still catch up with him, but as soon as it came to the classic defensive stance, I was passed around like a standing man! And all this at the expense of an incredibly fast, explosive first step.
That is why, as soon as I got home, I was determined to find a way to develop leg speed, given that I would have to practice at home, where I would have no more than 5 meters of free space and virtually no additional devices. Let's see what came of it.
Developing the foot speed of basketball players
There are at least two ways to start moving faster and, most importantly, sharper: train your legs so that they move faster on the floor, and use “little tricks”, that is, develop the very technique of moving in a defensive stance. Naturally, not all of us are lovers of easy ways, but often they are the most logical. So I propose to start with the “useful little things” that Rick Torbet talks about in the training video “ Better 1 on 1 Defense ". By the way, if you haven’t watched it yet, I highly recommend doing it: the 8-part personal protection video tells a lot of useful things, and even if you don’t speak English, still take an hour of your time and watch it. I promise you won't regret it.
Development of leg speed: little tricks
Let's start with the most important thing - the defensive stance. It is very important to learn the correct defensive stance, which can be very different from what you are used to. So, the main thing in a defensive stance is good body balance. We have already talked about the importance of balance and methods of its development on the pages of this site, in the materials of Evgeny Burin ( General physical training of basketball players: part 1 and OFP: part 2 ). Now, the key to a proper guard stance is to keep your head in line with your knees. If it is slightly behind the conditional line - you will fall back, or fall forward - if it is ahead.
The second moment - when moving right-left, forward-backward, you should practically not take your feet off the ground, you seem to be sliding on the parquet. This method of movement will reduce the time between repulsions from the ground, which means it will increase the speed of movement and change of direction.
The third point is the foot. It must be turned in the direction in which you are moving. Yes, it will really speed up your movement. And now let's see everything that I described above in a small video. The first part is about balance, then - about the minimum distance from the legs to the parquet, and the third - about the correct setting of the foot. I think, after such an explanation, the translation will be superfluous.
[youtube]VhWFyd97Xs8[/youtube]
Well, these little tricks will allow you to quickly move around the site, sharply changing the direction of movement. And now, let's move on to the actual development of the speed qualities of the leg muscles, and for this we will use a very interesting simulator that each of us can make from improvised means in a few minutes.
Ladder Agility Drills
Ladder agility drills - this is the name of a series of exercises with a rope ladder located on the floor, are a great way to improve footwork speed, agility, coordination and overall speed on the court. These exercises are an integral part of many SAQ programs (Speed Agility Quickness Programs - programs for developing speed, agility and quickness) and complement a variety of training complexes in many sports.
These exercises are based on the principle “ Quality is more important than quantity ”, which means that after performing them you will not get tired and will not “breathe”, as, for example, after “ Super Shuttle ”. It is best to start these exercises at the very beginning of your workout, immediately after warming up and stretching, because the muscles must be fresh in order to provide good, quality movements.![]() And again, after doing these exercises, your muscles will still be ready for a fairly intense workout, so don't worry: you won't overload them with these exercises! Let's move on to the exercises themselves.
And again, after doing these exercises, your muscles will still be ready for a fairly intense workout, so don't worry: you won't overload them with these exercises! Let's move on to the exercises themselves.
Exercises for the development of agility, speed and quickness of footwork
Exercise No. 1 – “classics”. This is one of the easiest agility exercises and is suitable for everyone.
- Begin the exercise in a starting position at the bottom of the stairs, feet shoulder-width apart.
- Jump forward with both feet and land on the first sector of the ladder on your left foot.
- Next, pushing off with your left foot, jump forward again, but land on two feet.
- Push off with both feet again, jump forward and land on the right foot.
- Pushing off only with the right foot, jump forward and land on two feet. This is 1 cycle. Repeat this cycle until the ladder ends.
"Classics"
Exercise No. 2 - "inside-out". This is another basic exercise, however, it is very effective.
- Begin the exercise with your feet shoulder-width apart before starting the stairs.
- Step (don't jump, but step) into the first section of the ladder, first with your left foot and then with your right foot.
- Once the right foot has entered the first section, immediately place the left foot to the left of the next section of the ladder, then the right foot to the right of the ladder.
- Again, step your left foot into the inside of the stairs, and then also step your right foot (as if to return to the previous position).
- Repeat this movement pattern until the ladder ends.
"In-out"
Exercise No. 3 - "step to the side" . This exercise will require more concentration and coordination of movements from you. Make a few trial attempts at low speed, and after that start working at full power.
- Start the exercise by standing near the lower left corner of the stairs (we started the exercise in the center before, but now we need to move a little to the left).
- Step onto the first section with your left foot, and without stopping immediately step there with your right (as if doing a jump, or jump stop; in the original this movement is called "1-2 motion", minimize the time between each step).
- Now you need to move to the right of the current section, again placing first the left and then the right foot.
- Now step diagonally to the left and up, again using the left and then the right foot.
- Move to the left as you exit the stairs, first with your left foot and then with your right foot. Here we are in the starting position.
- Continue in the same way to the end of the stairs. If you decide to perform this exercise several times, then each time start moving from the opposite side of the stairs, so your leading foot (in the example it is the left foot) will change regularly.
"Step to the side"
Exercise No. 4 - "Tango" . This exercise was named after a famous dance, and once you do it, you will immediately understand why.
- Begin this exercise by standing at the bottom left of the stairs (as in the previous exercise).
- Step your left foot over your right foot and stand in the middle of the first section.
- Continue without stopping, place your right foot at the level of the crossbar between the first and second section, and immediately place your left foot near the right.
- This exercise is performed on the count of 1-2-3, as in a dance.
- From this position, the right foot steps over the left and stands in the center of the second section of the ladder, then the left foot…..
oh, I can no longer describe these manipulations, I'm afraid that reading them you will get confused on the contrary. Let's just look at the picture, everything is quite clear and without explanation. Yes, you need to repeat the exercise until the ladder ends. "Tango"
Exercise No. 5 - "Five Steps". This is the most difficult exercise of all presented here, it will require a very high level of training and innate dexterity to complete it.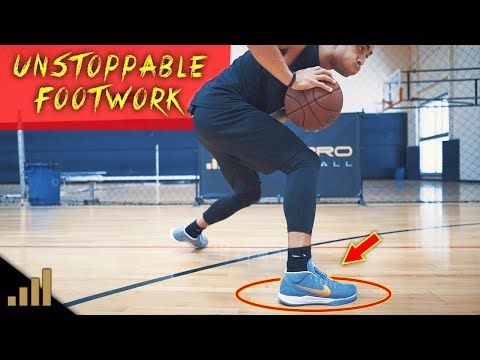 But if you learn to perform this exercise smoothly, without breaking down and at high speed, most of your opponents simply will not be able to keep up with your movements.
- Starting position - feet shoulder width apart, standing in front of the stairs in the center.
- Stand with your right foot to the right of the first section of the ladder, almost simultaneously placing your left foot on the first section of the ladder.
- The right foot moves to the left, after which the left moves to the second section (i.e. steps forward), and the right goes after it.
- Movement consists of 5 steps - this is the first phase. The second is almost similar to this one, but the movement begins in the left leg. The exercise must be repeated along the entire length of the stairs.
"5 steps"
That's all, the article came to an end, which told about how you can develop the speed of footwork at home. As for the stairs - of course you can buy it, you can make it from improvised materials, you can stick pieces of adhesive tape on the floor - in general, it all depends on your imagination and materials at hand.
Update: Sometimes I duplicate articles from this site on my blog, which is located on slamdunk.ru. In one of the comments, I was advised to watch this video about training with stairs. There are actually a lot of similar videos on Youtube, but I liked this one and didn't look any further. As a matter of fact, here it is:
[youtube]qhPN7B9bisU[/youtube]
Good luck with your training and see you soon on the pages of this site!
10 exercises for developing attacking skills of basketball players
Hello, dear visitors of basketball-training.org.ua! Today I want to tell you about a few basic exercises, by regularly performing which you can reach the next level, becoming a really good attacking player.
Yes, many articles have already been written about this and many videos have been shot. Yes, we all know a few dozen exercises that promise to make you at least the next Michael Jordan. I will not reinvent the wheel, but will tell you about a series of exercises that just a year ago helped me a lot to improve in the attacking aspects of the game.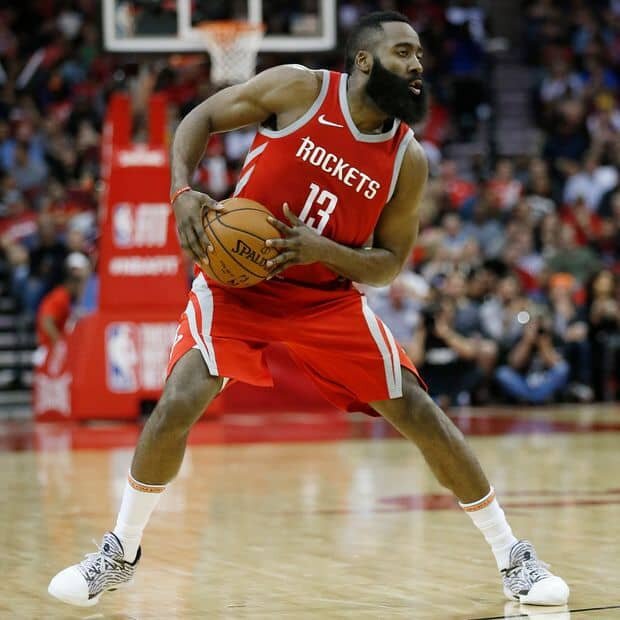 Let's start the story.
Basketball drills
Mikan Drill
This drill gets its name from the first really big guy in the NBA, George Mikan. Begin to perform the exercise, located on the right side of the basketball basket (a meter and a half from the ring). Take two steps to the left, parallel to the endline, and throw a half hook on the other side of the hoop using your left hand. Without letting the ball fall to the ground, pick it up and take 2 steps to the right (again parallel to the base line) and again throw the ball into the ring with a half hook using your right hand. Try to get into the rhythm and hit 10-20 in a row.
[youtube]CmFOj0nhUN8[/youtube]
This exercise will teach you how to attack with a weak hand and turn it into a formidable weapon. Personally, while doing this exercise, already on the second day I began to complete the passages with my left hand. And after a couple of weeks, the effectiveness of the attacks doubled: now the defender had to hold both sides, and I could always attack with the hand farthest from him.
Superman Drill
This exercise is very similar to the previous one. Position yourself almost on the border of the three-second zone (you always want to call it a “trapeze”, but with the change in the rules of basketball, it has lost its usual shape). We perform a throw on the ring with one single difference: do not try to hit the ring! On the contrary, raise the trajectory higher so that the ball, bouncing off the backboard, falls on the other side of the ring. This is where you need to catch him, not allowing him to fall to the floor. Important: try to take no more than three steps to overcome the distance from one side of the ring to the other. Follow the rhythm: let the entire exercise be performed in the same rhythm. Do 10 to 20 repetitions of this exercise.
[youtube]T2Jo-2ME-z4[/youtube]
Beat the Pro
Imagine that you are playing 1 on 1 against your favorite player. You just need to beat him by being the first to score 21 points.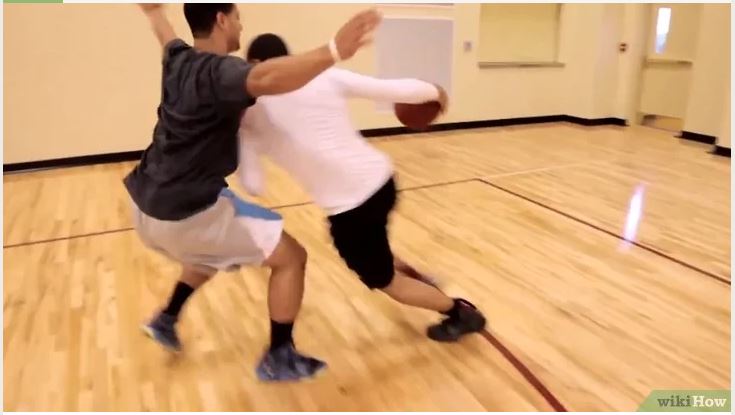 Perform game throws (with deviation, after strides, after crossovers and sudden stops). Be clear about your opponent, how he defends against you, how he tries to cover your every throw, how he waits for the slightest mistake in order to intercept. For each roll you make, you get 1 point. For each miss, the opponent receives 2 points. When you reach 20 points (if you haven't lost before) - you need to make a "buzzer beater" and it needs to be scored. How will you do it: with an incredible deflection after a fabulous dribbling or just hitting the ball with 9meters. Try to beat the best players in your imagination. Important: be realistic when playing against Shaquille, it is foolish to push him with your back or try to shoot the ball while in close contact. Also, it would be wrong to try to overtake Rose or Jordan. In general: adequately evaluate the opponent and try to complicate your life as much as possible.
Shoot the Shot
Do you remember the good old game "Around the World"? Sometimes it is called "Points", but that's not the point.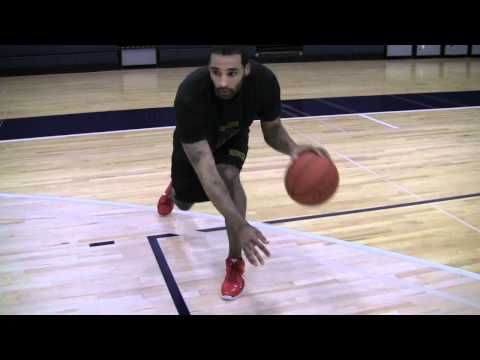 Now we will try to add a hit percentage to this game. Also, we will add a couple of new points to it, the so-called "elbow spot".
In order to advance to the next point, you must make at least 3 out of 5 rolls. Naturally, if the level of your game (and especially your sniping skills) allows you to regularly shoot with a percentage higher than 60%, then increase the number of goals scored to 4 out of 5 from each point. Or up to 5 out of 5 from medium and 4 out of 5 from long range. Total: you have 18 points, 90 throws of which at least 54 must reach the goal. Challenge accepted?
Ball slaps and squeeze
Throw the ball up as if it had bounced off the ring after a bad throw. Jump up, grab the rebound and squeeze the ball as hard as you can with your hands. Imagine that you had difficulty getting this rebound and now they are trying to knock it out from you. Immediately after the rebound, rotate the ball around the body (at different heights): around the head, back, knees and calves.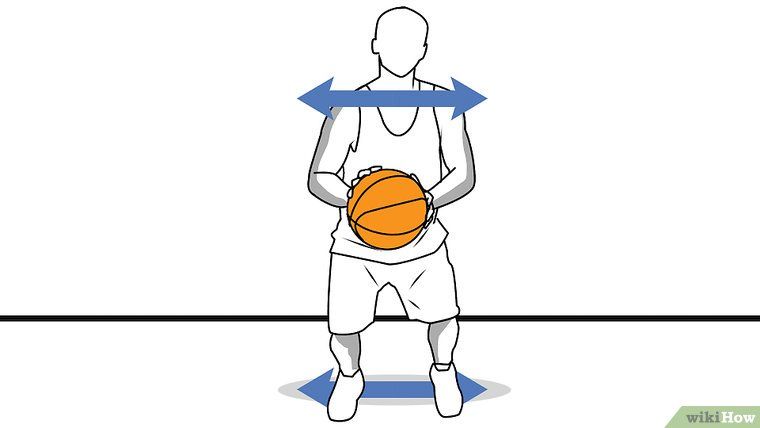 Repeat this exercise 10-20 times.
Figure 8's - with dribble and without dribble
Eight, the famous eight is back, now with dribbling. Do you remember how Petya Maravich taught us how to handle the ball? So, now we are doing the same thing, but using dribbling. For those who find it difficult to perform such dribbling - try to perform the exercise without it.
[youtube]DYAQoOxuskg[/youtube]
Quick hands
This is a cool exercise that is sure to be performed at every training session for young basketball players. Starting position: one hand in front, the second - behind, the ball is between the legs. After releasing the ball, you need to change the location of the hands: if the right one was in front and the left one was behind, then now the ball needs to be grabbed with the right one from behind, and the left one in front. Diversify the exercise: both hands in front, the ball between the legs. We release the ball and catch it with our hands, but from behind.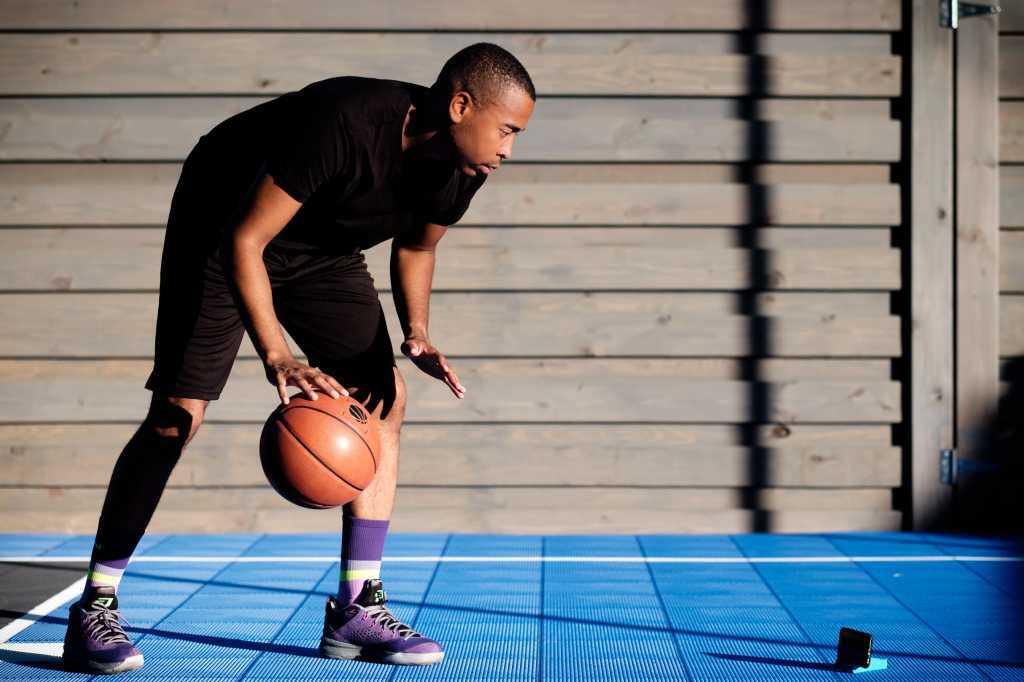 Important: regular performance of this exercise will allow you to develop hand speed, which is very important for performing high-quality and fast feints.
How to do it: 30 seconds first option, 30 seconds second option. Write down how many times you managed to do the first time, and then compare with the results after a week.
[youtube]TGh81tj6zbU[/youtube]
Tom-Tom dribble
This movement is also familiar to many of us. Stand with your legs slightly apart so that you can easily transfer the ball between them. We start with the right hand. We transfer the ball in front of us from the right hand to the left; then from the left hand, transfer under the foot to the right hand. Now with the right hand we transfer the ball behind the back - it turns out to be in the left hand and we send it back (also behind the back) to the right. This is 1 repetition. Repeat 10 times and change hands (i.e. mirror).
Drum dribble
The point is to learn how to quickly and comfortably change your dribbling pace and pitch. For example, right after a screen or a run, you may find yourself kicking the ball out from behind (even though you already think your opponent is offside). The most elementary countermeasure is to sharply reduce the height of the dribbling. So, the exercise is that you need to knock the ball on the floor alternately with your right and left hand. Start from a normal static position (legs and back straight) and go down, increasing the intensity of the knocks on the floor. As soon as there is a space between your hands and the floor, a little more than a ball, begin to rise up. Make several series (for example, 5). For advanced players, try this exercise without looking at the ball, or by hitting it with 1 finger of your right hand and 1 finger of your left hand.
Results
Here is a set of exercises I suggest doing every time you enter the court. Believe me, the results will shock you! Of course, if you are a professional player, then these exercises will be familiar to you and will be given easily.