Home » Misc » How to install basketball hoop on garage
How to install basketball hoop on garage
How To Install A Basketball Hoop On A Garage, House, Or Wall – Backyard Sidekick
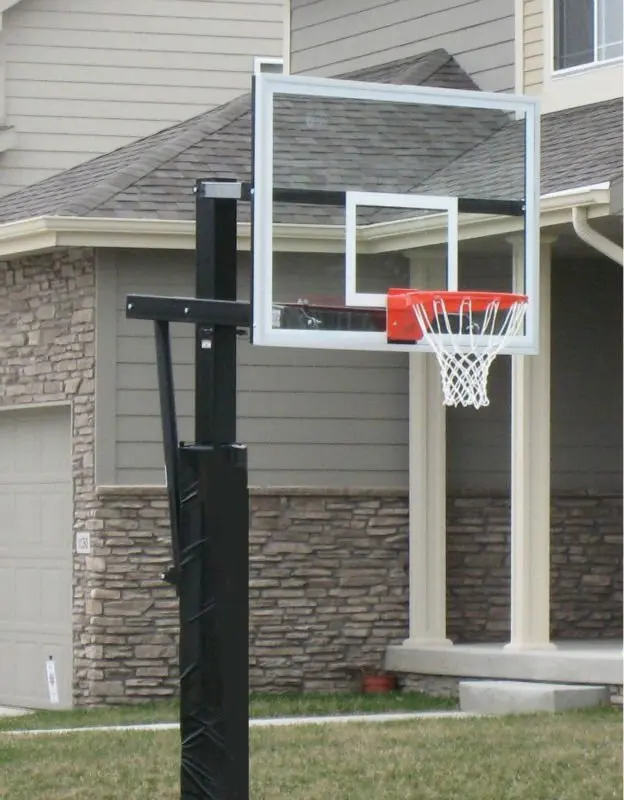
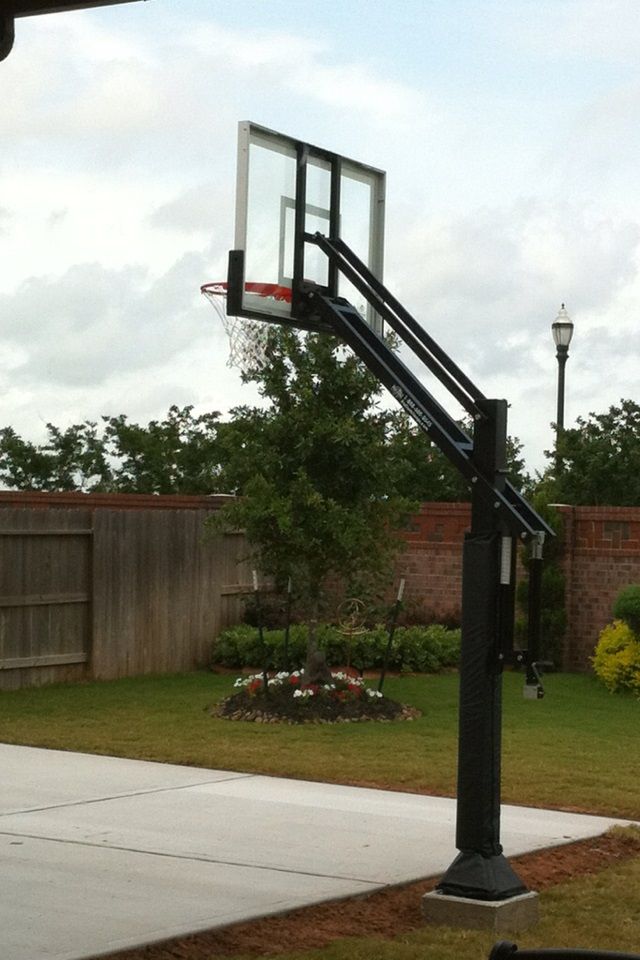
Setting up a new basketball hoop can be a bit of a challenge. If you’ve decided to go with a more permanent approach as opposed to a mobile hoop, there are a couple options. Installing a permanent pole in the ground, or getting a wall mount for the hoop and installing it on the garage, the house, or a wall.
To install a basketball hoop on the garage, you will need a basketball hoop wall mount and compatible basketball backboard and rim. Set the height of the rim to the ground at 10 feet, and draw a free throw line 15 feet from the hoop to comply with NBA regulations for a more realistic practice.
That sounds simple enough right? Well, there’s a bit more to it so I will go into more detail about the planning, set up, and installation so keep reading.
If you already have a basketball wall mount set, then great, let’s jump into the steps. If you haven’t selected a hoop yet, I recommend at least a 54″ wide backboard for a two car driveway sized area, like this Silverback 54″ Wall Mounted Basketball Hoop Set (link to Amazon).
Smaller areas can get away with smaller backboards, but it’s best to get as close to regulation size as possible for training purposes.
Plan Hoop Location
This might be the most important step starting right away. You want to make sure the location you pick will be suitable for playing basketball, but also that players won’t be in the way of other things going on in the area.
Centered on playing area
Out of the way if possible
Highest hoop adjustment will set the top of the rim 10 feet from the ground
Enough area to draw a free throw line 15 feet from the backboard
If at all possible try to mount the hoop in the center of the playing area, for example if you plan on playing on a concrete slab or a driveway. Keep in mind the height you will want the hoop to be at. It’s recommended for 4th and 5th graders to play on an 8 ft hoop, 6th graders to play on a 9 ft hoop, and everything above should play on the regulation height 10 ft hoop.
The hoop I recommended above has a 2.5 foot adjustment range to cover all of those heights. It’s best to make sure that the top of the rim will be 10 feet from the ground wherever you plan on installing the hoop if you want to be within high school, NCAA, and NBA court regulations.
A regulation free throw line is 15 feet from the front of the backboard. If you plan on practicing for an actual basketball game, It’d be nice to have at least that much space on the court. We will get into the other markings later on, but up front, it’s good to have a plan to fit your needs.
Tools And Set Up Equipment
Now that you’ve decided where you want the hoop to be mounted, it’s time gather the tools and equipment. Most of the wall mount basketball hoops will come with lag bolts meant to mount the bracket, and I was able to do so with just an impact drill and the correct size socket.
Tools Required:
Lag bolts (if not included) or nuts and bolts
Socket set and drill, or a set of wrenches
Stud finder (recommended)
Ladder (or two if you have help)
The equipment you will need should all come in a set if you got it from a decent company. For example, the Silverback 54″ Wall Mounted Basketball Hoop Set (link to Amazon) comes with everything you need. The wall mount, backboard, and rim.
If you’re piecing these parts together yourself, be careful that not all companies make the equipment to the same specs. The holes won’t line up or you’ll need to make modifications and things like that. That being said, they do make a Universal Mounting Bracket from Amazon, but still make sure it will work with your backboard before buying.
Find Studs To Install The Wall Mount
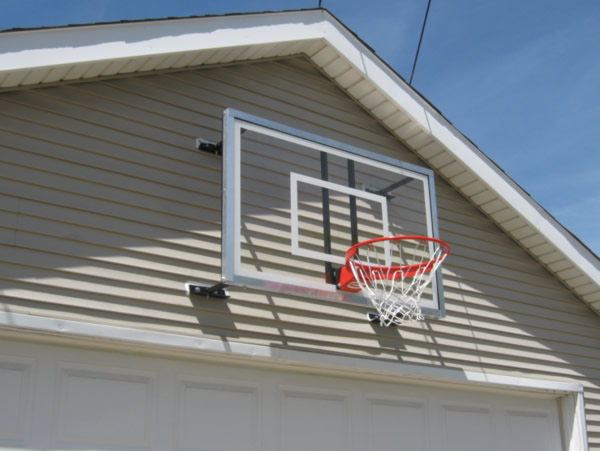
We’ve got all the tools, equipment, and know where to mount the hoop now. I recommend finding a wall stud to drill the wall mount into. This is easy to do on an unfinished garage usually, because you can look on the inside of the wall and find a stud to use. I’ve actually added pieces of 2×4 into the wall to keep the hoop centered where I wanted it.
On the side of a house, or a wall that is covered on the other side, this may be a little tougher. In that case, use a stud finder and do your best to install the wall mount securely into a frame stud.
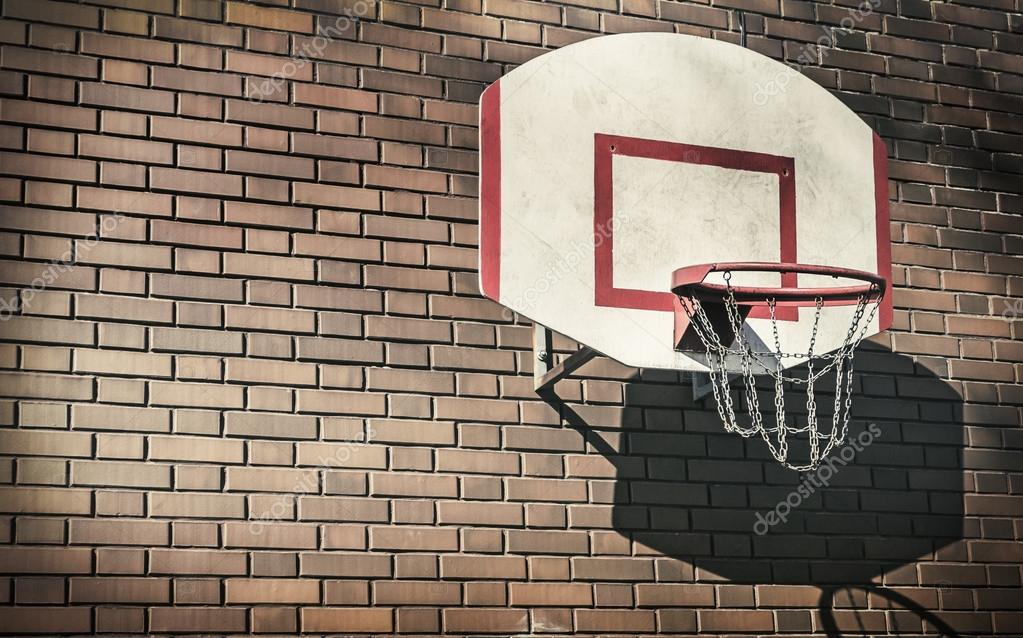
For a concrete or brick wall, I would simply not use the lag bolts and use concrete anchors of an appropriate size to install the wall mount.
Install The Wall Mount
Hopefully you were able to find a stud, or add 2×4’s where you want to mount, without too much trouble. Before trying to just drill the lag bolts into the stud, you should drill a pilot hole first. This will help the lag bolt seat correctly and lower the chances of splitting the stud.
Some sets will come with a nut and bolt rather than a set of lag bolts. If that’s the case, drill a hole the size of the bolt, and simple bolt the mount into place using the bolt, nuts, and washers.
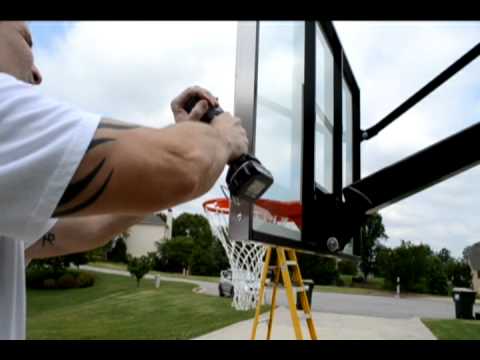
Here’s a video of the steps we’ve covered so far that might help you out if you prefer a visual. This guy was piecing together a backboard he got that didn’t come with a wall mount, but it might help to see the issues he had.
Install The Backboard And Rim
Some sets come with backboard and rim already installed onto the wall mount, and some come in all separate pieces. If they come in separate pieces, I found it easier to install the wall mount when it was a standalone piece by itself. Then attaching the backboard and rim with the included bolts.
On the other hand, I then had to make three trips up and down the ladder to install each part individually. It’s all personal preference which approach you take here.
If you feel like you could use some help on any of those steps, I suggest looking somewhere like HomeAdvisor Handyman Services where you can find a local helper to give you a hand.
Check Tightness Of Equipment
Once the wall mount is secure and everything’s in place, I like to do a once over check on all the equipment, moving parts, and bolts to make sure everything’s nice and tightened down properly. If you did a good job, this step will be quick, easy, and will give you a little peace of mind.
This is also a good time to make sure the adjustable action of the hoop mount is functioning properly. Simply move from it’s lowest setting to its highest and confirm everything’s in working order.
Mark The Basketball Court
I wrote a whole article about Basketball Court Dimensions for high school, College, and NBA regulation courts. So if you have the space, and you’re picky, you can check out all the official measurements. But for the average backyard or driveway basketball court set up, you’ll probably be fine with a simple key and free throw line.
I recommend using a decent kit like this Easy Basketball Court Stencil Kit (link to Amazon) to map out the court under the hoop. I think it adds a nice touch to the feel of the court, even if it’s simply in a driveway.
Here’s the instructional video for the stencil kit above, so you can see if it’s a project you want to tackle.
Play Basketball
That’s it! You now a have a sweet basketball hoop set up to play basketball on. Check out these 14 Fun Basketball Games For All Ages to get some ideas for the different games you can play on your new hoop.
There shouldn’t be too much maintenance for these types of wall mount basketball hoop set ups. Once a year I like to go out and check the tightness of all the bolts again, usually when spring starts before the hoop starts getting a lot use.
Helpful Links:
Silverback 54″ Wall Mounted Basketball Hoop Set (link to Amazon)
Easy Basketball Court Stencil Kit (link to Amazon)
10 At Home Basketball Training Drills
How To Get Better At Basketball: Skills Improvement
Sharing is caring!
Facebook
Twitter
How to Attach a Basketball Hoop to a Garage
Skip to content
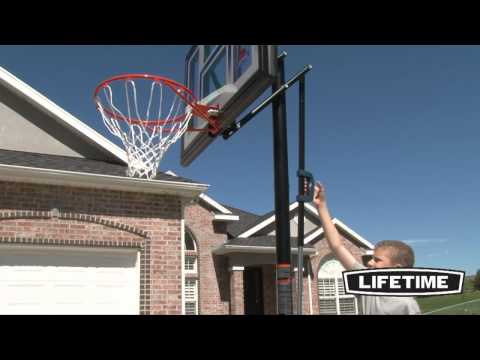
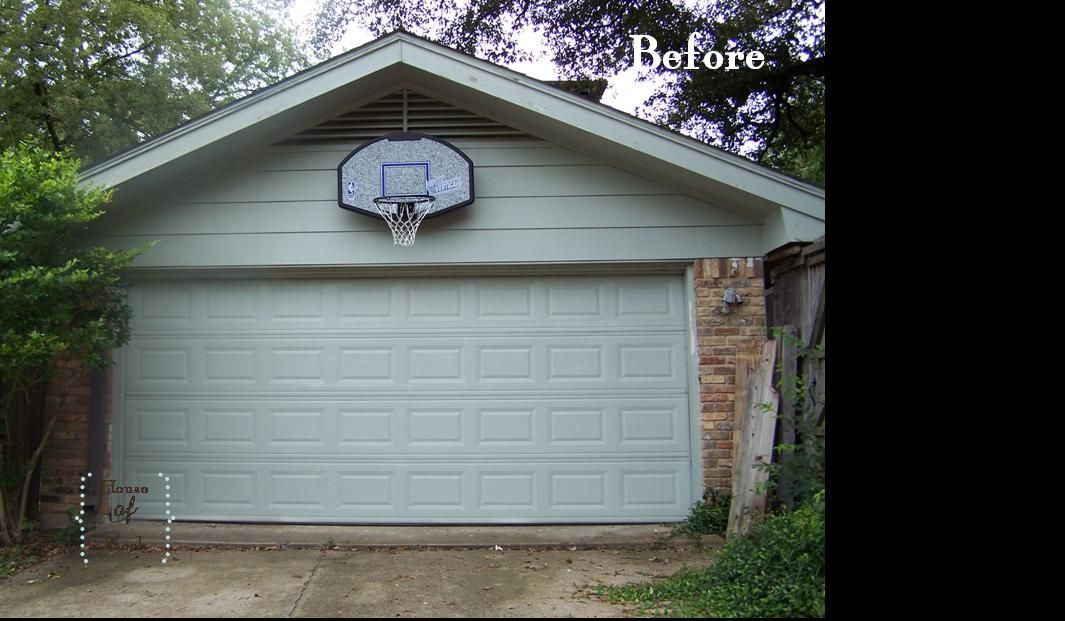
Transform your driveway into a court and bring one-on-one games to life with the addition of a basketball hoop to your garage. You don’t have to be a handyman extraordinaire to tackle this project, only an owner of a ladder and a drill and the knowledge to use them.
Home Court Advantage
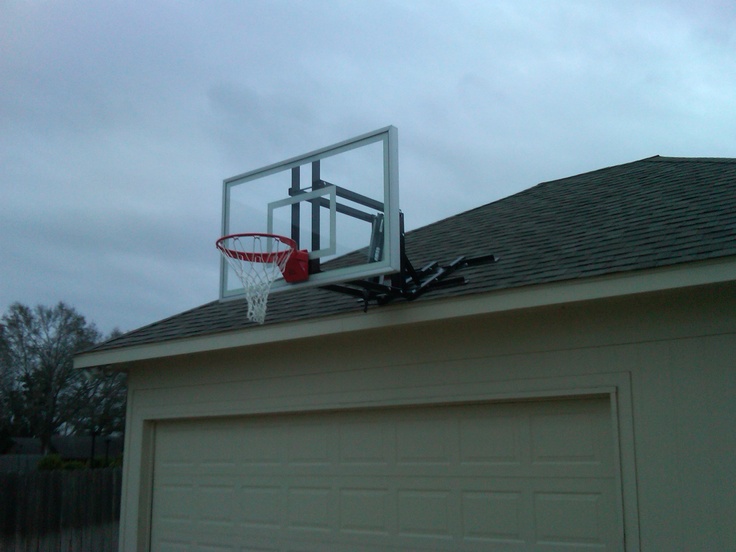
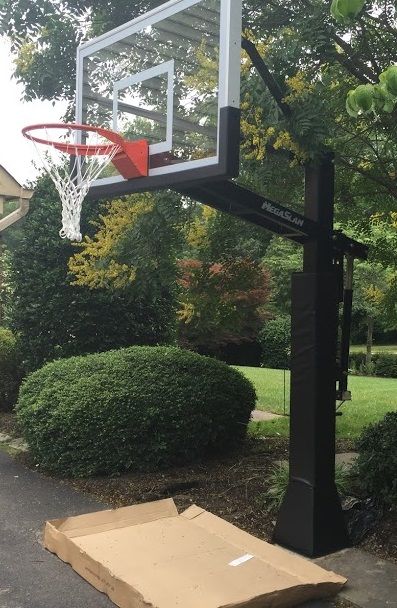
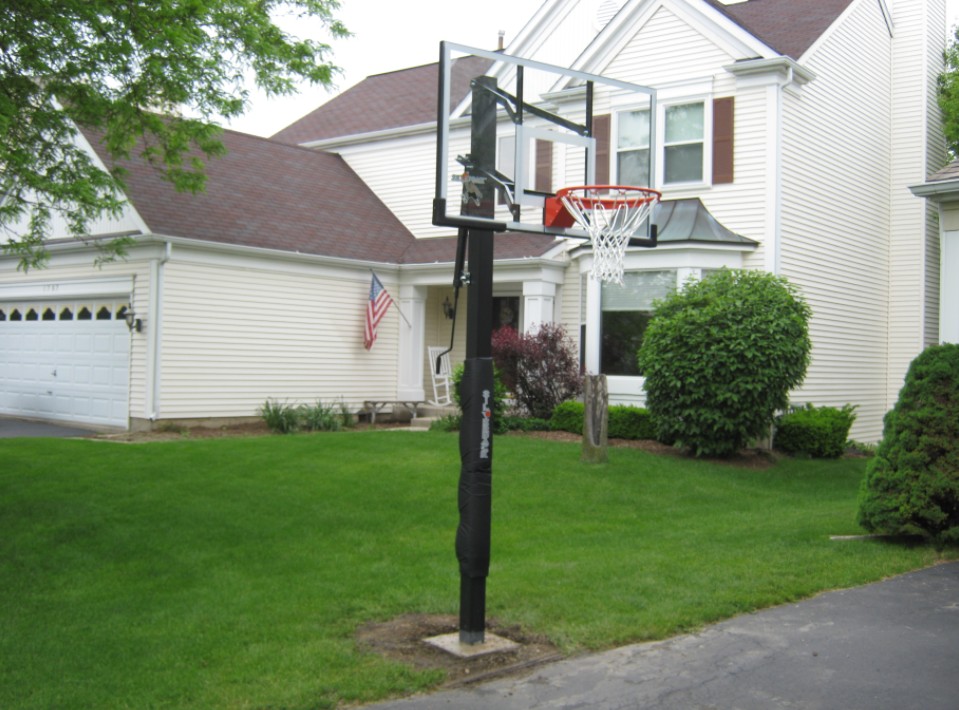
Installing a basketball hoop can turn any empty area into a playful zone of H-O-R-S-E games and casually shooting hoops with friends and family. The best places that make home-courts are roomy driveways, preferably hanging the hoop on the roof in front of a double garage. The best pseudo-courts are level and smooth, but anywhere with wide enough playing space will do the trick. Plenty of homeowners with single door garages have make their narrower driveways work in their favor.
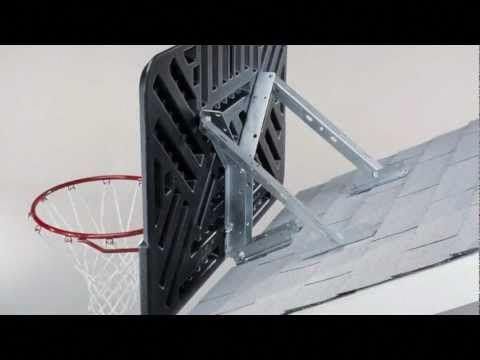
Installing a roof-mounted basketball hoop is one of the easiest ways to turn your driveway into a court.
There are a few things you should consider before climbing up to your roof and installing your new garage-mounted hoop:
Your mounting surface needs to be secured and able to support the hoop without fear of it falling or wobbling off (especially onto your car or yourself).
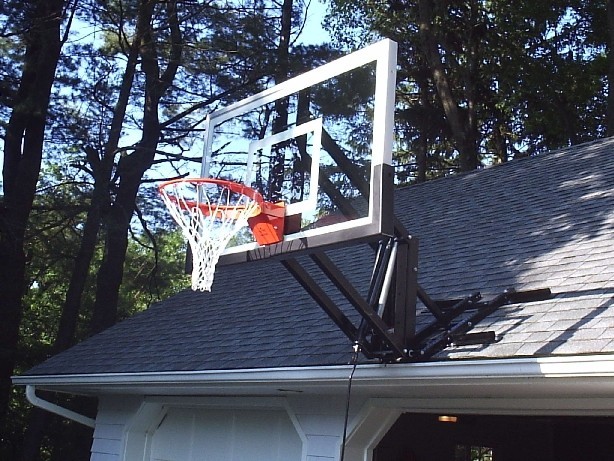
Mounting on your garage means you should avoid the hoop being obstructed by the roof line.
The hoop, when installing it on against the garage, should be as flat as possible.
Be sure that the place where you’re installing the basketball hoop is free and clear of any mechanisms around the garage door area.
Installing Your Basketball Hoop to Your Garage: Step-by-Step
The NBA’s regulation backboard size is 72 by 42 inches and the NBA, WNBA, and NCAA’s regulation height for the hoop’s rim is 10 feet from the playing surface, with the rim measuring 18 inches in diameter and net hanging 18 inches from the rim itself. This is your court, and you certainly don’t have to follow any strict regulations to have a fun game of basketball, so just decide ahead of time how high you want your hoop and if you want to match the pros.
Step One
Scout the area where you’d want your basketball hoop to go. Next, mark where you’ll be putting the mounting brackets for the hoop. You’ll want to attach your hoop against the roof’s studs in the center of the roof, which you can locate with an electronic stud finder.
Now, gather your tools:
Ladder
Drill
Stud finder
Crescent wrenches
Level
Tape measure
Your basketball hoop kit
Any additional tools recommended by the kit’s instructions
Step Two
Install your mounting brackets on the places you previously marked on your garage’s roof. Do this by following your hoop kit’s installation instructions. The majority of basketball hoop kits will have adjustable brackets that accommodate for different roof pitches and other unique garage features.
You’ll be drilling pilot holes for your lag bolts, so you’ll want to use a drill bit that’s ¼ the size of the bolts you’re using. Now, line up the holes and attach the bracket to the roof with your lag bolts. Attach the mounting bracket with a socket and ratchet.
Step Three
With the help of a family member or friend, attach your backboard. Your kit will likely come with nuts and bolts, which you’ll use along with your power drill to install the backboard.
Next, use water-resistant, exterior caulking to seal any holes or gaps left behind. This will keep your newly installed bolts from rusting and stop water from sneaking into places it doesn’t belong. Rainwater can also be the culprit behind rotted out studs. Test the backboard while on your ladder to ensure that it’s installed securely.
Step Four
Finally, attach the net to the rim.
Installing a basketball hoop is an easy project that only demands a few moments of your time. Most of us have a ladder, a drill, and the appropriate wrenches lying around to mount a backboard, a task that can be completed in thirty minutes or less. Mounting a backboard basketball hoop to your garage is decidedly easier than attempting to install an in-ground basketball hoop.
Once you’ve mounted the brackets, hung the backboard, and attached the net to the rim, take a step back and remove the ladder away from the basketball hoop. Check to see if the backboard appears straight, even tossing the ball a few times to make it’s not hitting the backboard at any odd angles.
Periodically, you’ll want to check to see if you need to re-caulk around the areas where you drilled for your lag bolts. You’ll also want to ensure that the backboard is still secured as outer elements like strong winds and storms can wreak havoc on exterior installed accessories.
Do You Need A Garage To Attach Your Hoop To?
At Danley’s, we have all the garage styles and sizes that will improve the value of your home. All the stuff that you wanted to move out of the garage can be stored inside a two-car or even a three-car garage. Speak to a specialist about garage sizes and get a free quote online today.
Join over 100,000 satisfied customers and get a free and easy quote from Danley’s right now.
Get a Free Quote Now
Basketball hoop - how to make a stand with a backboard with your own hands
Love basketball and want to make a hoop? I wanted to make it myself, not buy it, and I ended up making it. It's pretty cheap, especially if you have some of the stuff you need to assemble.
Let's start assembling the basketball hoop with our own hands.
Step 1: Shape the Ring
The first thing you will need is a ring, I made it with 12mm rod, but it doesn't have to be that size. The standard diameter of a basketball hoop is 450 mm.
To make it flat you need something to wrap it around, this thing should be about 400mm in diameter.
I found an old car rim of the right size, you will need to clamp it to the table with a clamp using a piece of wood.
As shown in photo 2, place another clamp a little further from the first with a rod between them.
As shown in photo 3, slowly wrap the rod around the disk, once you wrap the rod and its edges overlap, cut off the straight ends.
Use a clamp to press the ends together, then weld them together.
To complete this part, place the ring on the ground and straighten out all the curves.
Step 2: Frame
Bend a piece of flat metal, mine was 4mm thick.
Weld it to a flat point in the ring.
Cut two rods 320 mm long.
Weld them as shown in the photo.
Drill four holes to match your existing bolts.
If you need a netball ring, you can simply attach it to the pole and skip the rest of the steps.
Step 3: Mesh Staples (Optional)
Show 7 More Images
Do this step if you need mesh. If you need a network, you will have to buy it. This step is not as difficult as it seems.
cut 12 pieces of wire 90 mm long (I would recommend making a few spare parts, as they are easy to ruin. )
bend them in the middle (it doesn't matter if the tips are the same length)
clamp the wire in a vise with a steel rod at one end
bend wire over rod
repeat this with all parts of
retighten the wire wrapped around the rod (see photo)
bend it
repeat with all parts
retighten the wire wrapped around the rod
bend it (at this point you can't just remove the wire from the rod - you will need to slide it to one of its edges and remove it from the edge)
repeat with all parts of
divide into 12 pieces and weld on the brackets
Step 4: Backboard
Cut the board to size. My board does not fit the full size of basketball boards. (the second picture shows the dimensions of a standard shield).
My measurements are 1100mm wide, 700mm high and 25mm thick. (You don't have to be that size.)
Step 5: Paint the Shield
Once you've drawn all the lines on the shield, lay masking tape over them. If you try, everything will look neat.
If you are using MDF, you will need to take care to protect the edges from moisture (as shown in photo 2).
Carefully paint over the areas around the masking tape.
Remove masking tape after enough coats of paint have been applied and the board looks complete.
Step 6: Paint the ring
First you need to sand the metal. I used a grinding disc on a grinder.
The ring must not be black or white, it must stand out from the shield. Usually the ring is painted orange or red.
The easiest way to paint inventory is from a can.
Step 7: Assemble
Put it all together. Screw the ring to the shield, hang a net on the ring.
Step 8: Installation
DIY Basketball Post is great to mount on a garage or house wall, but if you want to mount it on a pole, you can create one too.
I installed my ring in the yard using heavy duty wood screws.
A standard basketball hoop must be placed 3 meters from the ground.
I am not responsible for any damage you cause to yourself or your property - you make your own ring.
Successful throws!
Do-it-yourself basketball backboard with height adjustment (20 photos). Basketball backboard dimensions and markings
Today we will talk about how to make a high-quality basketball backboard and basketball net with your own hands at home from improvised materials. We will also consider the technology of manufacturing a basketball backboard and a net for playing basketball for children or adults.
In order to make a simple DIY basketball hoop for kids, we need thick wire and rope. Instead of thick wire, you can take an old unused hula hoop, cut it, shorten it and reconnect it. It is important to leave a "sprout" for attaching the ring to the shield.
If you want to make a basketball hoop with your own hands from thick wire, then in order to get the most even circle, we recommend using a cylindrical fixture designed to serve as a template. We wind the wire around it. And do not forget to leave a "sprout" for attaching the resulting ring to the basketball backboard.
The diameter of the metal blank for the ring should be slightly larger than the diameter of the basketball. Then you should take the prepared rope and cut it into 20-22 identical segments. At the same time, the length of each should be 2.5 - 3 times greater than the planned length of the mesh hanging.
These pieces are attached to the metal ring at regular intervals. You need to tie the ropes exactly in the middle so that 2 ends of equal length remain free. Then we connect in turn 2 ends of nearby ropes around the entire circumference of the ring. This is the first level of our grid. Then, similarly, we tie the ropes to the next level, etc. If you want to make a basketball hoop for your home, you can tie the bottom of the net so that the ball will stay inside when it hits. This will help reduce the chance of an accidental bounce of the sports equipment after hitting the basket.
DIY basketball backboard for adults. How to make a professional basketball backboard - here you have to try. How to make a basketball backboard at home. The process of making a basketball backboard is no more difficult than making sports predictions, especially if the necessary materials are available.
Here is a typical instruction for making a basketball backboard at home. For the base of the basketball backboard, you can choose a sheet of plywood, which is inexpensive and not hard to get either. A sturdy rectangular piece of plexiglass or thick plastic may also work well.
If the basketball backboard will be installed outdoors, then it is worth choosing the material for its base based on considerations not only of strength, but also of resistance to adverse weather conditions.
The next step is to choose a place where the basketball backboard will be attached. When choosing such a place, the main thing to remember is that the lower edge of the shield should be at a height of 290 centimeters from the ground, and the ring should be located at a height of 305 centimeters.
Now you need to mark and cut out the dimensions of the plywood blank. The ideal size of a standard basketball backboard are the following parameters: width - 1.8 meters, height - 1.05 meters. This size will allow players to make more accurate and varied throws.
Before you start cutting the workpiece, you need to use a pencil to outline the dimensions and draw lines along which the workpiece will be cut. It is better to cut it with a jigsaw, when working with which you must be careful.
After the blank of the future basketball backboard is ready, it will be necessary to draw a white square on it, which plays a very important role.
The white square is a kind of guide for the players when shooting, with the help of such markings it is much easier to get the ball into the basket. If the ball is correctly thrown into the corner of this square, then it will definitely reach the goal.
In order to mark out such a square, not only a brush and paint are needed, but also knowledge of the dimensions of the rectangle. Its external dimensions are 59 centimeters horizontally and 45 centimeters vertically.
When marking out, it should also be taken into account that the upper edge of the base of this rectangle must coincide with the level of the upper plane of the ring. The width of the stripes of the square should be 5 centimeters.
Basketball hoops
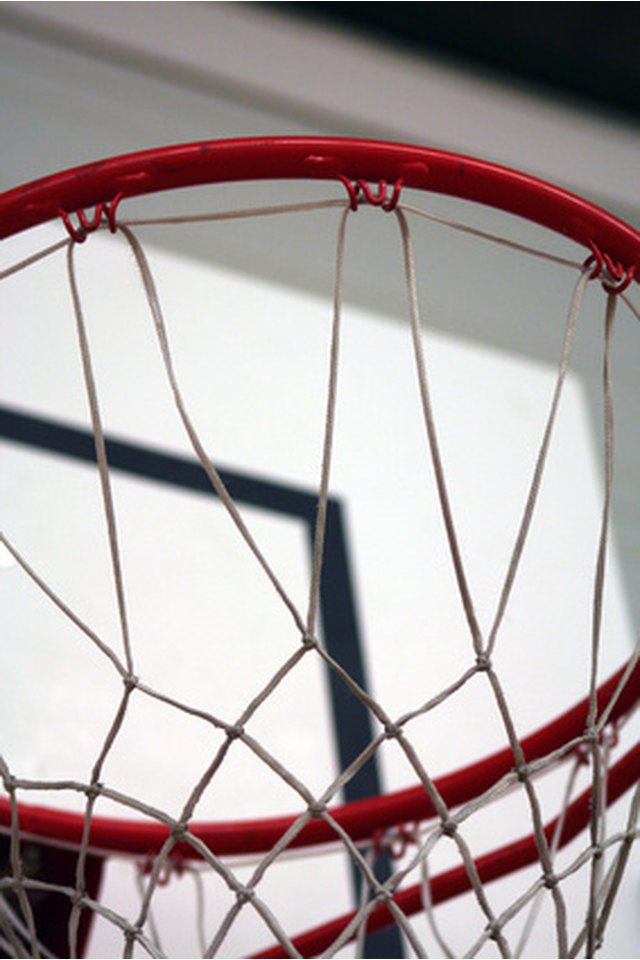
Material - solid steel, inner diameter 45 cm and painted orange. The metal bar of the ring must have a minimum diameter of 16 mm and a maximum diameter of 20 mm. On the bottom of the ring there must be devices for attaching nets, such as to prevent injury to the fingers. The mesh must be attached to the ring at twelve equally spaced points along the entire perimeter of the ring. Net attachment devices must not have sharp edges or crevices that could get caught by the player's fingers.
The ring is attached to the structure supporting the basket so that no force applied to the ring is transmitted directly to the backboard. Therefore, there should be no direct contact between the ring and the device that secures the ring to the shield and the shield. However, the gap must be small enough that fingers cannot get into it. The top edge of each ring must be placed horizontally at a height of 3.05 m above the ground at an equal distance from the vertical edges of the backboard. The nearest point on the inside of the ring must be 15 cm from the face of the shield. You can use rings with a shock absorber.
Made of white cord and designed to hold the ball momentarily as it passes through the basket. The net length must be at least 40 cm and not more than 45 cm.
Each net must have 12 loops to attach to the ring. The top sections of the net must be sufficiently rigid to prevent: Net entanglement on the ring and possible entanglement. Ball stuck in the net or thrown out of the net by the net. Basketball net can be woven from braid, twine, rope, thick threads. The braid or thread is first cut into segments.
The length of each segment must be four times the length of the grid. The number of segments is determined as follows: the ring intended for the grid is measured, and the resulting value is divided by four. The do-it-yourself basketball backboard is almost ready. Now it needs to be firmly fixed. To do this, you will need 4 large bolts that can withstand a load of 30 kg, and drill four holes in the wall or any other place where the basketball backboard will be mounted.
Use a spirit level to drill holes evenly. After that, you can start installing the shield. It is very inconvenient to do it yourself, so you should again resort to the help of friends who can insure you on the stairs, as well as file and hold the shield.
Once the bolts are in place and screwed into place, the basket can be hung up so that you can finally play on the court with your new basketball backboard that will last for years.
In short, you can make a good basketball backboard with your own hands. But it is important to pay attention to one serious point.
The fact is that no matter how it seems to us from the side that the contact of the ball and the basket hoop is quite soft, it should be noted that the impact load on the fastening of the hoop to the backboard is very high. The weight of the ball (if you do not go into the definition of physical values) during contact with the ring increases many times, even when thrown from an average distance.
Well, with an inaccurate hit from a long distance, this blow can reach destructive power. And such a load acts on the mount hundreds and thousands of times. So that your work does not go to waste, that is, the future ring with a shield is a reliable design, you need to pay maximum attention to attaching the ring to the shield and then the same shield to the wall or other structure. Regarding the material of the shield, it can be put together from the same inexpensive pine boards available, and preferably from harder wood. Proposals to make a basketball backboard from plywood, fiberboard, plastic do not stand up to criticism. The first two positions do not pass due to the fact that if your shield hangs in the season in the rain and the sun, nothing will remain of it.
Plastic will naturally withstand all of these weather conditions, but is unlikely to be affordable. Plastic plastic is different, because the one that is used in the gym is very expensive, another different lottery ... will stand it - will not stand it. But a wooden board, it is a material that has stood the test of time and history. It is known that the official dimensions of the basketball backboard are as follows - a width of 1 meter 80 centimeters and a height of 1 meter 5 centimeters.
But in principle, you can try to build a flat square of boards 3 cm thick and 80 cm x 80 cm in size, I think this area will be quite enough to play normally or work out the throw. Basically, only a square is actively used when throwing (its dimensions are 59centimeters, height 45 centimeters) above the hoop, since this is the small square you need to be able to hit if you want to perform a throw from the shield.
Then (if it hits this square), the ball will most likely fall into the ring. Even in this case, if you perform a throw with a rebound from the shield, the load on the shield itself will be very small, but on the fastening of the shield and the ring, in this case, the pressure will be maximum.
The basketball hoop is made from a metal rod with a diameter of 16 - 20 millimeters. I think everyone understands that in order to protect against atmospheric precipitation, the entire structure should be painted with the appropriate paint, which can be bought at the store, explaining to the seller why the paint is needed.
As a result, I will repeat myself and say that when trying to make a basketball backboard on your own, pay attention to the fastening of the ring to the backboard. This is the most fragile place in this design.
In this article you will learn:
What are the dimensions of the backboard with hoop
How to make a basketball hoop with your own hands
Where to buy a ready-made basketball backboard with ring
Basketball-like games were found among the ancient Scandinavian peoples and Mexican Indians. Today in northern Mexico, one of these games is popular - "Pok-Ta-Pok". It is believed that it appeared due to religious rites, which eventually turned into sports fun and an attraction for tourists. How the game "basketball" appeared, and what is a basketball backboard with a ring as a necessary element of this popular game, we will learn in this article.
When basketball and the first backboard with a hoop appeared
The forerunner of basketball is the 19th-century children's game "duck on the rock", familiar to the Canadian inventor of basketball James Naismith. The principle of the game was to hit a small stone on top of a large one.
The concept of basketball was finally formed when D. Naismith moved to the US and became a physical education teacher at the Youth Christian Organization College (YMCA) in Springfield, Massachusetts. Already teaching physical education and as a college professor, he faced the challenge of creating a winter game between baseball and football. Naismith, given the weather conditions this time of year in Massachusetts, decided that this game should be played indoors.
Naismith's goal was to create an outdoor game for the students of the Christian Workers' School that required more than just strength and dexterity. It was supposed to develop coordination of movements in teenagers and at the same time be interesting.
So, in the winter of 1891, under the leadership of Naismith, the first basketball baskets were installed in the college gym. Baskets from under the fruit, fixed on both sides of the hall on the balconies, which encircled the room around the perimeter, acted as basketball hoops. Such baskets were fastened at a height of 3.05 m, it was this indicator that became the international standard, which is observed to this day.
The task of the players was to throw the ball (at that time they used football) into the basket. The first basketball match was held in the same hall on December 21, 1891. According to the conditions of the game proposed by Naismith, each team had 9 people, which exactly coincided with the number of students in the group.
The news of the new game spread very quickly throughout America, and Naismith was asked to send the rules. On February 12, 1892, after learning the rules and mastering the basics of technology, the students of Springfield College played the first "official" match in the history of basketball, which ended in a 2-2 draw.
This meeting turned out to be so successful, and the rumor about a new type of competition spread so quickly that soon two Springfield teams began to hold demonstration competitions, which were already attended by hundreds of spectators. The initiative was picked up by students from other educational institutions, and the following year, the Northeast of America was swept by a real basketball fever.
The rules of basketball that Naismith wrote himself as a college instructor at 1891 year, was a list of 13 points, which eventually formed the basis of modern international rules, which hardly fit on 200 pages. In 1893, instead of baskets, they put iron rings with a grid, two years later they added shields, and two years later the team was reduced to 5 people.
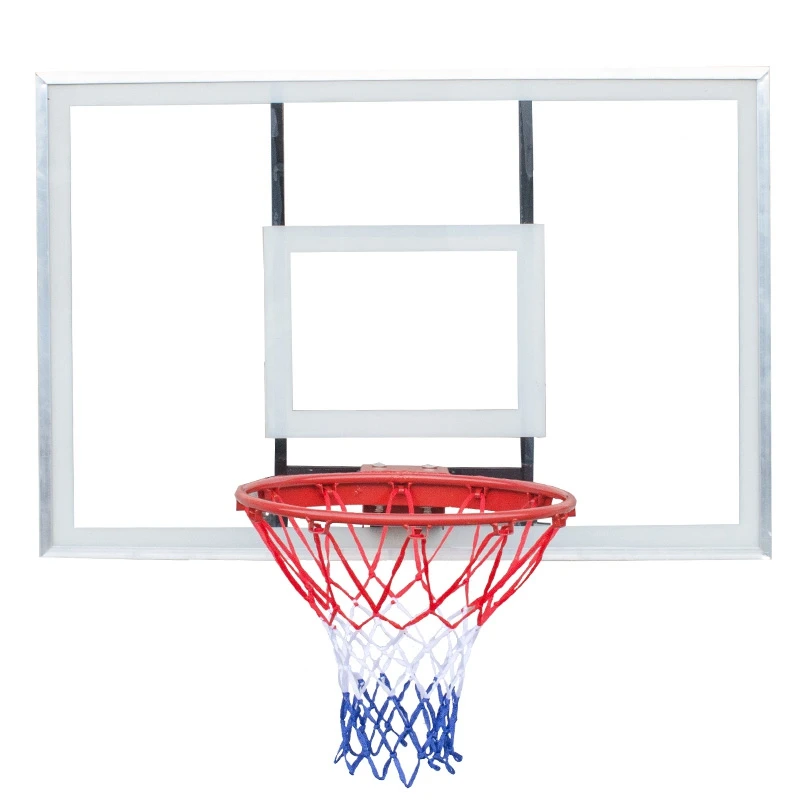
What is a basketball backboard with a ring today? The shield is made of a transparent material, usually a single piece of tempered impact-resistant glass with a degree of hardness corresponding to that of a 30 mm thick hardwood shield. It is allowed to produce such shields from other materials, but in this case they must be painted white and comply with other requirements for such sports equipment.
The front side of the shield is made smooth, a marking line is applied along the edges, a rectangle measuring 45 cm vertically and 59 cm horizontally is indicated at the place where the ring is attached. Moreover, the upper edge of the base of the rectangle must coincide with the level of the upper plane of the ring. White outlines are applied to transparent shields, and black is used in other cases. The width of the lines is 5 cm.
The backboard with the hoop is installed at right angles on both sides of the playing court, parallel to the end lines. The center of the front surface of each shield lies on perpendicular lines reconstructed from points located on the site at a distance of 120 cm from the middle of the inner edge of each front line.
Shields are upholstered, the following requirements apply to it:
the sides of the boards and the bottom end are covered with soft material at a height of at least 35 cm from the bottom corners;
the lower end is upholstered with material at least 5 cm thick;
the back and front surfaces of the shield should be decorated with upholstery material, the thickness of which is at least 2 cm, at a height of at least 2 cm from the bottom end.
The following requirements are imposed on the structures on which the shields are attached: their front parts, including the upholstery, are placed at a distance of at least two meters from the outer edge of the front line. They are painted in bright colors that contrast with the walls of the sports hall in order to provide sufficient visibility to the players of both teams.
The structure on which the backboard with the hoop is mounted is fixed to the floor of the court in such a way as to prevent it from moving during the game.
Structures used for fastening the shields must be upholstered with soft material behind the shield at a distance of 120 cm from the front surface of the shield. The minimum thickness of the upholstery is 5 cm, and the density is the same as that of the upholstery of the shields.
The base of the structure from the side of the playground is upholstered with dense soft material to a height of at least 215 cm, the thickness of the upholstery is 10 cm.
The minimum value of the so-called "indentation factor" of the upholstery of panels and structures is 50%. This figure means that when an appropriate force is applied to the upholstery, its indentation should be within 50% of its original thickness. The upholstery material provides protection to players from possible injuries during the game.
Basketball backboard and hoop dimensions
It's hard to imagine a basketball court without a basketball backboard and hoop. For them, world standards established by the International Basketball Federation have been adopted.
A basketball backboard is a rectangular or square panel to which a hoop is attached. Mounting is provided on the shield for mounting on a pole or hanging on a wall: rigid mounting is required, the product should not stagger and move.
Shield dimensions - 1.8x1.05 meters, with an installation height of 2.9 meters. By NBA standards, the size of the backboard must be 72x42 inches. Two shields are installed opposite each other from different ends of the field, the material is impact-resistant (as an option, tempered glass, acrylic, wood). Lines are drawn on a smooth surface. Models of basketball backboards with a net that are not intended for stationary installation are equipped with the same mounting elements as in the brackets for hanging punching bags. This method makes basketball backboards able to withstand a lot of weight and securely fixes them.
Ring or basket includes a metal (steel) circle covered with netting without a bottom. It is installed at a height of 3. 05 meters from the floor and indented 15 cm from the lower edge of the shield. The inner diameter is selected from the range of 45–45.7 cm. The basketball hoop is painted in a bright color, usually orange. It is impossible to allow the transfer of load from the basket to the shield, therefore, the installation of the product is carried out with special attention.
DIY basketball hoop
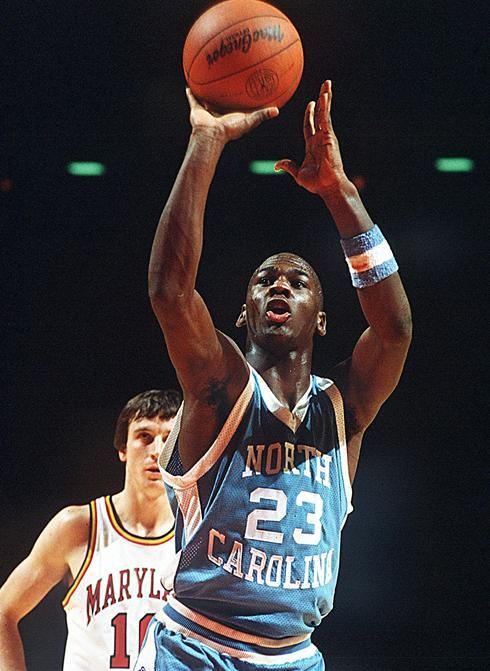
Homemade basketball hoops are installed in summer cottages or hung in the yard near the house. In the summer, you can throw the ball with pleasure, feeling like Michael Jordan for a moment. This game is available to everyone: both children and adults. The benefits of such a seemingly simple exercise are incredible!
Have you set out to make your own basketball hoop and don't know where to start? Further, we will talk about this.
To make your own basketball hoop, you need thick wire and rope. Instead of a wire, an old unnecessary sports hoop is suitable, which is cut, shortened and connected again. Do not forget to leave a "sprout" for attaching to the shield.
In order to make a thick wire basketball hoop, you will need to use some tricks. To obtain an even circle, a cylindrical fixture can be used as a template on which the wire is wound. But, before cutting off the wire, do not forget about the "sprout" for attaching to the wall.
The diameter of the metal blank for the hoop is slightly larger than the diameter of a basketball. Next, the pre-prepared rope is cut into 20–22 identical segments. The length of each is 2.5–3 times the planned length of the net hanging.
These segments are attached to the metal ring at regular intervals. The ropes are tied in the middle, and the two ends of equal length are left free. Then the two ends of the nearby ropes are tied in turn, and so on along the entire circumference of the ring. It turns out the first level of the grid. The ropes of the next level are tied in the same way, and so on.
When making a basketball hoop for the home, the bottom of the net can be tied, which will allow the ball that hits the net to stay inside. Thus, the ball does not accidentally bounce to the side.
Now we know how to make our own basketball hoop. But it is necessary to answer the question, which is better - a home-made or a quality product bought in a store?
Making your own parts is fun. To do this, you only need free time, the necessary materials and a third-class welder. If you do not have this, then it is better to purchase a basketball hoop with a backboard from trusted manufacturers.
In order to make a basketball backboard with fastening, you will need six meters of a 2x2 cm profile pipe, 8.5 m of a 2x4 cm profile pipe, a backboard made of laminated moisture-resistant plywood, a basketball hoop, six anchor bolts for attaching to the wall. The design is assembled from three parts for easy wall mounting.
The required part is cut off from the shield.
Metal structures are welded and the prepared AKZ is applied to them.
The shield is drawn, pasted over with adhesive tape, and lines 5 cm wide are applied to it.
Attach the shield to the frame.
Where to buy a basketball hoop with a backboard
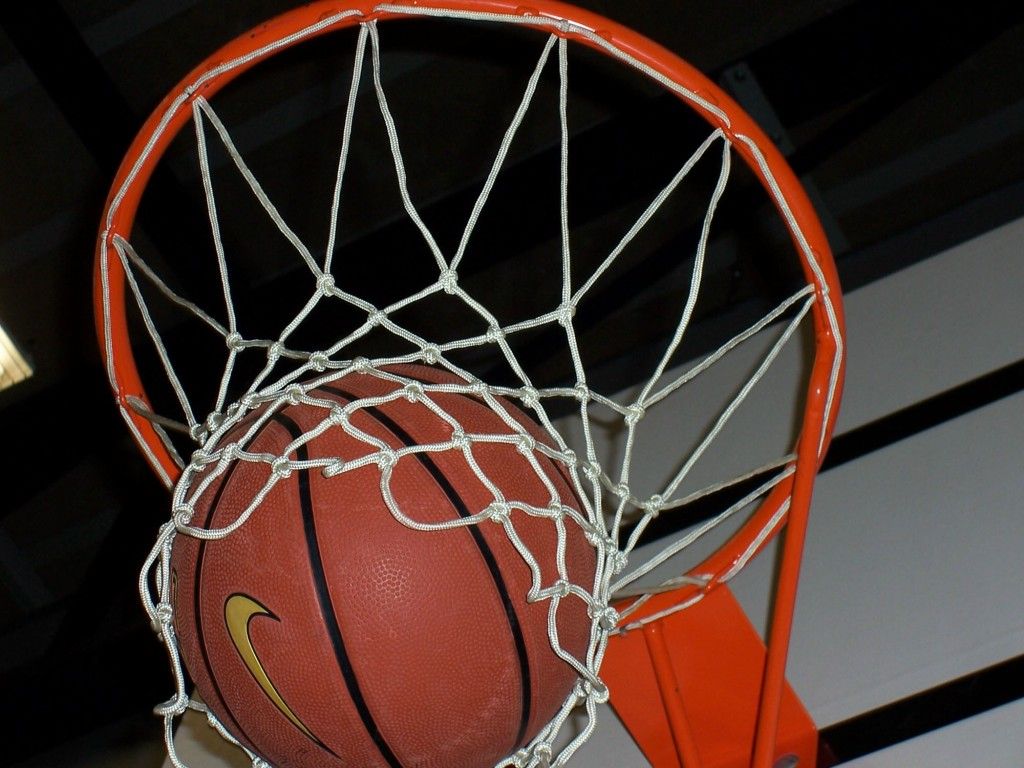
In such an active game as basketball, every little thing is important! Even at the finish line, troubles happen: the ball is in the ring, but gets tangled in the net and gets stuck. This moment is ruined! How to avoid such troubles?
The following requirements apply to the ring net:
12 fastening loops;
length should be 40–45 cm;
use rigid white cord as material;
upper is made in such a way as to prevent throwing the net on the ring, tangling or sticking the ball.
How to choose the right basketball net? The main thing to pay attention to is the material, diameter and thickness of the thread, type.
Capron and nylon products are used more often. The latter is more wear-resistant, so for professional training, boron falls on this material.
The diameter is selected according to the diameter of the ring and the ball.
For professional basketball nets, thick threads of increased strength are used, but for amateurs, more fragile ones can be used.
Type: knotted and knotless. Products of the first type are widely used, but knotless basketball nets for the hoop look better and absorb the impact of the ball well, and are more reliable.
Looking for quality hoop backboards? We will help you make the right choice. Sportstyle started its activity in 1992 and has been successfully presenting its goods and services in the markets of Russia and neighboring countries for more than 20 years.
One of the main activities of the company is the production of sports equipment. Our products are very popular and in demand, among them:
boxes, rings, bags and pears;
wrestling mats;
equipment for sports aerobics and much more.
The range of our company is not limited to sports equipment. We are happy to produce for you tents for summer cafes and weddings, awning garages, trade tents, awnings for cars and boats, as well as pool bowls.
Our son became interested in basketball in the summer, and although there is a beautiful stadium with a basketball court half a kilometer from home, sometimes you want to knock the ball near the house. Therefore, it was decided to make a do-it-yourself basketball backboard near the fence (so that you could knock on a relatively hard road surface, and the ball would fly away, if it didn’t hit the ring, to our site, and not to someone else’s. We deviated a little from the standard and we got the following dimensions (photo is clickable)
The shield was cut out of OSB (just in case, two layers were twisted, and one more, a small square, was added to strengthen the fastening - this can be seen in the photo below) and carefully painted with oil paint
The support was made of metal profiles 50*50 and 56*56 in size. The fact is that that part of the fence, at which the shield is attached, is supposed to be removable for us - it is there that we usually dump soil, crushed stone and other minerals. Therefore, it was decided to make the shield removable. Along with support. We implemented this idea like this.
A short post driven into a pre-dug hole and cemented. The long one is fixed in it with screws. If necessary, it can be taken out. Actually, this is also visible in the diagram above.
Just before the shield was built, we had a welding machine, and this product turned out to be a great workout. The pipes were welded with the letter G, a beautiful rectangle was welded to a short crossbar, on which a shield was attached.
Mesh rings are sold for little money in all sports shops and in many hyper stores. It turned out very nice.
O sport, you are the world!
There is nothing to do in the country, only bending metal, fumbling shish kebab, drinking beer. It is necessary to go in for sports both by ourselves and by children.
True, for this you will first have to "bend the metal" and celebrate this matter with beer and barbecue.
Basketball backboard in the next series of the "Made of Metal" project. Joint work of me and my father.
Batko studied the standards for the height and dimensions of a basketball backboard, made a wooden backboard, painted it, made wing screws, installed a pole. Well, in addition, he made critical remarks to the metal part.
I - designed the whole metal part and welded the metal.
Let's go!
01. First I sit down at the computer and sketch out the drawing of the shield and the pole itself.
The original plan was to put the ring in another place and pull it with a solid hitch to the nearest tree. But there turned out to be a lot of roots and they decided to put them in free flight and without a screed, which is why the ring in the upper part of the column remained rudimentary only in the drawing. Diagonals that are not in the drawing (green) have also been cancelled. We decided that the rigidity of the wooden shield and metal fasteners would be enough not to "walk".
Also on the move I changed the way of strengthening the outrigger knee. Not with a corner as in the drawing, but with two stripes on the sides, see the photo below.
A 5 cm profile was used for the pole, a 6 cm profile was used for the bracket strung on the pole. A strip is welded inside to prevent play. Everything that adjoins the wooden shield is a 25 mm corner.
Important: the ring must be universal for both adults and children of different heights. Therefore, a height offset system was made.
02. The main large elements are welded: a pole, a knee, two stepson solid fuel boosters. The upper edge of the pillar and stepchildren is bevelled: for rainfall and for beauty.
03. More different types
04.
05. There is a strip welded inside the elbow pipe. At the top of the hole.
06. Welded shield fixing system. No, this is not a bottle of Zhatetsky Gus beer, this is gasoline.
07. Stepsons welded on. There was an error in the calculations. It was assumed that the stepchildren would strengthen the pillar from swinging, but they were attached lower than necessary. Further in the photo you will see that they protrude quite a bit from the ground. It would be possible to raise 30-40 cm higher. And now, nevertheless, the pillar sways during the game.
08. The heels are welded to the part that goes underground.
09.
10. Everything is painted
11.
12. Yamka
13. It will stand so for a couple of days and you can continue the part of the column under painted, because there was no putty for metal, to putty the seams. The putty was bought in addition, puttied and repainted a little later.
14. Up!
15. Shield assembly.
16. Done!
17. The ring is now at its lowest point. Even lower than calculated, because one hole is not used (see the vacant thumb screw). Altitude change occurs with the help of one man-power on a stepladder.
18.
19. The village basketball open championship has begun!
Did you have to restrain yourself when you passed the basketball court in order not to throw the ball into the basket? Why hold back? Team sports reliably unite people of any age, religion and social status. And in order to look decent at any moment and on any site, it is enough just not to start training.
Small places for playing streetball can be equipped on sports grounds near the house, and rings for children to play from improvised means can be built in summer cottages. So, how to make a basketball hoop yourself?
Dimensions and materials required
The inner diameter of the basketball hoop is 45 cm;
the height of its upper edge above the playground is 3.05 m;
ring material - metal bar, plastic pipe, improvised materials;
diameter of a bar or a pipe for a ring — 16-20 mm;
distance from the ring to the shield - 15 cm;
mesh length - 40-45 cm;
mesh material - metal chain, synthetic cord, rope, braid.
Types of basketball hoops
Hoops can be different:
metal with anti-vandal nets made of metal chain;
metal with rope mesh;
plastic with nets of various types of materials;
creative (from the remains of construction, from old furniture, from large plastic containers).
The construction of a metal bar ring begins with marking. Since the basket must have an internal diameter of 45 cm, a rod or pipe is selected based on this.
Material length is calculated using the formula:
Bar length = Circle diameter x 3.14 (pi value). We have 45 × 3.14 = 141.3 cm.
Since we need to fasten the ring to the shield, take the length of the rod about 150 cm. You can bend the rod or pipe on the template (wheel), or you can bend it to size, measure the diameter and straighten it with a mallet. The rest of the rod or pipe should be prepared for fastening to the shield using drilled holes and screws.


 For example, the Silverback 54″ Wall Mounted Basketball Hoop Set (link to Amazon) comes with everything you need. The wall mount, backboard, and rim.
 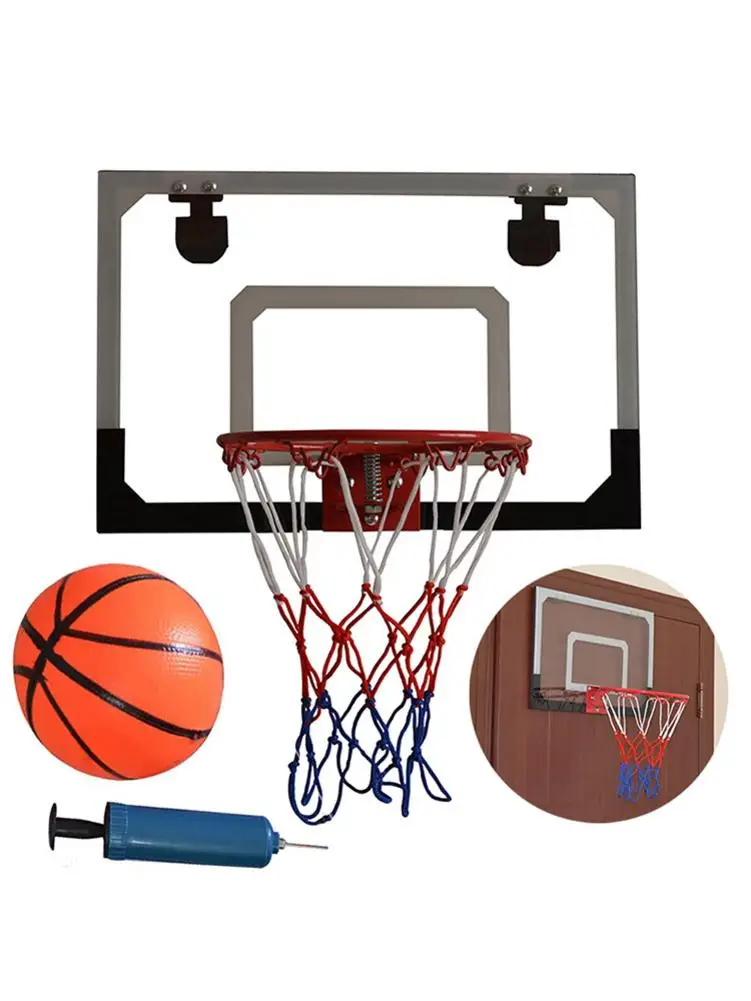 In that case, use a stud finder and do your best to install the wall mount securely into a frame stud.
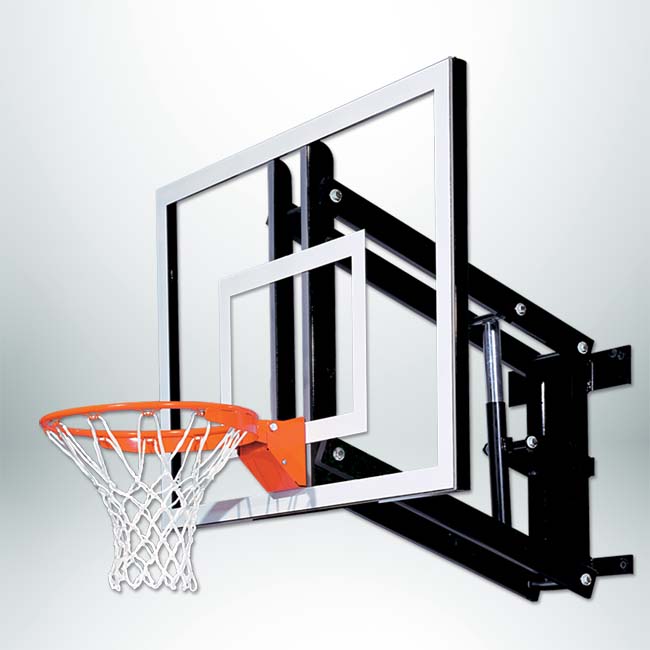

 I think it adds a nice touch to the feel of the court, even if it’s simply in a driveway.
 You don’t have to be a handyman extraordinaire to tackle this project, only an owner of a ladder and a drill and the knowledge to use them.
 You’ll want to attach your hoop against the roof’s studs in the center of the roof, which you can locate with an electronic stud finder.
 Your kit will likely come with nuts and bolts, which you’ll use along with your power drill to install the backboard.
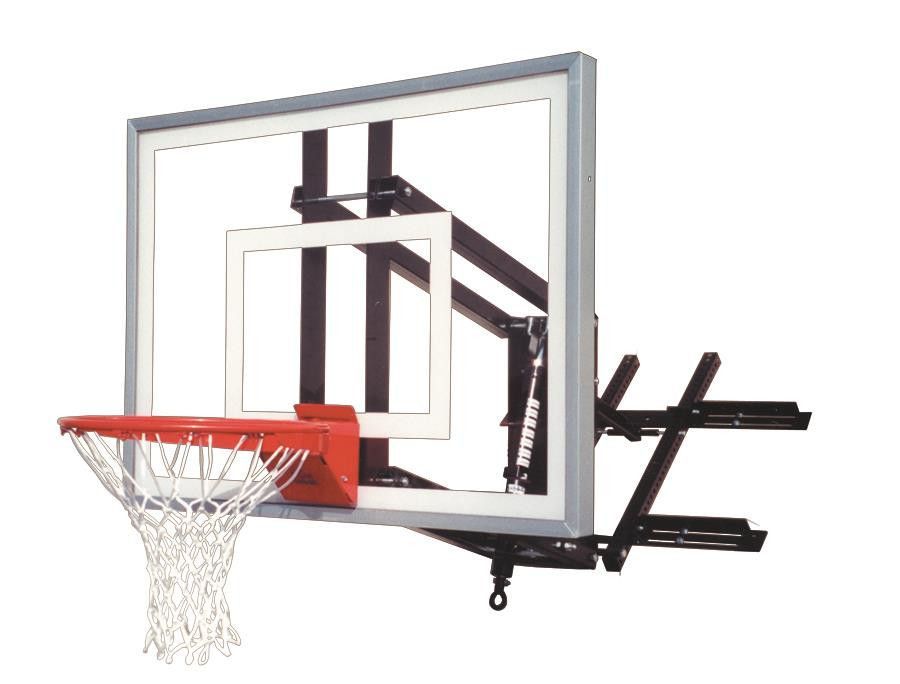 Check to see if the backboard appears straight, even tossing the ball a few times to make it’s not hitting the backboard at any odd angles.
 All Rights Reserved
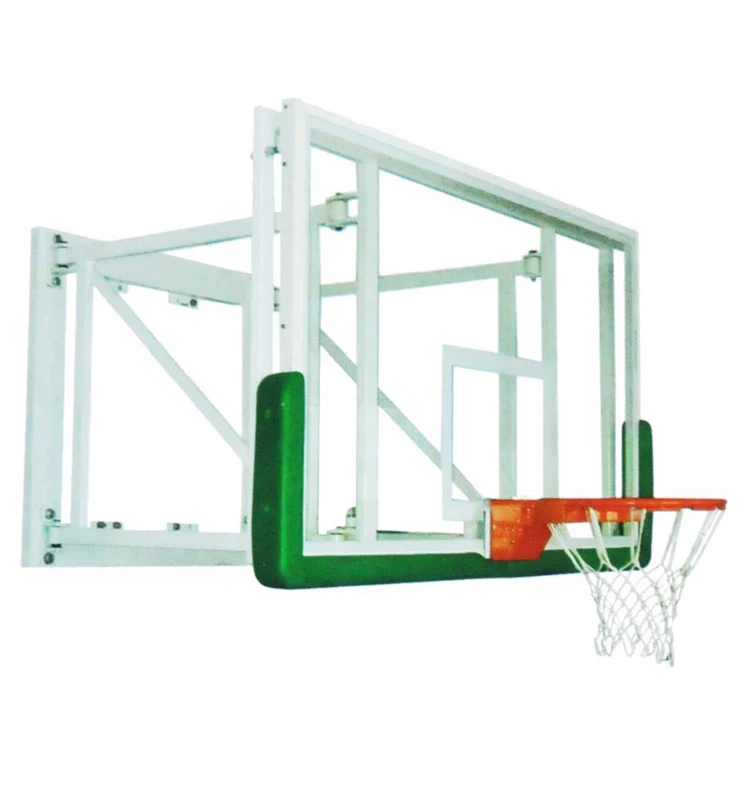
 )
)  If you try, everything will look neat.
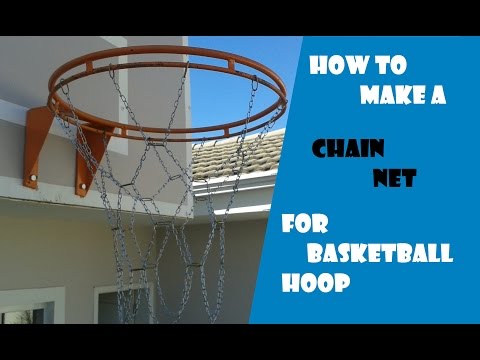
 We wind the wire around it. And do not forget to leave a "sprout" for attaching the resulting ring to the basketball backboard.
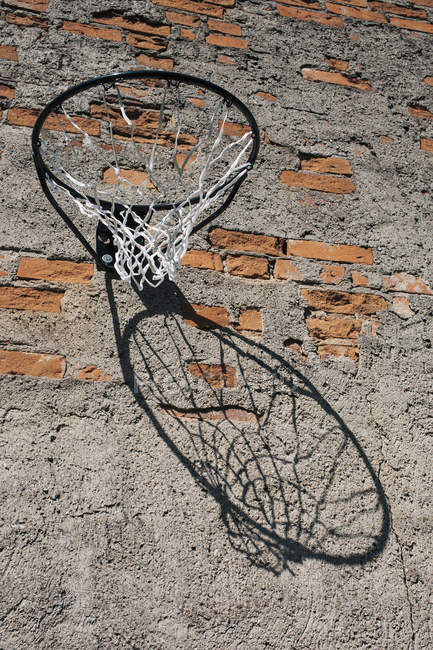
 Its external dimensions are 59 centimeters horizontally and 45 centimeters vertically.
 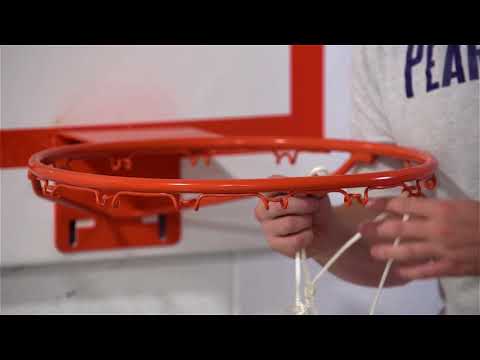 Therefore, there should be no direct contact between the ring and the device that secures the ring to the shield and the shield. However, the gap must be small enough that fingers cannot get into it.
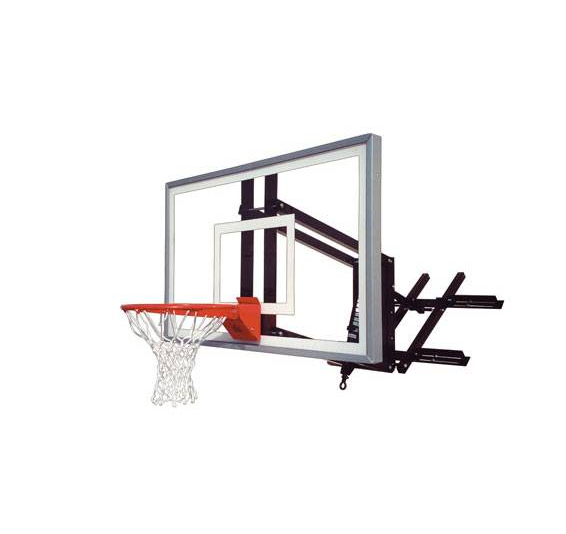
 But it is important to pay attention to one serious point.
 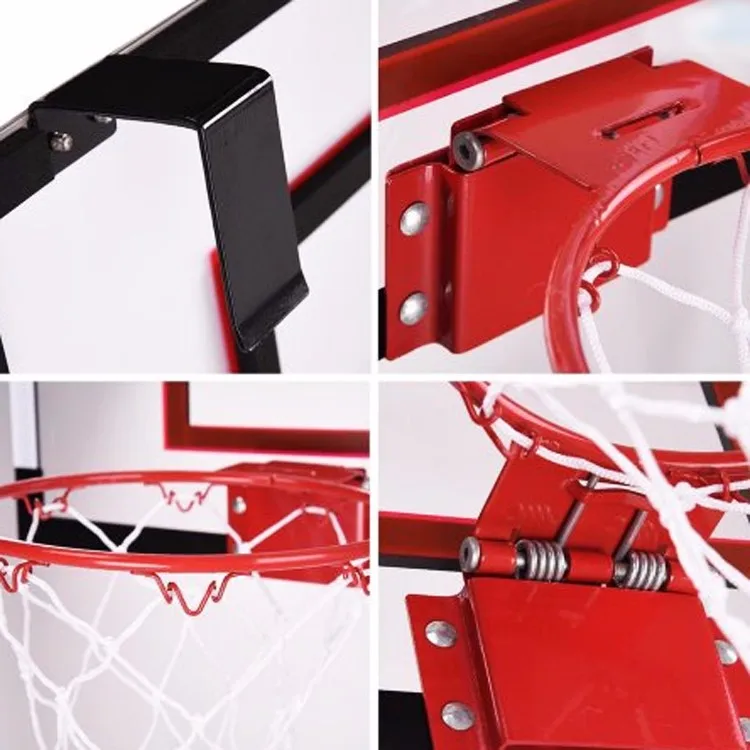 Proposals to make a basketball backboard from plywood, fiberboard, plastic do not stand up to criticism. The first two positions do not pass due to the fact that if your shield hangs in the season in the rain and the sun, nothing will remain of it.
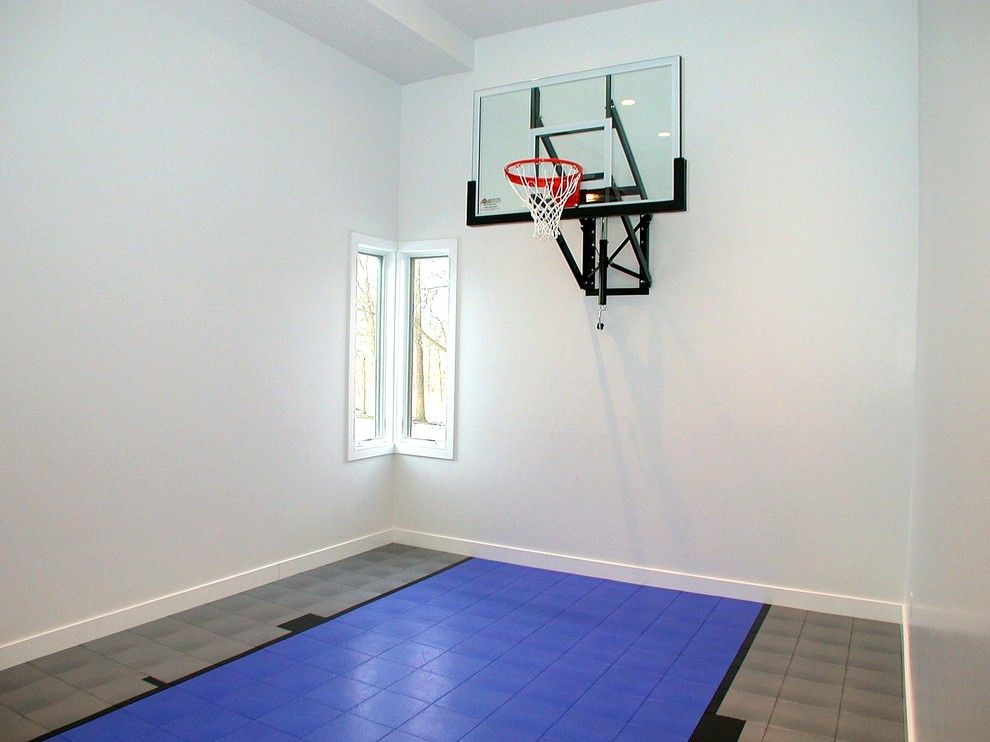
 Today in northern Mexico, one of these games is popular - "Pok-Ta-Pok". It is believed that it appeared due to religious rites, which eventually turned into sports fun and an attraction for tourists. How the game "basketball" appeared, and what is a basketball backboard with a ring as a necessary element of this popular game, we will learn in this article.
  Naismith, given the weather conditions this time of year in Massachusetts, decided that this game should be played indoors.
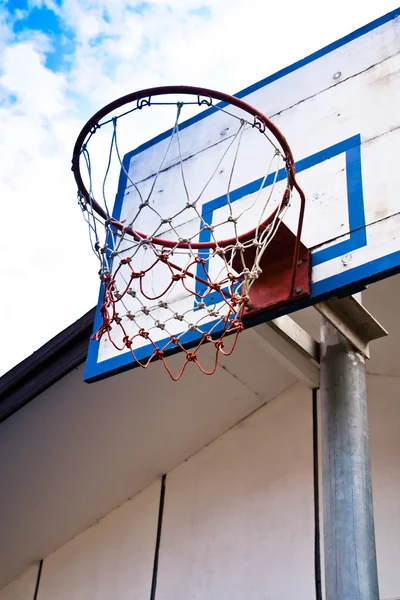

 05 meters from the floor and indented 15 cm from the lower edge of the shield. The inner diameter is selected from the range of 45–45.7 cm. The basketball hoop is painted in a bright color, usually orange. It is impossible to allow the transfer of load from the basket to the shield, therefore, the installation of the product is carried out with special attention.
 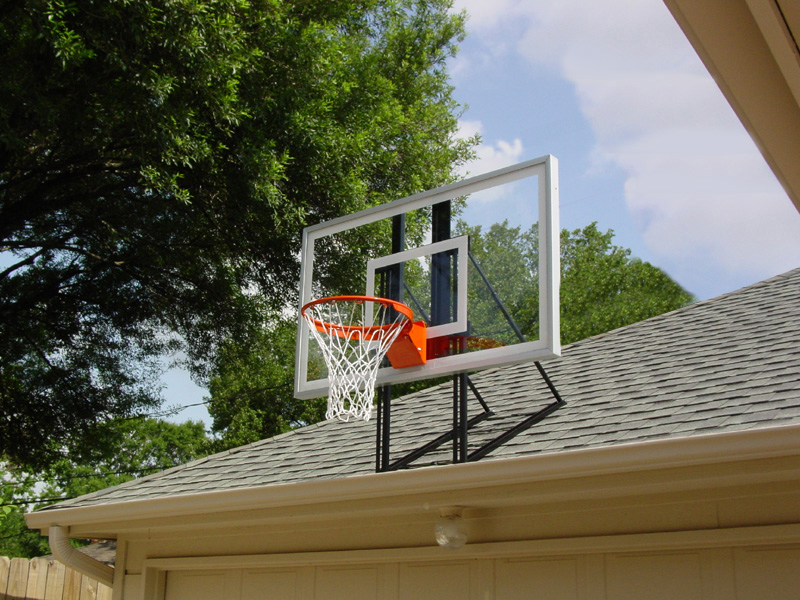 Do not forget to leave a "sprout" for attaching to the shield.
  Thus, the ball does not accidentally bounce to the side.
 Therefore, it was decided to make the shield removable. Along with support. We implemented this idea like this.

 Stepsons welded on. There was an error in the calculations. It was assumed that the stepchildren would strengthen the pillar from swinging, but they were attached lower than necessary. Further in the photo you will see that they protrude quite a bit from the ground. It would be possible to raise 30-40 cm higher. And now, nevertheless, the pillar sways during the game.
  Altitude change occurs with the help of one man-power on a stepladder.