Home »
Misc »
How to make a jump shot in basketball
How to make a jump shot in basketball
Basketball Tip: How to Master the Jump Shot
Basketball Tip
A great jump shot is one of the best things you can add to your game. The best part? You can practice this tip by yourself. Mastering this skill is all about technique, balance, and repetition but the most imperative part is your will to succeed. The greatest basketball players to ever play the game started just where you are now and worked hard to master this skill. Now it’s your turn. Here are a few jump shot tips, that are commonly taught at Nike Basketball Camps, to help take your game to the next level.
Before the shot
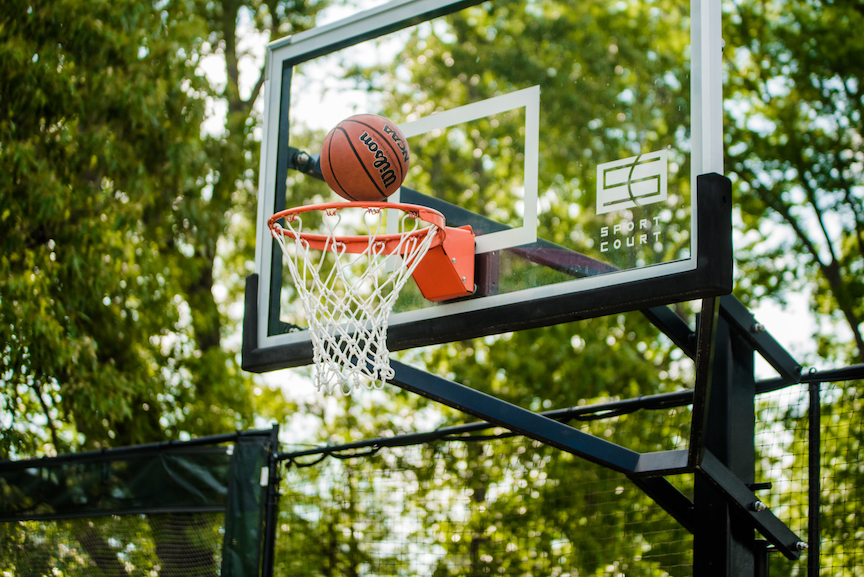
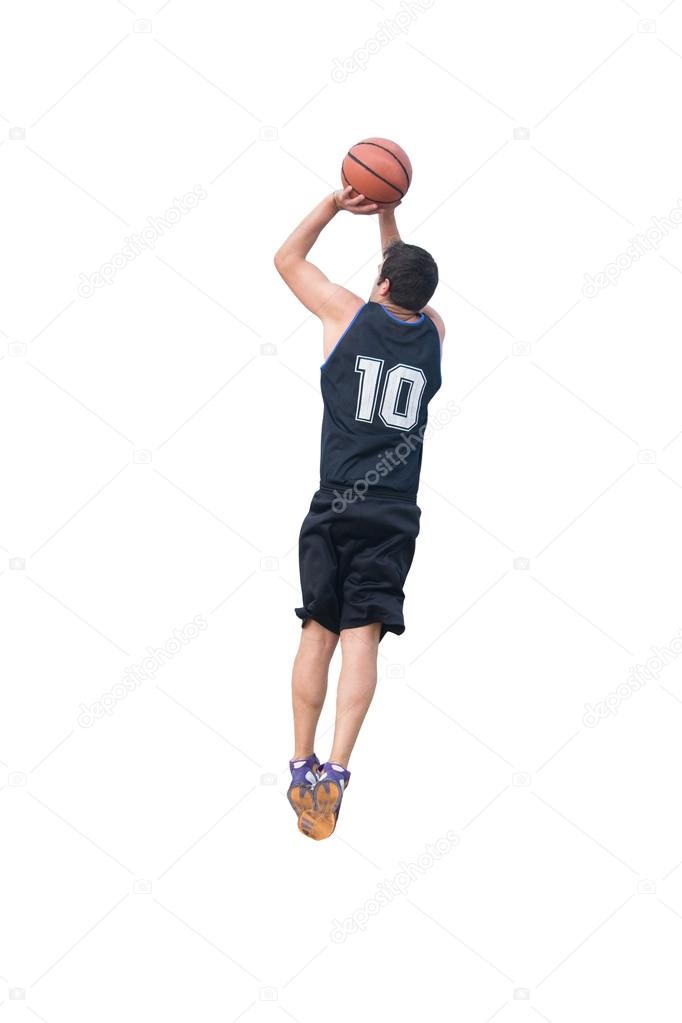
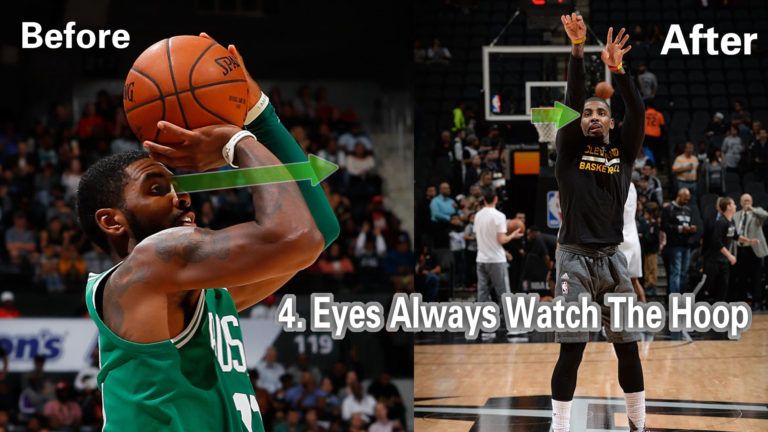
The first step in improving your jump shot technique is keeping your eyes on the rim throughout the whole shot. This will keep your form compact and will lead to a straighter shot. When you get ready to shoot, make sure your feet are shoulder width apart facing the basket and your knees are bent (much like a spring ready to release).![]() Next, you will move the ball into what is called the ‘shot pocket’. This means that you hold the ball just above your waist lined up to the basket. The final thing you do before you are ready to shoot is to find the right grip. In order to do this, you should place the ball’s air hole between your middle and index finger while spreading your fingers enough to feel like you can balance the ball. Let the ball sit on your shooting hand and get ready to begin your release.
Next, you will move the ball into what is called the ‘shot pocket’. This means that you hold the ball just above your waist lined up to the basket. The final thing you do before you are ready to shoot is to find the right grip. In order to do this, you should place the ball’s air hole between your middle and index finger while spreading your fingers enough to feel like you can balance the ball. Let the ball sit on your shooting hand and get ready to begin your release.
During the shot
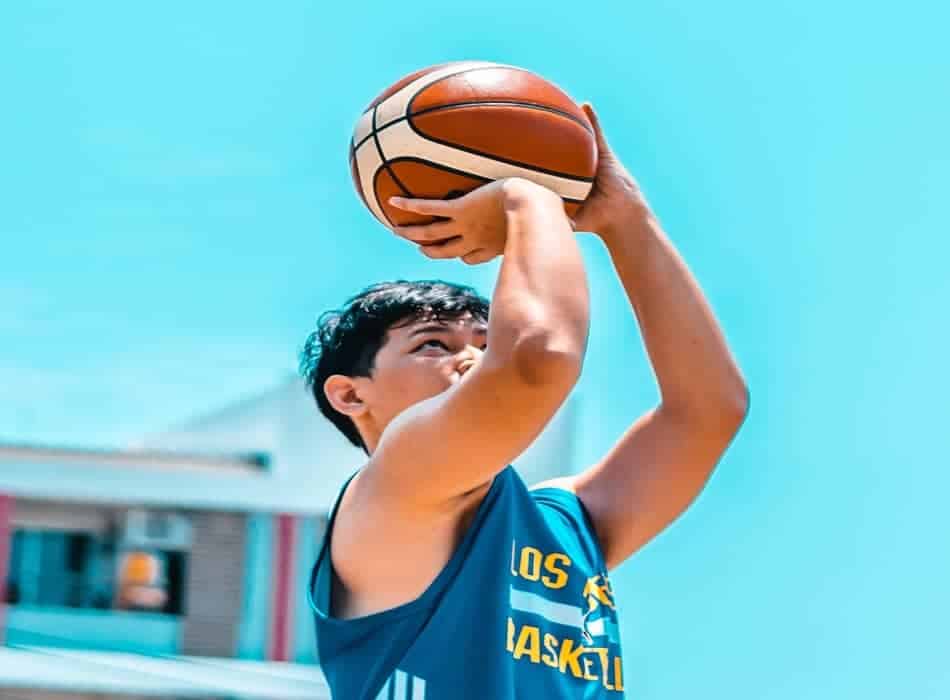
After completing all of the pre-shot prep, you will be ready to move on to the next phase: during your shot. Make sure your other hand or “non-shooting hand” is on the side of the ball. This hand should not affect the ball’s spin and should not move upon release. Begin to bring the ball directly up from the balanced position you had it in keeping your shooting hand’s elbow underneath the ball. Keep the ball in front of you and all at once begin your jump, releasing all of your power loaded up in your bent knees and bent arms at once. Release the ball at the highest point your hands can go and keep your shooting hand pointing at the basket in a straight line. The ball should be in a backspin and you’re on your way to scoring a bucket.
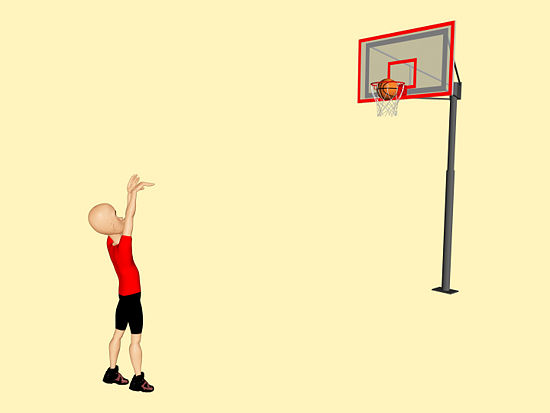
After the shot
After the ball is released try and land in the same spot you jumped to make sure you are balanced. In your follow through your wrists should be relaxed on the way down and your fingers still pointing at where you wanted to shoot. Hold this position until the ball hits the basket.
If you can practice these steps consistently you will begin to see a major upgrade to your jump shot technique and results. Remember: practice makes perfect. Check out more basketball shooting tips and get better this summer at a Nike Basketball Camp near you.
Share This
See all the latests basketball tips
Basketball jump shot: Technique, drills & tips
What is the basketball jump shot?
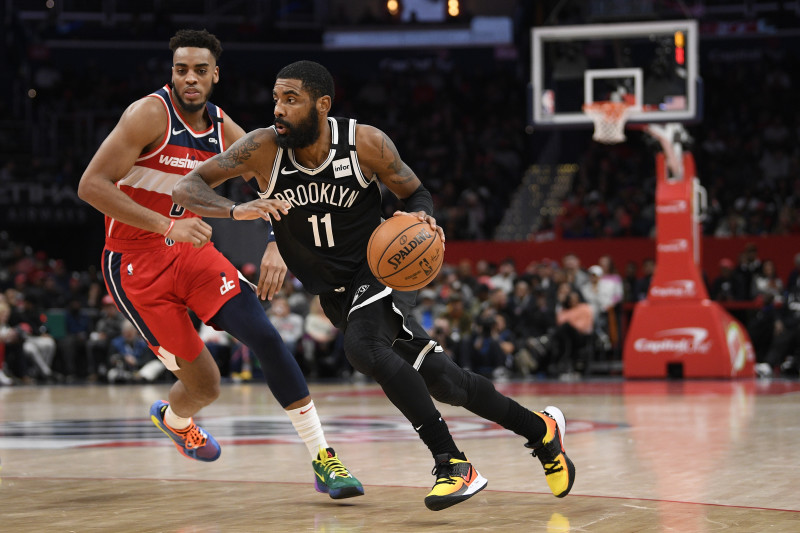
The jump shot is one of the most important shots in basketball. It is a basic shooting technique in which a player throws the ball towards the basket from a straight vertical jump. The jump shot is done with one hand, where the second hand holds the ball in place until the shot is taken. The jump can be made from movement, for example while dribbling, as well as from a standing position.
Fun Fact: John Miller Cooper, an american teacher, is considered to be the inventor of the jump shop. He is said to have used the jump shot as an offensive technique for the first time in history while playing basketball for the University of Missouri.
Ad
Advantages of the jump shot compared to a standing shot
- Higher chances of success: The ball is much more difficult for opponents to block than with a standing shot, because the players can jump straight into the air and throw the ball from a much higher angle above the head.
- Less effort and more momentum: If the jump shot is taken from a run, the momentum from the running movement can be transferred directly into the shot.
 This allows players to throw more powerfully, faster and more dynamically with significantly less effort overall.
 - Better throwing angle: With a strong jump the attacker can achieve a better throwing angle to the basket.
Disadvantages of the jump shot compared to the standing shot
- High coordinative demands: The difficulty with the jump shot lies mainly in the coordination of the jumping movement and the relatively fast throwing motion.
- Requires a lot of practice: The technique of jumping requires a lot of practice. For this reason the shooting technique is only suitable for advanced basketball players.
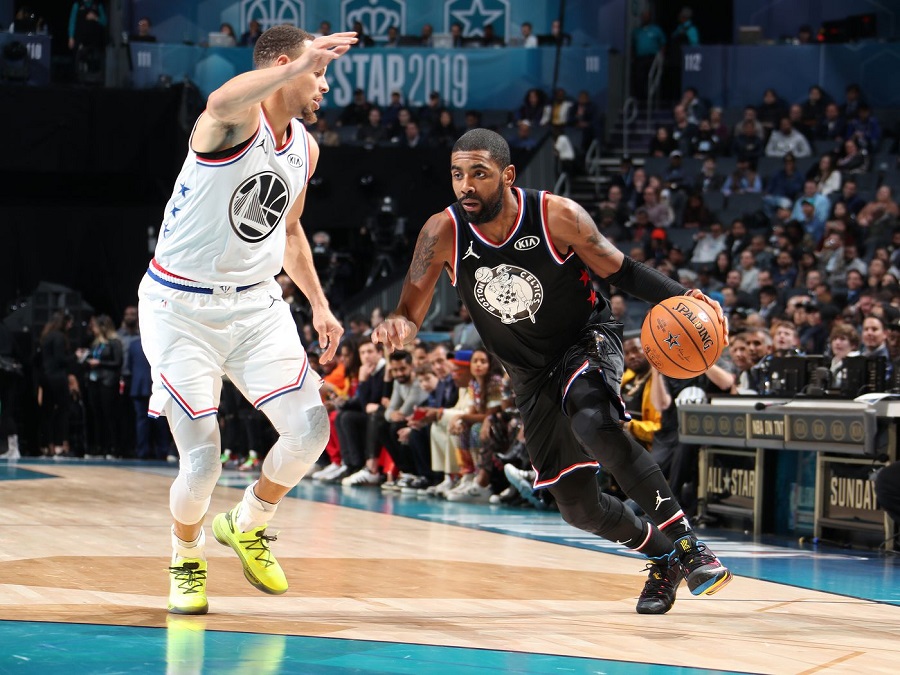
The jump shot is an effective offensive technique over longer distances.
How does the jump shot work?
The straight vertical jump is achieved by the explosive extension of the legs and the simultaneous raising of the arms. At the highest point of the jump phase, the player then executes the actual throw with his hand.
For the jump shot, players only use one hand or one arm for the throwing movement. The second hand keeps the ball in place in the throwing hand until the time of the throw. The second hand supports the ball from the right or from the left until the time of throwing, depending on whether the ball is played with the left or right hand. The advantage here is that the player has better control over the execution of the throw.
With the jump shot you make it harder for opponents to stop you as a player.
Important training basics
Ideally, you should already have mastered these basics before you begin to train for the jump shot:
- catching and throwing while standing and in motion
- standing shot (position shot)
- offensive strength
- great throwing and jumping power
- good coordination
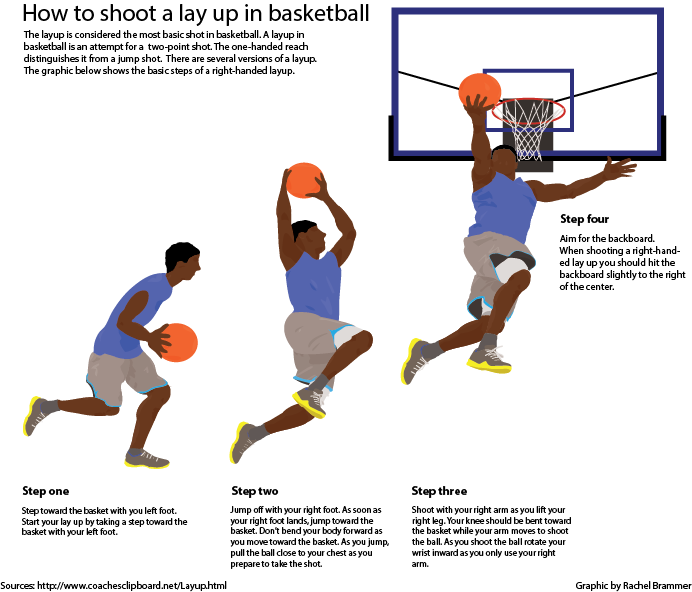
The correct execution of a jump shot
The following video will show you how to correctly execute the jump shot as a beginner:
The phases of a jump shot
The jump shot generally consists of three phases:
- 1.
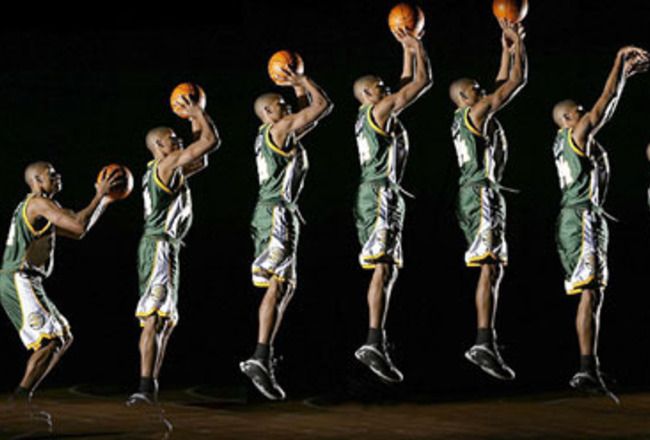 First, a straight vertrical jump is executed.
 - 2. Shortly before reaching the highest point of the jump, the actual throwing motion is initiated (arm-hand-guidance).
- 3. The ball should not leave the throwing hand until the apex - the highest point of the jump - is reached.
All the phases mentioned seamlessly transition into each other . The descending phase of the jump ends in the landing. The jump shot can be executed either from a standing position or from movement (jump shot after receiving a pass or jump shot out of a dribble).
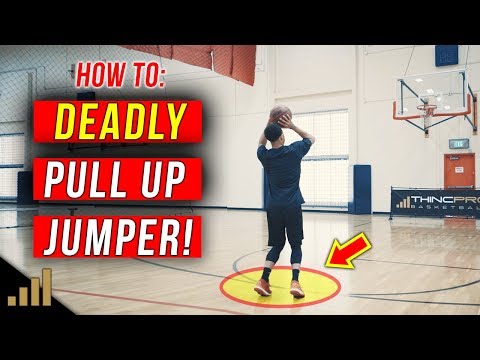
Tips for the execution of the jump shot
For a technically clean throwing technique a number of points need to be considered: For example, how you receive the ball, foot position, but also body and hand position as well as elbow position are important. In the following we will explain how to do the jump shot correctly step by step.
Note: The following manual is designed for right-handed players.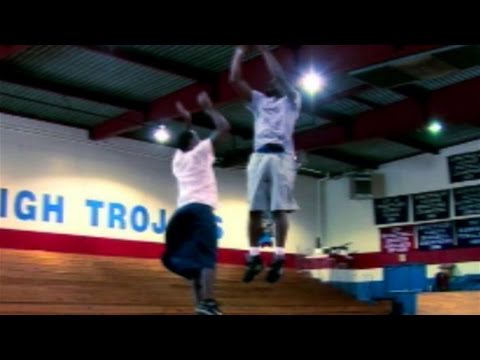 Left-handed players can simply reverse the information given here.
Ad
The Starting Position
The shot begins with the correct reception of the ball. The goal should always be to accept the ball the same way the player wants to throw it afterwards. In other words: After catching the ball, hold it loosely in front of the body in your throwing hand. The middle finger is pointed forward and the left hand supports the ball to the side (T-shape). The legs areshoulder width apart and the toes point towards the basket. The feet are parallel to each other or are in a slight stepping position. This means that the right foot (for right-handed people) can also be slightly in front of the left foot. The knees are bent slightly and also the upper body tilts forward a little. Jumping
- The player now swiftly and dynamically moves the ball upwards over their head.
 The movement should be fluid. The swinging motion of the arms provides a stronger jump.
 - The elbows are kept loose and in a natural position: They should neither point too far outwards nor lie too close to the body.
- By extending the arms, the vertical upward jump has already begun. It finally ends at the highest point of the jump (apex).
The throwing motion for the jump shot is the same as during a standing throw.
Shooting
- The actual throwing phase begins shortly before reaching the apex.
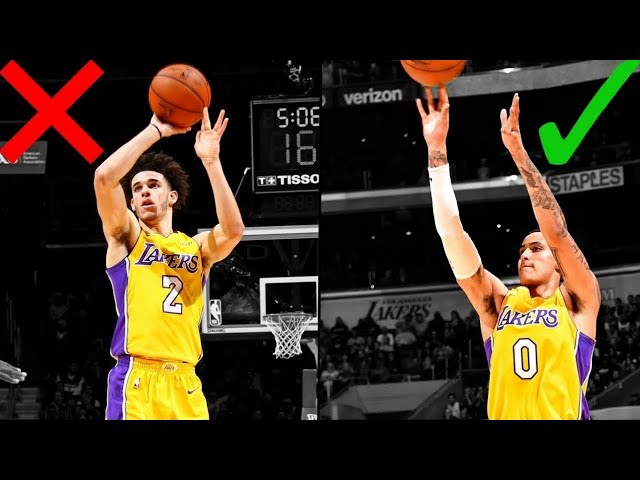
- In the actual throw the elbows should be at least at shoulder height. This is the only way to accurately and effectively perform the throwing motion. The ball lies only on the fingers, not on the palms.
- Once both shoulders and elbows are at a 90 degree angle, the player flicks the wrist forward. It is important that the movement is primarily upwards and that the wrist does not bend too far downwards.
 This allows a good throwing angle onto the basket. You can also see tips on hand positioning when throwing a basketball in the following video.
 - The movement pattern of the actual throw is therefore identical to the arm-hand and ball-hand-motion of the standing throw (position throw): Here the player does not take the throw from the jump but from the standing position.
The Landing
- After the throw, the player lands firmly on both legs, bends their knees slightly and moves their center of gravity forward to regain composure immediately.
- His feet, but also the index and middle finger of the flicked wrist are pointed towards the basket.
Common Mistakes
- The right timing: It is very difficult to coordinate throw and jump correctly. To achieve the optimal timing, a lot of practice is necessary. Therefore, it is most important that you have patience and intensify the training progressively.
- Leg position during the jump: In order to generate enough power for the jump and retain your balance at the same time, it is important that the feet are shoulder width before the jump. If the stance is too wide, the player's reaction time is slowed down, if the feet are too close together, this is to the detriment of balance. In order to optimize leg position, you can first practice jumping without throwing.
The jump shot is great for scoring points from a distance.
Jump Shot Variations
There are a number of different variations on the jump shot. In the following we present the most popular ones.
Fadeaway Jump Shot
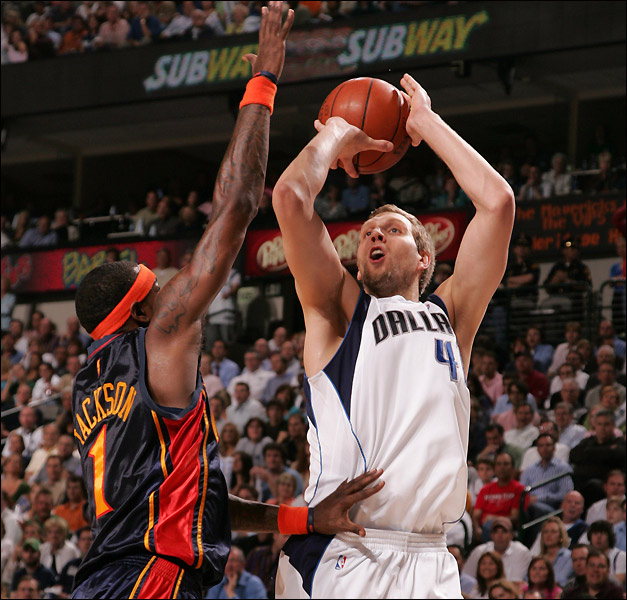
A variation of the jump shot is the "fade away jump shot". The player does not jump forward as usual, but lets themselves fall backwards during the jump.
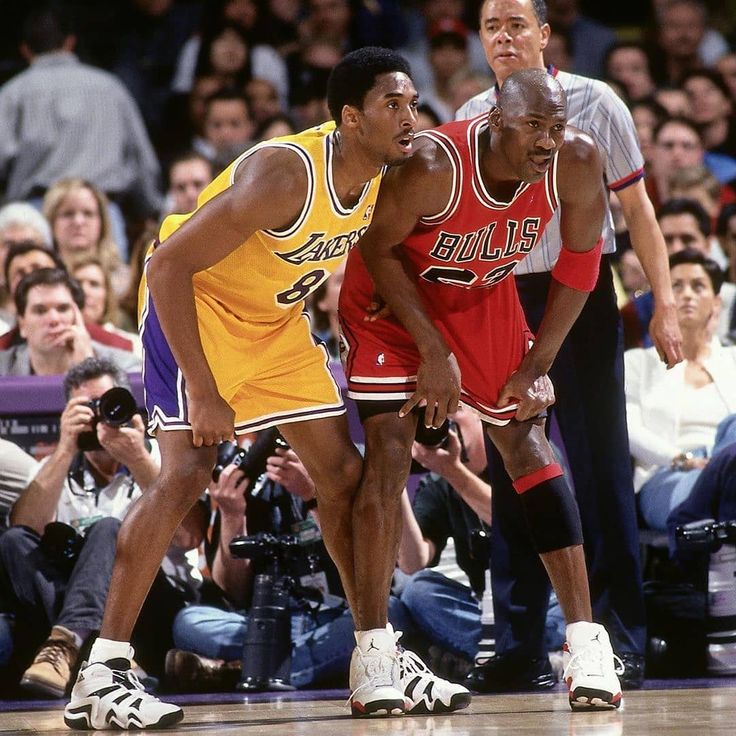
The advantage: The intentional backward movement increases the distance to the defenders, who are normally close to the player.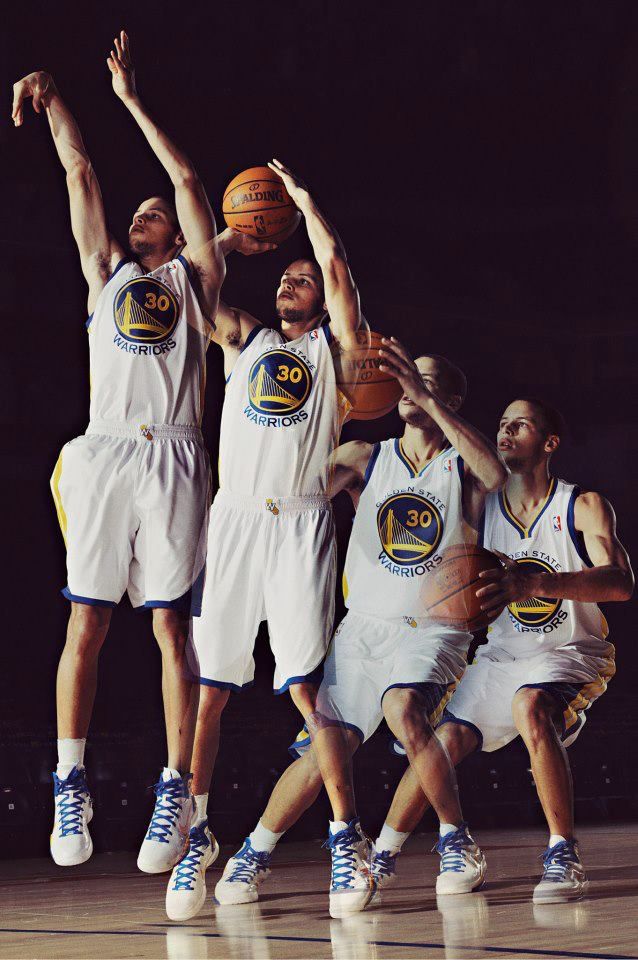 By increasing the distance, the shot becomes a lot harder to defend. The NBA players Michael Jordan, Kobe Bryant and Dirk Nowitzki are known for their fadeaway.
Leaning Jump Shot
The counterpart to the fadeaway jump shot is the "Leaning Jump Shot" (also "Leaner"). The player does not move backwards during the jump but moves forward.
The advantage: The variation helps the attacker to jump past or over the defender. The forward movement usually surprises the opponent, so blocking is more difficult for him. Defensive players who follow the attacker can also be easily defeated.
Because the jump can be executed directly out of a run, the player can also take advantage of the existing momentum and transfer it directly into the throw. Most often the "Leaner" is thrown from a short distance close to the basket.
Ad
Turnaround Jump Shot
For the "Turnaround Jump Shot", the attacker has his back turned towards to the defender, jumps off and then spins around in mid air.
By jumping, they push themselves away from their defender in a turning motion and throw the ball after they have turned 180 degrees. This variation was made famous by Michael Jordan.
Step Back Jump Shot
The "Step Back Jump Shot" is initiated by a step forward. The attacker then steps back to their previous position and executes a regular jump shot. This increases the distance to the defending player, similar to the "Fadeaway Jump Shot".
The advantage: By stepping back, the attacker creates enough distance between himself and the defender to execute the jump shot unhindered.
The jump shot allows you to throw over the defenders.
Basketball jump shot: Exercises & tips
Here we will show you the best exercises with which you can train the jump shot with your team.
For beginners: position throws (standing throws)
Before jumping right into training for the jump shot, players should get comfortable with standing throws first.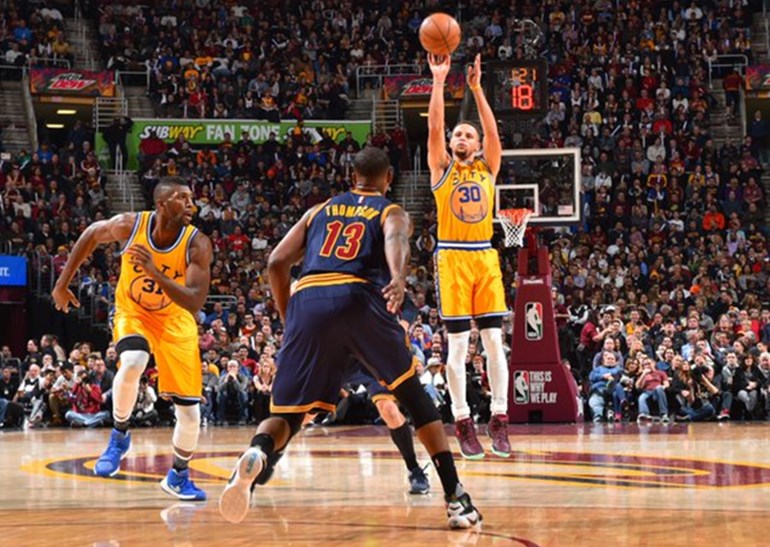 Start by practicing a few free throws or close and medium range throws.
You can use this exercise as a warm-up to develop a feel for throwing the ball. This video will show you how to properly execute a standing throw:
Jump shot from a standing position
You can take it one step further by training the jump shot from a standing position. The following video by FC Bayern (German basketball team playing in the BBL, Germany's premier basketball league) will teach you the technique for this as well as show you a few exercises you can incorporate into your training:
Jump shot while moving
The next level of difficulty is the jump shot while moving. Once you have the technique for a standing throw as well as the jump shot from a standing position down, you can start practicing this technique. The following video will teach you, proper execution as well as exercises and a few tips on how to get better:
Tip: In order to strengthen the jumping ability of your team, you should vary the different jumping techniques and exercises during training again and again. For advanced basketball players it is advisable to, for example, employ obstacles or to make the jumps more difficult by increasing the load (e.g. weights).
Practice makes perfect...
To further your team's chances of success, we recommend training your mental strength or finding strategies on how to strengthen your team spirit.
If you want to read more about basketball, you can also learn how to plan and structure your basketball training.
Are you also looking for the right jerseys for your team? You will find a variety of completely customizable basketball jerseys in our online shop. We look forward to hearing from you!
Ad
Photo credits: Title picture: © gettyimages/miodrag ignjatovic, Picture 1: © gettyimages/South_agency, Picture 2: © gettyimages/Svetikd, Picture 3: © gettyimages/Deimagine, Picture 4: © gettyimages/bymuratdeniz, Oicture 5: © gettyimages/oneinchpunch
Shooting exercises
replica swiss watches
Basketball is a great team game, the team consists of players whose skill is achieved with great effort.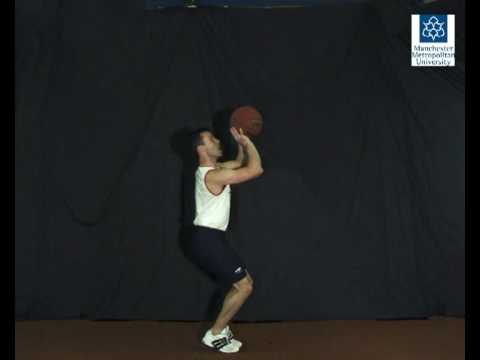 The only person who can understand that you are working hard is yourself. Remember, you only get out of the game what you put into it. Give yourself to her without a trace.
Jump shot
In basketball, an outstanding sniper is a piece item. If you want to be a great sniper, all you need to do is just want to be one.
First, you must improve your skills.
This includes having a good coach and years of training. Secondly, you must improve in game mode.
This means that you must perform throwing drills at the same intensity as in the game. It's far better to hit 100 shots in play than 500 sloppy shots that a good defender would never let you make in a game. Finally, you must understand that working on a roll is like investing in a bank. If you don't deposit anything into your account, you won't receive dividends when you need them.
The sniper must have "throw school". When throwing after a dribble, one of the main features is the last hit of the ball on the court, which must be fast and strong so that it bounces higher, right into your hands - this will help you not waste time handling the ball.
Individual Shooting Exercises
Exercise 1 Attention Concentration
- Start from a distance close to the ring.
- Throw with one hand. Follow correct technique.
- Make five from each position. Take a step back and repeat (Fig. 1).
Exercise 2 7 throwing positions and rebound (4 meters)
- Jump shot from position 1.
- Pick up the ball, dribble quickly to position 7, shoot.
- Pick-up, fast with guiding back to position 1.
- Make 10 rolls.
- Repeat the same steps using positions 6 and 2, 5 and 3, 4 (Fig. 2).
Exercise 3 7 shooting positions and a rebound (from behind the three-point line)
1. Repeat the same steps as in exercise 2 (fig. 3).
Exercise 4 Throw after stop
- Start from position 1, toss the ball to position
- Pick it up, while you have to run around the ball so that you are facing the ring.
- Make 10 rolls, then advance to the next position.
Ex.5 Shooting from five positions after a fake move (from four meters or from behind the three-point line)
- Start from any position.
- On bent knees and with your head up, you do a throw feint, hit the ball one or two with your right hand, stop and jump.
- Return to position, throw feint, one or two hits with the ball with the left hand, stop, throw.
- At each position, 5 attempts (Fig. 5).
Exercise 6 Jump shots after dribbling
- Start the exercise from the center of the field, move towards the hoop with dribbling at game speed, after stopping quickly shoot.
- The shot must be taken from a middle distance or from behind a three-point arc. Perform the exercise, both on the right and on the left and in the middle of the site.
- Use different types of dribbles: fast dribbles, broken tempos, pivots, etc.

- Make 5 attempts in each direction (Fig. 6).
Exercise 7 Playing with a virtual opponent
- Perform a free throw. If you have implemented it, you get one point. If not, then your "opponent" is three.
- You make subsequent throws from any position except the three-second zone, imitating the rhythm of the game. Work on different moves and throws. Each of your successful attempts is estimated at the bottom of the point, unsuccessful at two for the "opponent". The game goes to 11 points.
- This is a very good exercise to consolidate what you have learned. Try! Improve! (Fig. 7).
Double shots
Dr. 8 2 players, shot and rebound (4 meters or from behind the three-point line)
- The drill starts with a good, clear pass. The player who made the pass from under the basket goes to the place of the thrower.
- The player in position 1 catches the ball and shoots.
- After the shot, the player runs to the rebound and then passes the ball 1 position and so on.
- Each player must make five throws. The exercise is performed at a fast pace, but the throws should not be sloppy.
- Then move to another position and everything is the same (Fig. 8).
Exercise 9 Two players, throw and rebound (per result)
- The exercise is performed as described above.
- The player who made the pass tries to interfere with the shot, but does not block.
- Game up to 5 hits.
- Then we move to another position, and so on. (Fig. 9).
Exercise 10 Two players, throw and rebound, throw feint
- The exercise is performed in the same way as the previous one.
- The defender who made the pass tries to interfere with the player in position 1, but does not block the shot.
- The attacker makes a throw feint and beats the defender.
- Performs a short dribble, stops and throws.
- Do 5 times each and change position (Fig. 10).
Ex. 11 2 players, shot after a stoppage (from four meters or from behind the three-point line)
- The attacker is in position 1, ready to receive the pass.
- The player under the basket passes.
- After the throw, the attacker waits for the rebound to be made.
- The player receives a pass by making a stop, but already in position 2. Then back.
- Make 7 throws, two free throws and switch (fig. 11).
Ex. 12 Shooting with movement (from four meters or from behind a three-point arc)
- The attacker moves around the perimeter at game speed.
- A player passes to the hand farthest from the ring.
- The attacker must stop, catch the ball and throw.
- Make seven throws, two free throws and change (fig. 12).
Note: The previous exercise has three options.
A) Receive the ball and throw it.
B) After receiving, throwing feint, dribbling in the same direction, throwing.
B) Receives a pass, throw feint, dribbling to the ring in the other direction, stop, throw.
Ex.13 Various dribbling options and a jump shot
- The attacker starts from the center of the field and, dribbling at game speed, moves towards the ring, stops and takes a jump shot.
- The player under the basket picks up the ball, the attacker runs to the center of the field, and receives the ball on the opposite flank. Moves with dribbling to the ring, stop, jump shot.
- On the right side, dribble with the right hand, on the left - with the left (Fig. 13)
Note: Use speed dribbling, change of pace, transitions, pivots.
Three players, two balls
Exercise 14 Warm-up exercise
- One player throws, another passes, a third rebounds.
- Thrower becomes rebounder after seven tries.

- Passer - thrower. Picking up - passing (Fig. 14).
Note: different options are possible
1) From seven positions (four meters)
2) From seven positions (from behind the three-point arc)
3) From five points with feints to shoot
4) Throw after stoppage
5) Throw and rebound (constant rotation around the circle)
Double shots: using screens
To use the screen effectively, you must read the defender correctly. You must always see the player with the ball and how the defender defends against you. A player who moves well off the ball and knows how to use screens correctly is very useful offensively. When you watch a match that has good players, notice how well they move off the ball. The hardest thing to defend against is a well-moving attacker.
Exercise 15 Back screen and snatch
- The player imitates opening and screening behind his back, makes a dash to the corner of the court.
- Throw to the nearest hand.
- Attacker catches the ball and shoots.
- The attacker picks up his shot, passes to a partner and returns to his original position.
- Make seven attempts and change (Fig. 15)
Note: do not back away when dashing, turn around and run, but do not lose sight of the ball.
Exercise 16 Screening behind the back, "false" screening
- 1. Attacker starts on the base of the trapezoid and moves up to imitate the screening.
- 2. After the imaginary breakout runs, the screening attacker rises to the ball and prepares to receive the pass.
- 3. Having caught the pass, he immediately makes a throw.
- 4. Make seven attempts and change (Fig. 16).
0003
- An attacker imitates a defender aiming for a screen and rises sharply towards the ball.
- The player must be ready to receive the ball.
- The attacker catches the ball and makes a quick throw.

- Make seven attempts and change (Fig. 17)
Exercise 18 Screening the ball carrier, moving away from the ring
- The attacker screens the ball carrier.
- The ball carrier passes through the screen aggressively.
- Instead of pulling back to the basket (deuce), the screening attacker moves away from the basket and prepares to receive the pass.
- Having caught the ball, he immediately makes a throw.
- Make seven attempts, then change.
Exercise 19 Barrier at the base of the trapezoid - opening to the flank
- The attacker takes the player under the ring, breaks shoulder to shoulder through the barrier and makes a dash to the flank.
- When catching the ball, the player must turn to the ring.
- Use different throw options: just throw, and dribbling to the right or left after a throw feint. Change after five attempts (Fig. 19).
Exercise 20 Screening at the base of the trapezoid - opening into the corner of the court
- The attacker takes the player into the three-second zone, pretends that he will break through to the flank through the screen, the defender starts running around the screener through the three-second zone.
- The attacker makes a dash to the corner of the court, and the defender hits the screen.
- Further, the same as in the previous exercise (Fig. 20).
Ex. 21 Screen at the base of the trapezoid - dash inward
- The defender is chasing you, not falling behind until the very screen.
- Then you run through the screen as close to the screener as possible and break into the three-second zone or foul line area.
- Receive the ball by turning towards the hoop and throw it.
- Also work out various options for continuing after receiving the ball. After five attempts, change (Fig. 21).
Throws in pairs: pass and discount
Exercise 22 Pass and discount - starting from the center of the field flank.
The receiving player is opened for transmission. Player receives a pass and shoots. The player who made the pass picks up the ball and gives it to the thrower. Players switch roles. Everyone makes ten throws (Fig. 22).
Exercise 23 Pass and discount - start from the flank
Variation of exercise 22 (Fig. 23)
Exercise 24 Pass and discount - start from the corner of the site one more
exercise 2
more variation 3 .24).
Updated on 18.03.2014 00:40
Jump shot | Basketball
What basketball player does not feel joy when his shot reaches the goal. There is no more pleasant sight for him than the ball slipping into the net. But how difficult it is to achieve!
I told about the passage under the enemy's shield. But my handwriting as a basketball player was more characterized by a jump shot from medium distances, less often from long distances. Most often I had to throw with a deviation of the body. This is not from a good life - now the defenders take care of the attackers hard, if you hesitate a little - the attack will be thwarted.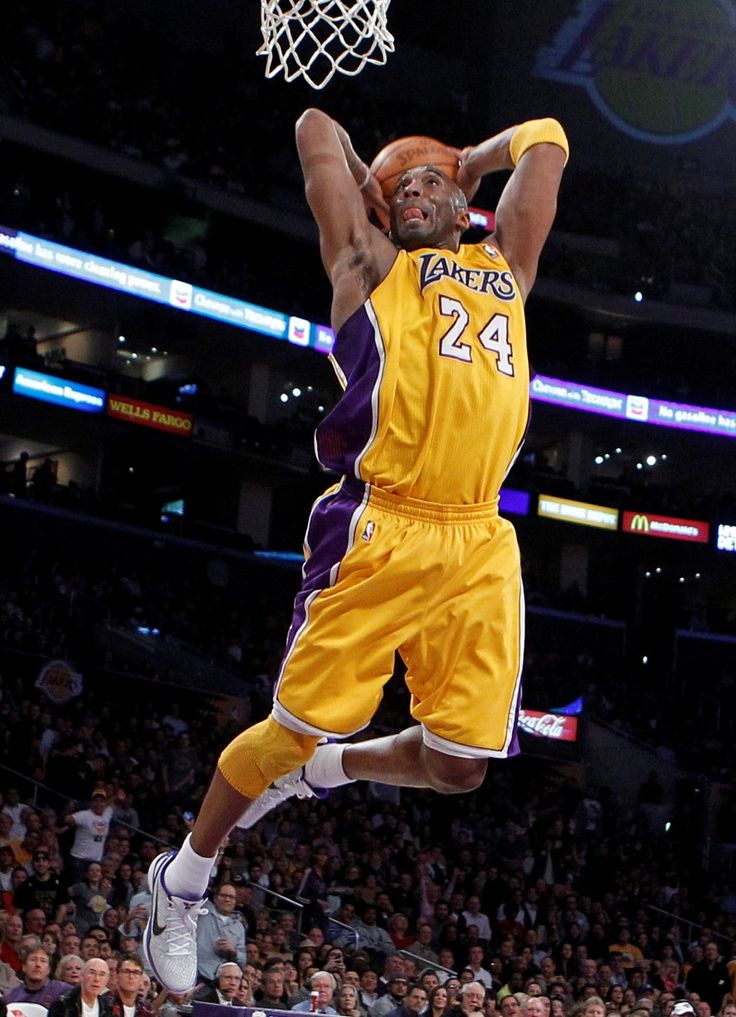 And the tall one will simply cover the “ordinary” throw.
How useful my Siberian school was to me later. In Tomsk, from the age of 14, I began to play in the company of students of a construction, then a polytechnic institute, and at 16, I was not inferior to them in anything. And relentlessly polished the throw. This is where athletics and volleyball training came in handy with its jumps with repulsion with two legs, which developed my legs so much, made an instant start and, as my comrades called it, an “explosive” jump to throw.
What is required for a successful jump shot? The quick last step before the jump is the so-called stopping step (see filmogram, frame 1). To increase the emphasis and slow down more sharply, the stop foot should be placed with the toe not forward, but inward (frame 2). Having jumped out, deviate already in flight back away from the guardian, release the ball from a fully extended arm at the highest point above the head, sending it into the ring in a steep arc (frame 3).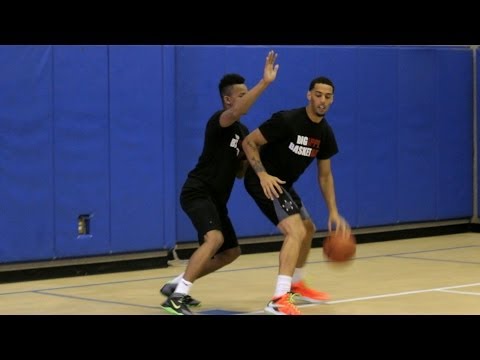
This is the technique of the jump shot
It only takes experience to, having entered the zone with the ball under the opponents' backboard and being surrounded by defenders, calmly perform a shot around the ring
But, obviously, it will be more interesting to consider the throw technique on a specific example. Yes, and all basketball techniques can be performed in isolation from each other only in training, in the game they form a single logical chain. Here, in my opinion, is the episode of the end of the attack, characteristic in all respects, in the match of one of the championships of the country CSKA - Kalev (Tallinn).
Already at the start, I was assigned a short, but the sharpest, highly technical Kalev player Alexei Tammiste (then he was replaced by Mihkel Tike). The situation recorded on the film was quite typical for this match. My colleague Viktor Petrakov put up a barrier that Tammiste ran into. A gap was formed in the Kalev defense, which was usually famous for its density (frame 1). We had to get there before the rivals. Covering the ball with my elbow, I slip between two Estonian defenders (frame 2). But then their center Rashid Abelyanov appears on my way (frame 3). With a sprout, he exceeds me that way by 12 centimeters. Only my very “crown” can help out here. I jump out, tilting the body back, and on a steep trajectory I throw the ball into the ring over Abelyanov's raised arms.
More than once starting attacks in the same way, I often then chose a different, combinational, continuation. With an unexpected pass for the opponents, he led Petrakov to the final throw, who, after the screen, went to an empty place (see the cinematography). Basketball players call such interaction a “two”.
Subsequently, I reconsidered my attitude to the throw with body deflection. At one time, when choosing a throw method, I did not have enough information. Having enriched myself with it, I somewhat changed the manner of throwing, and in the last years of my performances in big basketball, it looked like this.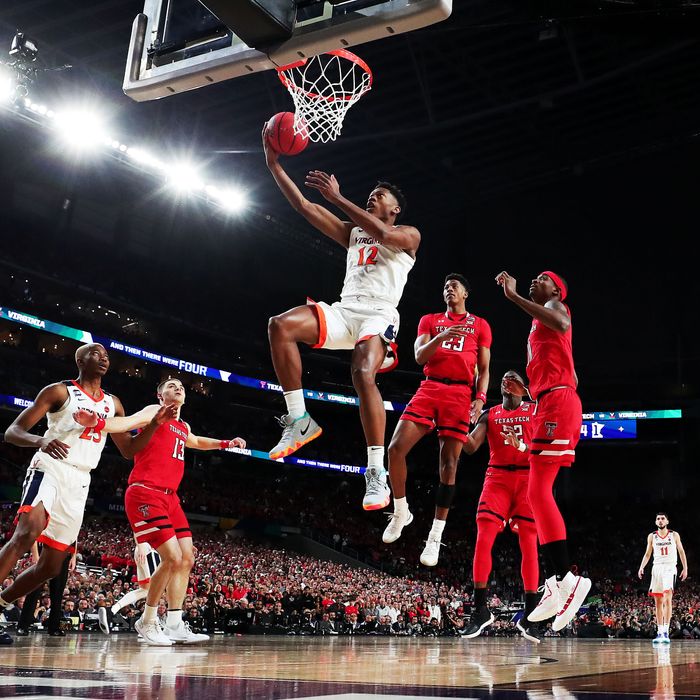
Jump up - strictly vertical. The throw follows (i.e., the ball is released from the hands) at the highest point of the jump with an open hand of a fully extended arm.
The jump itself should be as powerful as possible, but in the air the basketball player needs to relax.
Shoulders turned towards opponent's basket. The position of the ball on the hand is the same as described in the next chapter "One on one with the ring", i.e., as when breaking free kicks. By the way, it would be ideal if the basketball player achieved absolute uniformity in the performance of field goals and free throws.
The main error that leads to misses in jump shots is the wrong choice of the throw trajectory. Often the player sends the ball along an underestimated trajectory. You always need a cool one.
On such a throw, I repeat, I stopped. But this does not mean at all that in my recommendations I would decide to exclude all other methods. The choice of the crown, and therefore the most reliable, throw is very important for a basketball player. And you need to make this choice as early as possible.
After all, any player in a match has the ball for a few minutes, and the whole set of technical means simply does not have time to apply. To master this set, of course, you need to completely, but in the game you inevitably meet with the need to choose one means, one technique. And if you are given a few moments to make this choice, as is the case with a throw, of course, it is better to opt for your signature one.
This means that it must be sanded first. What it should be like - you yourself can gradually reach this, but it is better if a coach helps you make a choice at the very early stages of training.
At one time, airborne jump shots were very popular. But, encountering guardians who could just as well, if not better, jump and hang, basketball players gradually abandoned this method. Although even today a situation may arise on the site in which you can beat the guardian by tightening the jump.
As for the deviation throw, with great diligence and repeated repetition in training, it can bring excellent results. I only gave, so to speak, the classic basics of the jump shot, the main direction in his training, which must be approached creatively.
Such axioms as releasing the ball at the highest point of the throw with a fully extended arm, for example, should not be forgotten with any throw method.
So far we have been talking about mid-range shots, the main weapon of the back row players. There are many more types and methods of throws. Let's say how to throw from under the hoop itself - from the backboard or "clearly" so that the ball goes straight into the basket - this will be taught to you already in the first lessons with the ball. Here I would like to recall the hook throw, almost forgotten in our country. It was once superbly performed by the players of the USSR national team Alexander Kandel, Viktor Zubkov, Albert Valtin, Jaak Lipso. Today, except that Anatoly Myshkin, no, no, and yes, he will please with this technique.
And for some reason, it turned out to be forgotten only here.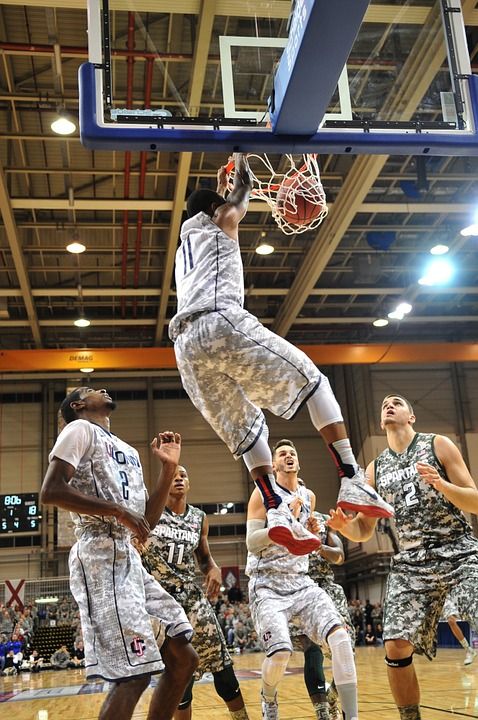 Basketball players of well-known foreign clubs successfully use it even now. True, sometimes in a somewhat transformed form - to outline the body or arms of the guardian. Real Madrid striker Diaz showed us a kind of hook from the side. But the American Abramaitis from the same Real Madrid is armed with a classic hook. It would be very nice to remember this throw and our giants.
Finally, about the throw over the raised arms of the defenders from any distance. This method comes into play when you fail, as we say, to beat the defender cleanly. He figured out your intentions and jumps out at the same time as you, trying to cover the ball at the moment of the throw.
The main thing due to which you will be able to achieve the goal even with such single combat is a higher jump than your guardian and a much higher than usual height of the throw trajectory. And the most difficult thing is to reduce the speed of the throw to some moments.
Be aware of the most common mistakes in this method of throwing: do not jerk your arm, straighten it completely and be sure to correct the flight of the ball released from your hands with the final movement of the hand.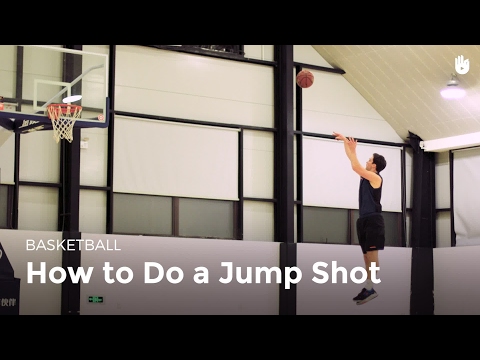 In training, such throws must be performed in game mode. It is useful to remember them in the warm-up before the match.
By the way, about the warm-up. The warm-up of CSKA can serve as an example of it. I strongly advise you to come to the matches of this team early - you will not regret it. You won't see a workout like this anywhere else. Most teams treat this element with coolness: the players will enter the court, become a “snake” in order to only throw around the ring.
Not so in CSKA. Everything here comes from the desire to revive the warm-up, emotionally saturate it, which helps the players to remove extraneous factors that could interfere with the game, say, an unimportant mood. The army team is doing everything to get rid of the monotony of the warm-up, to bring a charge of vivacity into it. Here and throws from under the shield, and the struggle for rebounds after the ball is specially sent to the shield, and those same throws over the raised hands of the defenders.