Home »
Misc »
How to stop a layup in basketball
How to stop a layup in basketball
How to Defend a Layup in Basketball Without Fouling
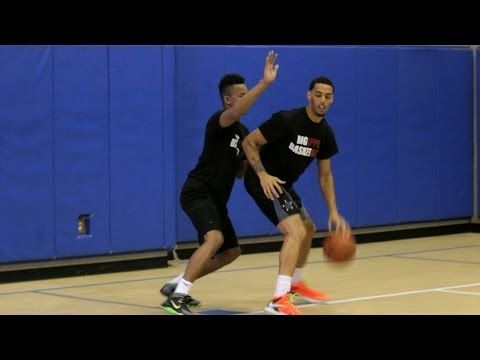
Defending a layup in basketball is one of the trickier forms of defense. As compared to defending a shooter, defending an opposing player driving to the basket for a layup requires a bit more dexterity, skill, and awareness.
However, although defending an opposing player driving to the basket for a layup can be difficult, it is not impossible. Rather, there are a few main methods that can be taken to play proper defense against a layup attempt.
Below, we are going to discuss how to defend a layup in basketball without fouling the opposing player. These tips will not only help you to play better defense but will also ensure that your defense on any player driving to the basket is done correctly and without incurring a foul.
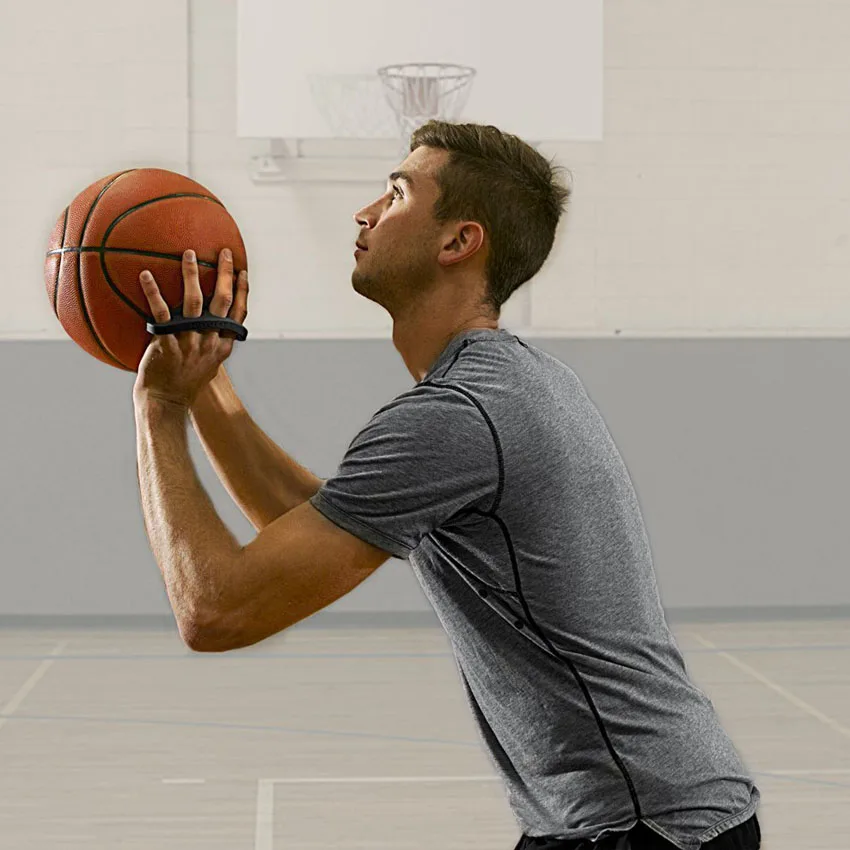
What is a Layup in Basketball?A layup in basketball is one of the simplest shots. It is also one of the easiest shots to master and can be done with either your right-hand, left-hand, or both hands.![]() A layup in basketball is a two-point shot, typically taken directly beneath or near the rim.
A layup in basketball is a two-point shot, typically taken directly beneath or near the rim.
A layup shot is attempted by leaping from below the basket and laying the ball up either against the backboard or directly near the rim. When attempting a layup, the shooter will lift their outside foot, or their foot away from the basket, elevating themselves with the ball, and releasing the ball gently and softly against the backboard, allowing it to roll neatly into the basket.
How Many Points is a Layup Worth?Nearly all forms of the layup are worth two-points in a regulation game of basketball. As the layup shot is taken directly near the basket, and well away from the three-point line, a layup will award the scoring team two additional points.
However, in a game of pick-up basketball, layups are generally considered to be one-point. This is due to the difference in point tabulation in a pick-up game versus a regulation one.
Typically, most pick-up basketball games tabulate points in a one and two-point system, with shots taken within the three-point line counting for one-point and those taken beyond the three-point line counting for two-points.
What Percent of Layups Should You Make?Although the layup is one of the easiest shots to attempt on the court, due to the reduced distance from the basket, successfully making a layup can depend on multiple factors. However, taking an uncontested layup is generally one of the easiest shot attempts and has a high probability of being made, particularly if you’ve practiced your layup form and are adept at the shot.
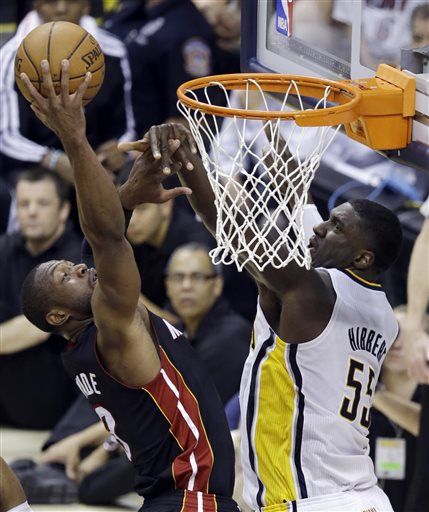
However, if you are attempting a layup against a taller or bigger defender, the probability of making the shot decreases significantly. As a layup requires near direct access to the hoop, a defending, taller player may have the opportunity to block the shot either before your release or during its upwards ascent to the backboard.
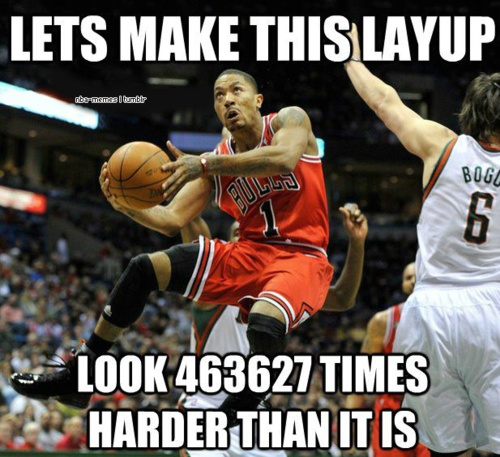
How to Score a Layup While Being Defended?While scoring an uncontested layup is relatively simple, doing so while being defended, particularly against taller and bigger players, can be substantially more challenging.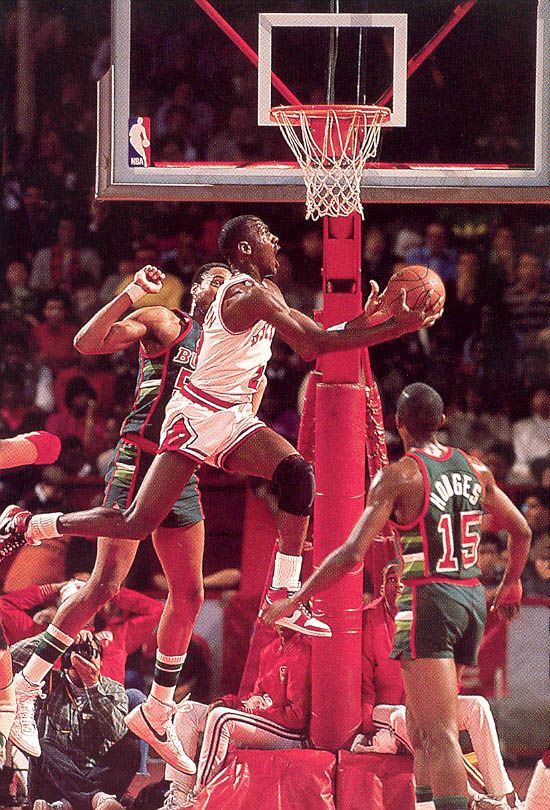 However, there are some steps you can take to score a layup even while being defended.
Firstly, rather than looking to avoid the defending player, you can attempt a layup by dribbling directly to the basket, anticipating the block attempt from the opposing player. If the opposing player jumps into the air or moves their feet to contest the attempt, and bumps into you, they will incur a foul.
Although you may not make the layup attempt, you may be awarded two free throw shots. With daily practice, a free throw shot should be relatively simple to complete and should provide your team with two additional points.
In addition, if you are attempting a layup and want to avoid both being blocked and fouled, it can be useful to perform a simple pump fake. A pump fake in basketball is the act of “pumping” the basketball in the air, mimicking a real shot attempt, only to pull the ball back quickly.
By performing a pump fake, you may be able to fool the opposing defender into leaping into the air in an attempt to block the shot.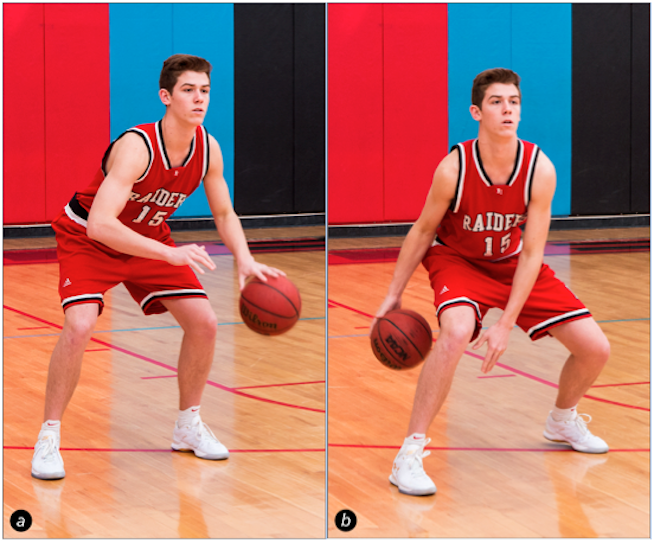 Once the opposing player has fallen for the fake shot, you will be given more room to take the layup attempt uncontested.
Lastly, if you are looking to create distance between yourself and an opposing defender to secure an easier layup attempt, one of your best bets is to run the base of the sideline court, moving bast the basket to the weak side, and laying up the ball with your alternate hand.
Defending Against a Layup Attempt Without FoulingThe alternative to scoring a layup attempt is, of course, defending and blocking the attempt. And inverse to the fact that scoring a layup is relatively simple, defending a layup attempt, without fouling the opposing player, is a much more difficult task.
Below we are going to go over some tips on how to defend a layup in basketball without fouling the opposing player.
- Don’t Jump – contrary to popular belief, defending the layup attempt is not only about blocking the shot. Rather, as a defender, you will want to contest the shot attempt and force a more difficult shot.
 However, if you jump to block the shot, you could incur a foul.
- Keep Your Arms Up – The single best way to defend against the layup is to simply keep your hands and arms high above your head. This natural motion helps to block the shot and forces the opposing player to aim the shot higher against the backboard, which is a lower probability shot attempt.
- Move Your Hips with the Opposing Player – when defending against an incoming player attempting a layup shot, it is best to move your hips parallel to the opposing player. This creates less space between the opposing player and the basket. In addition, if the opposing player attempts to forcibly drive to the basket, pushing you in the process, they will be assessed with an offensive foul.
- Keep Your Feet Planted – if you are not actively defending the opposing player, on a one-to-one defensive scheme, and the offensive player begins to drive to the basket, simply plant your feet on the shooting lane, or the lane between the player with the basketball and the hoop.
 While keeping your arms raised, attempt to force a contested shot. However, by keeping your feet planted, you will not incur a foul during the layup attempt.
ConclusionDefending against a layup attempt without fouling doesn’t have to be difficult. Rather, by keeping your feet planted, your arms raised, and by not jumping into the opposing player, you should be able to avoid being assessed a foul.
It is also important to attempt create less room between the opposing player with the basketball and the hoop. This can best be done by keeping your feet planted within the shooting lane, making the layup attempt more difficult for the opposing player.
How to Shoot a Reverse Layup in Basketball (4-Step Guide)
The hanging, spinning reverse layup has found its way into the highlight reels of some of the world’s most gifted stars.
A staple of Kobe Bryant’s slashing drives to the hoop, the reverse flummoxes big men and is an indispensable move for shorter players driving into the paint.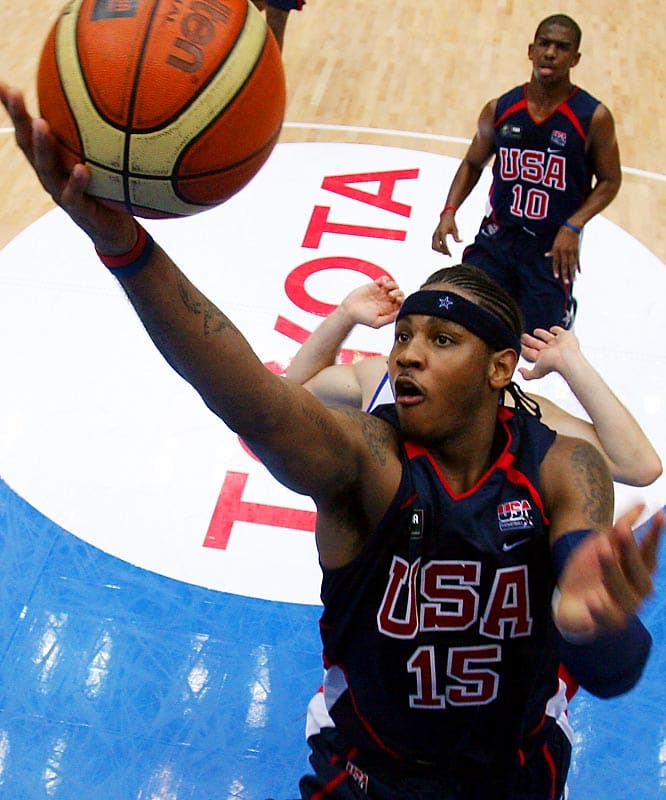
When done correctly, the reverse layup is virtually unblockable and can be executed in tight areas in the blink of an eye.
When to Use a Reverse Layup:
The reverse layup is the best way to counter larger defenders near the rim.
In these scenarios, a traditional layup would have a high probability of being blocked.
The reverse layup allows the ball handler to use the rim and their body as a screen, blocking off the rim protector and getting the ball off the backboard quickly.
It does have a higher degree of difficulty than a traditional layup and requires superb body control and tight footwork, so it should only be utilized when necessary.
How to Do a Reverse Layup:
Step #1: Drive to the Basket
A reverse layup is best done with some momentum behind it to carry you to the other side of the rim once you jump.
While it is possible to perform a reverse on a straight line drive to the front of the rim, it’s more effective and easily executed on drives along the baseline or at an angle.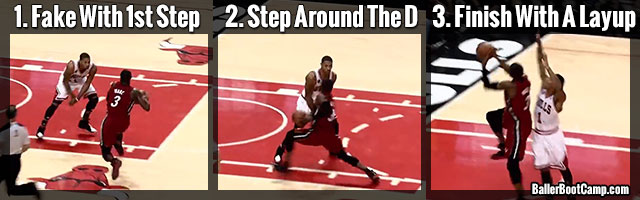
You need a clear lane to the hoop, so beating your man one-on-one is vital.
Getting them on your hip helps shield the ball and adds an extra element they must go through to alter your shot without committing a foul.
Step #2: Beat the Rim Protector Baseline
Regardless of your angle of attack, the reverse is best done when you have the inside step on the defender and can beat them to the baseline side.
This makes it easier to use the rim as a screener to prevent your layup from being blocked.
Step #3: Jump off Your Baseline Foot
A traditional reverse layup involves players jumping off the foot closest to the baseline.
The reverse layup is all about improvisation, however...
Perhaps the rim protector was late rotating over, causing the shooter to change their shot in mid air. While it’s my preference to take off the baseline foot, it is worth practicing both approaches.
More athletic players with larger vertical leaps may “show “ the ball on the near side of the rim before transferring the ball to the other side.
This gives the appearance that the player is going up for a traditional layup, causing the defender to commit, opening up the far side of the rim, and increasing the likelihood of drawing a foul.
Step #4: Locate the Square on the Backboard
The most challenging aspect for beginners, a reverse layup can be disorienting as your angle to the hoop and backboard changes.
Many players have the instinct to look down at the ball as they jump…
But instead, they should incline their head backward as they travel under the rim, looking for the top of the square on the backboard.
More practiced players can put additional spin on the ball, allowing them to release their shot later and from different angles to make it even harder for defenders to stop.
With all your momentum taking you away from the rim, transferring your energy up and generating a soft kiss off the backboard is difficult.
Like a traditional layup, get the ball high off the glass to create the largest target and margin for error. Shoot with the hand furthest from the hoop, the right hand on the right side, left on the left.
Common Reverse Layup Mistakes
#1 - Losing Track of Where You Are
Understanding your location on the floor is vital to mastering the reverse layup.
Yet as the driver attacks the rim, it’s easy to lose where the hoop is.
While repetition is invaluable, using the markers on the floor can help immensely.
Teach players how to locate themselves by where they are in relation to the blocks on either side of the lane, and emphasize how much room there is between the baseline and the backboard.
It’s more space than you think and getting pinned to the baseline can leave the ball handler with nowhere to go and in a perfect location to get trapped, leading to turnovers and a fast break the other way.
#2 - Too Much SpinThe highlight worthy appeal of the reverse layup easily seduces players to add an extra twirl or flick of the ball as they shoot for added style points.
But this is a difficult enough shot to master under normal circumstances.
Stress the difficulty and discourage motions that add unnecessary challenges.
Further Reading: Why Players Miss So Many Layups (And How to Fix It)
Reverse Layup Drills:
Drill #1: Mikan Spins
Stand directly beneath the hoop with a ball held above your head.
Alternating sides, jump straight up, reaching out to the side of the backboard with the ball.
See how far off the square you can flick the ball and still make a basket.
Land and attempt the same shot on the other side.
Continue alternating sides, getting shots up as quickly as you can.
In addition to improving touch and a feel for how much spin is required to finish the shot, the hectic pace helps stimulate the disorientating feeling experienced in game.
Drill #2: Drive Reverse
Place a cone at the elbow and another near the block, just outside the paint.
Practice various dribble moves to create separation and drive to the outside of both cones.
Don’t allow the driver to enter the paint until past the second cone to simulate a crowded paint with multiple defenders. Practice multiple approaches by moving the cones to change the angle.
Further Reading: 5 Layup Drills You Must Use Next Practice
Conclusion
While a very difficult shot, the reverse layup is a vital tool for guards and wings to master, particularly undersized players that have trouble challenging taller defenders at the rim.
When combined with the floater and pull up jumper, it gives guards a trio of shots in their tool chest to use against large rim protectors to stave off thunderous rejections.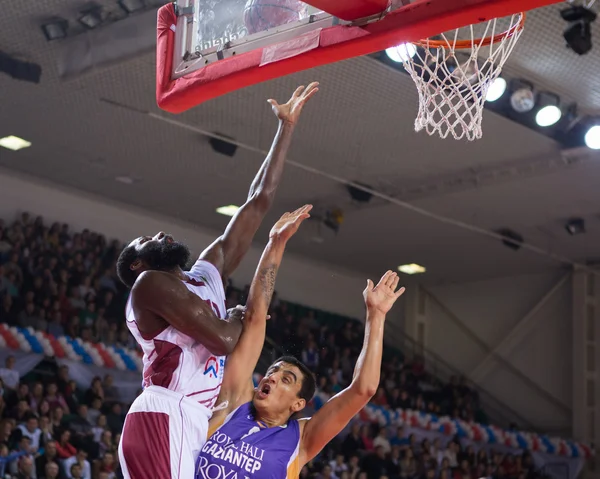
Fast Break Combinations
The fast break is undeniably the most advanced, highest scoring offensive system in basketball. For a team using a fast break system, it does not matter whether the opponent uses a personal, zone or mixed defense system, whether he often changes defense systems during the match.
Once in possession of the ball, the team should always try to set up a fast break attack. But how can such an idea be put into practice? First of all, it is necessary that for various situations that arise after catching the ball, the further actions of the players are planned in advance.
There are various ways to implement a fast break. It is clear that it is impossible to train the team in all options. It is better to have fewer options in service, but to master them perfectly.
Some young coaches try to teach players everything they know right away. But most players (especially those who are not experienced enough) cannot digest the whole mass of this knowledge, and the expected result does not work. It will be better if, during the training process, the coach offers the team a simpler and more effective option for a quick break, based on the physical characteristics and technical capabilities of their players.
The situation is different with various methods (methods) of organizing a quick breakthrough. There are many such methods, but, unfortunately, our basketball literature recognizes only one technique - passing the ball. This complicates the actions of the players, limits the possibility of using a fast break.
More than that. Coaches sometimes do not allow their players, even under the right conditions, to use any other technique to organize a fast break other than passing. But we have no right to say that the transfer is the only way to a quick breakthrough. To think so is to mark time.
It is expedient, for example, after catching the ball that has bounced off the backboard, in some situations it is advisable to use dribbling. This allows you to go through the opponent's defense, achieve numerical superiority, create a convenient position for passing the ball to a partner and further actions.
Some might say that the team, using the dribble, will be late in organizing a fast break. However, practice shows that this is not the case.
In the old days, when the ball bounced off the backboard, as a rule, only the center forward and defender fought for it, it would simply be pointless to use the dribble to organize a fast break. After all, the enemy players, after an unsuccessful throw, quickly returned to their shield to organize defense.
The situation is different now, when six, and sometimes more players are fighting for a bounced ball under the basket. It is enough for a player who has mastered the ball at his backboard to break out of a bunch of opponents and partners, and with the help of a dribbling he can create a numerical advantage for a successful fast break.
Everyone knows what often happens when a defender in the offensive zone tries to keep the attacker in possession of the ball at a very close distance. The latter, with the help of dribbling, easily bypasses the defender and throws the ball into the basket.
But the same close distance happens between the attacker and the defender after catching the ball that bounced off the backboard. Why, then, in the first case, in the attack zone, the attacker can achieve his goal with the help of dribbling, while in the second case, no less convenient, this is not allowed? The absurdity of such a situation is obvious.
* * *
So, when is the best time to make a fast break? After playing jump balls, after a free throw, when throwing the ball in from behind the end and side lines in the defensive zone, and mainly after taking possession of the ball that bounced off its backboard.
The fight for the ball bouncing off the shield is of paramount importance. After all, mastering the ball gives the team the opportunity to attack!
If the players of the defending team act correctly, they will almost always be able to take possession of the ball after it has bounced off the backboard. How can this be achieved?
First of all, when the opponent attacks the basket, the defenders must have time to position themselves between the attackers and their backboard. After the throw, each defender vigilantly monitors the actions of his ward. If the attacker rushes to the basket to take possession of the bounced ball, the defender, turning his back to the opponent, blocks his way to the shield with his body. Unfortunately, defenders often forget to do this and after a shot on the basket leave their players without supervision, while they themselves reach for the backboard to take possession of the ball.
This is a gross mistake! The ball can bounce towards an attacker who is not covered by a defender. It is clear that this attacker will catch the ball without interference and retake the throw. In addition, in such cases, the attacker, without encountering resistance, can take the shortest route to the best place to catch the rebounded ball.
After the defender turns to cover the attacker, he must move forward a little to avoid a collision with an opponent and not foul (this does not apply to a defender who guards a center forward playing near the basket).![]() Further, bending his knees, the defender places them shoulder-width apart. In order to occupy more space and more accurately guess which side the opponent wants to pass from, the defender should spread his arms bent at the elbows wide, lowering his forearms down. Some foreign trainers advise lifting the forearms up. But this is not rational. Indeed, if the defender makes a jump later on, he, by sharply raising his forearms, will be able to jump higher.
Further, bending his knees, the defender places them shoulder-width apart. In order to occupy more space and more accurately guess which side the opponent wants to pass from, the defender should spread his arms bent at the elbows wide, lowering his forearms down. Some foreign trainers advise lifting the forearms up. But this is not rational. Indeed, if the defender makes a jump later on, he, by sharply raising his forearms, will be able to jump higher.
What if the attacker is under the shield next to the defender? It is necessary that the defender is in front of the opponent, so that his leg is also in front of the attacker's legs. This situation is clearly seen in the picture that captured the moment of the meeting between the USSR and the USA in Moscow. The defender's arm, bent at the elbow, is above the opponent's arm. This is a very important detail! This position of the hand will prevent the attacker from making a well-timed jump.
What to do if the ball bounced towards the opponent? It is recommended to quickly take a step in the direction where the ball can land, raise your hands and try to cover the opponent's hand with your hand.![]() Now you need to catch the ball!
Now you need to catch the ball!
The player who catches the ball must be able to instantly understand the situation - to know which side his closest opponent is on and which side is free. This will make it easier for the player to move forward with a fast break.
Catching a rebounded ball in a jump, the defender is still in the air, before landing, quickly turns his head in the direction where there is no opponent. At the same time, the player turns his back to the nearest opponent and spreads his legs wide before landing.
What gives a clear execution of this technique? The opponent loses the opportunity to take the ball when the player in possession of it lands, and this latter immediately finds himself facing the direction of the opponent's backboard. All this means gaining precious seconds. Having instantly assessed the situation, it will be possible to launch an attack, leaving the nearest opponent behind.
There is another little "secret" to quickly avoid the enemy. We are talking about the instant start of a dash to the opponents' shield. The player who has mastered the ball needs to fix the landing after the jump or make at least the slightest pause. As soon as the toes (and not the entire foot!) touch the ground, the player, as if continuing the fall, tilts the body forward, vigorously pushes off and begins to dribble.
* * *
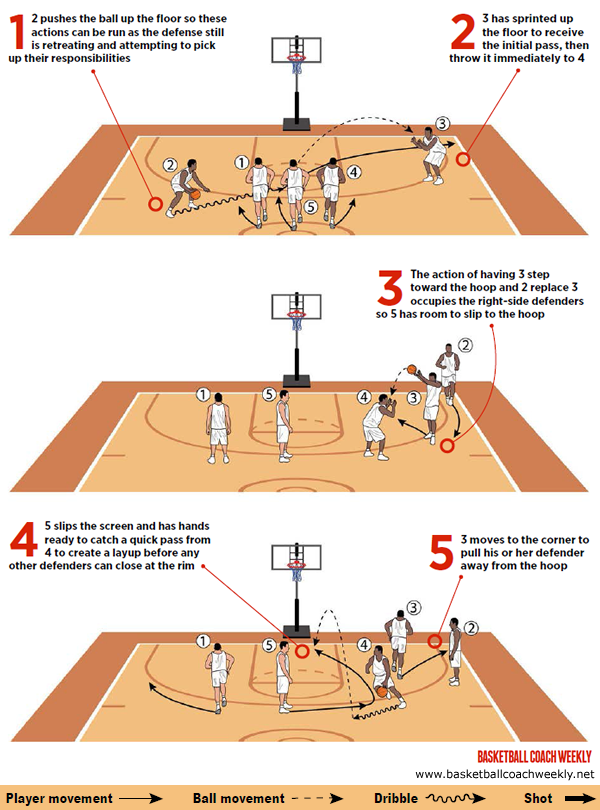
And now let's look at several combinations for organizing a quick breakthrough with numerical superiority.
Scheme 1. Having caught the ball rebounding from the backboard in a jump, player 4 immediately, in the air, turns his back to his nearest opponent m, having landed, begins to dribble the ball approximately along the longitudinal axis of the site. Players 6 and 7, who are closer to the opponent's shield, pass along the sidelines and, together with partner 4, create a numerical superiority (three against two).
Assume that player 5 has the ball (Diagram 2). He immediately starts dribbling, moving forward and slightly away from the longitudinal axis of the site.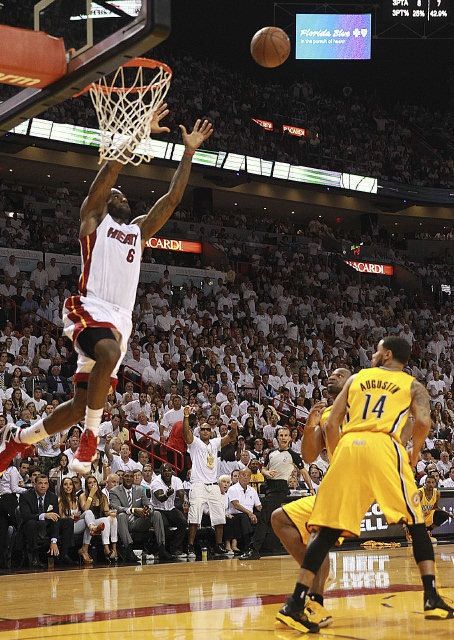 Meanwhile, player 4 breaks away from opponent 4, while players 6 and 7 advance along the touchlines. This creates a numerical superiority (four against three).
Scheme 3. Player 3 took possession of the ball. His task is to immediately bypass his nearest opponent with the help of a dribble. If this is not possible, he continues to dribble to the sideline in order to create a comfortable position to pass the ball to teammate 6. This player, seeing that his partner has started to dribble to the sideline, must in turn create a safe position to receive the ball.
At this time, player 4, turning over his left shoulder, makes a dash, leaving behind the nearest opponent, and
receives the ball from player 6. After the pass, player 6, like player 7, runs along the touchline to the opponent's basket.
Screenings can also be used to organize a fast break with superior numbers after catching the ball. They can be placed for each other by players who fought for a ball that bounced off their shield, or by one of the fast players, whose opponent obviously does not pose a great danger.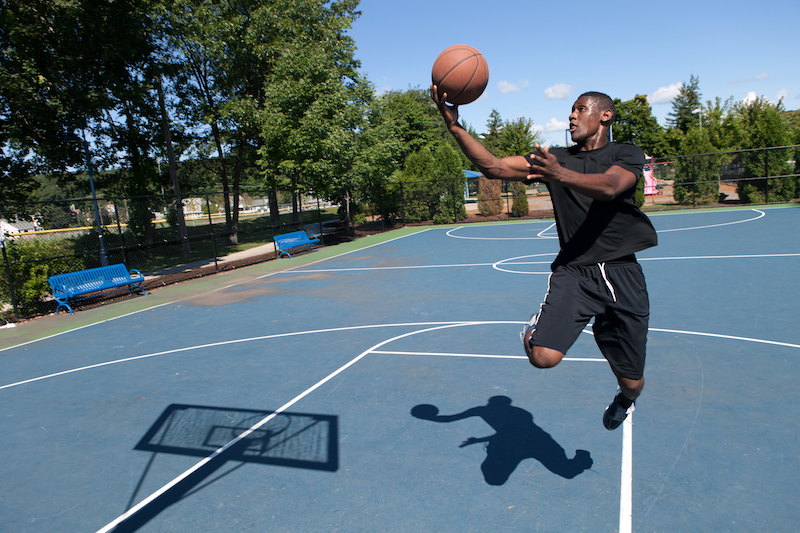 It is advisable to use the barrier after a successful throw (when throwing the ball in from behind the end line).
Diagram 4 shows how this is done, for example. When throwing into the basket, one of the fast players (7) approaches the opponent's center forward 4 (the slowest player).
Suppose the ball hit the basket. Then player 7 puts up a barrier to the opponent's center, not giving him the opportunity to return to the defense in time and follow his ward. As soon as the screen is set, player 4 quickly breaks away from the opponent and moves forward. Player 3 throws the ball from behind the endline to teammate 6, who passes to the outgoing player 4. Then players 6 and 7 pass along the sidelines. Even if the attacking team fails to create a numerical superiority, it will have the advantage of a few seconds gained. Now the tall attackers of this team can complete the attack without interference from the center (4) opponent, who will inevitably be late with defensive actions.
The same combination will be quite effective after successfully catching the ball that bounced off his backboard.
You can create a wonderful position for organizing a fast break and with the help of the transmission (diagram 5). Suppose one of the three attackers of the opponent could not participate in the fight for the bounced ball, since one of the defenders (for example, player 5) managed to block his path, stopping him far from the backboard.
If player 4 gets hold of the bounced ball, he immediately passes to player 5, who has his back to opponent 5. Having caught the ball, player 5 advances to the opponent's shield with the help of a dribble. If player 3 takes possession of the rebounded ball, he passes it to partner 6 (perhaps after dribbling along the touchline). Player 5 at this time rushes to the middle of the court, where he receives the ball from partner 6.
When the players move towards the opponent's backboard, the ball is passed as soon as possible -
- to the attacker who passes the court along its longitudinal axis.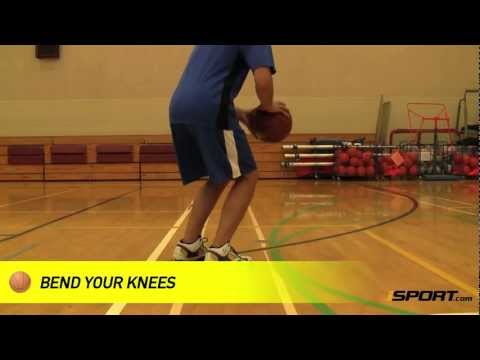 The player who received the ball is responsible for dribbling. In order not to reduce the speed of movement, the dribble should be high.
I would like to give a warning: be careful, do not rush to pass the ball until the final stage of the attack. Extra passes can lead to a loss of the ball (interception, inaccuracy) or to a violation of the zone rule. However, if, on a fast break, the attacker with the ball meets opposition from the defender who tries to stop him or intercept the ball, he must immediately pass to one of the free partners.
In the final phase of the attack, the player with the ball continues to dribble until one of the defenders begins to challenge him. As soon as this happens, you should immediately pass the ball to the partner who has freed himself from the defender. If the defenders, while retreating, cover the wingers, the player in possession of the ball continues to dribble and completes the attack. But at the same time, the wingers should not hide behind the backs of the defenders, but by active actions create a comfortable position for themselves to receive the ball.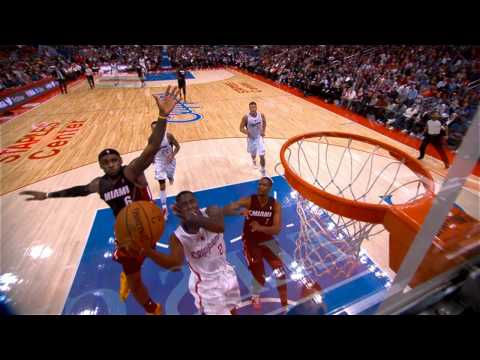 Several combinations of the fast break end phase are shown in Diagrams 2, 3, and 5.
* * *
A quick breakthrough with the numerical equality of attackers and defenders is also a sharp offensive weapon. This can be demonstrated by examples of several combinations.
Of course, in the case when the player of the attacking team is one on one with the defender, the successful capture of the basket depends entirely on the level of the attacker's individual technical skill. For example, he can mislead the defender by quickly changing the direction of the dribble, or, without stopping the dribble, make a feint - a distracting movement of the body to induce the opponent to rush in one direction, while he himself passes in the other.
In a two-on-two fight (diagram 6), player 6 starts the dribble, showing that he wants to break through to the backboard. At this moment, player 7 changes direction, receives the ball from partner 6 and breaks through to the basket.
Player 6 makes it easier for him to break through - by giving the ball, he immediately puts up a barrier to opponent 7.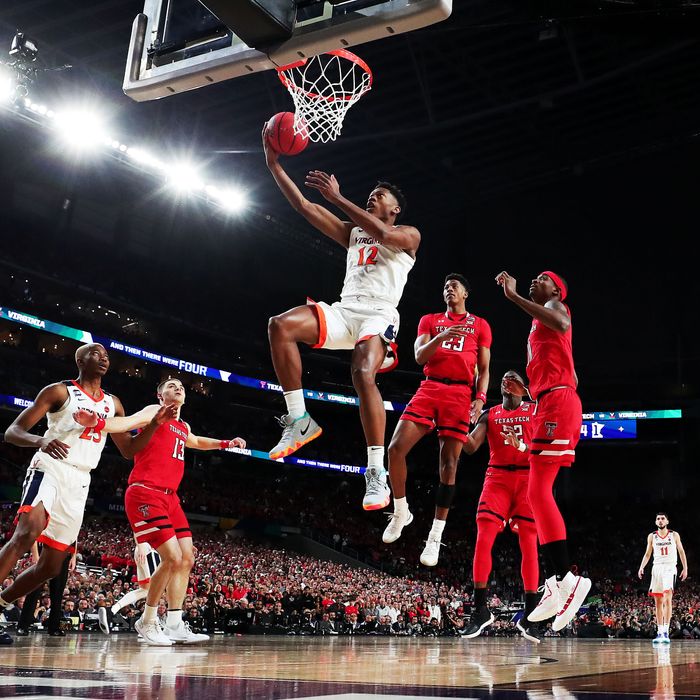 If defender 6 rushes to attacker 7, then he will leave player 6 free.
Variants are also possible here - attacker 7 (without the ball) on the move puts a barrier to defender 6 or attacker 6 suddenly and abruptly changes the direction of movement and breaks through to the basket.
When attacking three against three (diagram 7), player 6 goes to screen defender 5. At the same time, attacker 7 moves towards player 6 with a dribble. Player 5 abruptly changes direction. Freed from marking with a double screen, he receives the ball from partner 7 and shoots for the basket. If the defender guarding player 7 switches to attacking attacker 5, he immediately returns the ball to teammate 7.
The same combination can be used if player 6 has the ball.
You can also use the “three” on the move very effectively (passing in one direction, screening in the other).
In all cases, you must strive to attack quickly! Even if a quick breakthrough fails, the attackers will still achieve a certain advantage.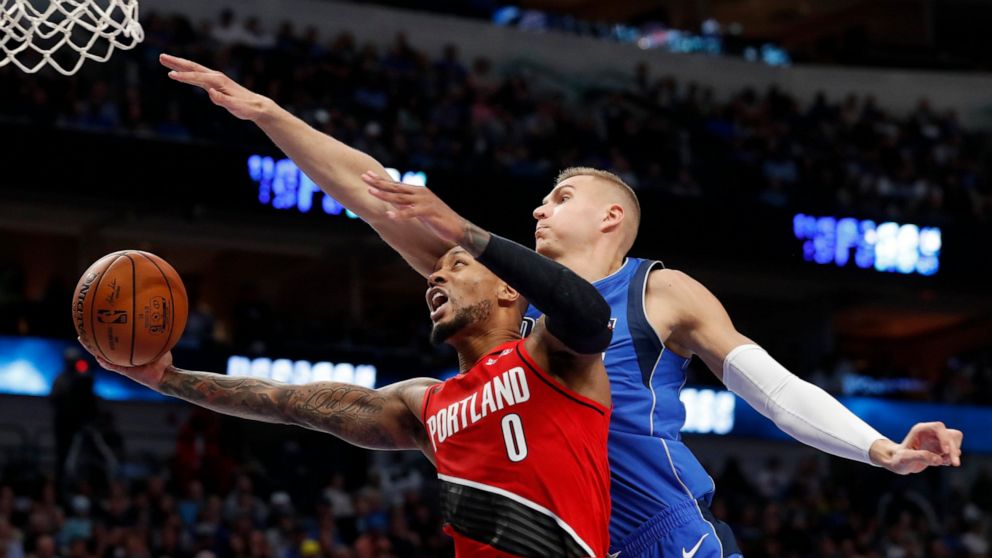 While the opponents are organizing the defense, they will be able, for example, to start shelling the basket from medium or long distances.
Of course, the coherence of the team's actions during a fast break is achieved only as a result of a long training session. Its goal is to develop the ability of players to move quickly and have excellent ball control. This skill may not come soon, but it will definitely come! The hard work you put into training will pay off handsomely in the competition.
A. ALACHACHYAN, Master of Sports
Flex Offense: The Complete Training Guide
Flex Offense: The Complete Training Guide
July 27, 2016 by Coach Mac
Flex Offensive - Origins
How to play flexible (Flex) offense, let's take a quick look at his history in basketball. Flex attacks were created as random variations in the 1970s by Carroll Williams of Santa Clara University. There are many coaches who have had success with the flexible offense, including Gary Williams of Maryland who won the 2002 NCAA championship, Beau Ryan of Boston College, Jerry Sloan with his variations of the flex offense in his time with the Utah Jazz, not to mention hundreds of coaches with high schools throughout the country.

As you can see, the flexible offense has worked at all levels of basketball. It is one of the main offenses among many high school teams.
What is Flex Cut? Let's start with the absolute basics. The offense was named after this snatch, it is important that every coach reading this article has knowledge of the flex snatch before we delve into this offense. A flex charge is when a player in the corner receives a screen from a teammate and rushes into the penalty area where he can receive the ball to attack the basket. You can see an example in the picture. The player rushing to the basket may use either side of the screener depending on where the defender is located.
It is important that these rushes are practiced frequently by your players during training, and once players learn to read their defender, the flex rush will lead to more basket-taking opportunities.
Flex Overview Offensive
Flex Offensive from a 4-player perimeter, 1-in setup forms a continuous offense that primarily uses down screens and a screen for the screener, an action famously named "flex screen" to get open shots from under the basket (layups) or jump shot near the high center position.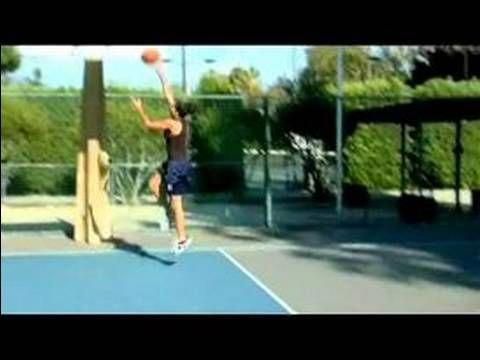 It is primarily an offense against personal defense, but can be used against the zone with minor adjustments. This is a slow attack that requires good placement, ball movement, passes, shots, passes, rushes, setting and screening of all players. It is common to see teams throwing the ball three or four times back and forth before creating an open shot to the basket.
Who can use Flex Assault? Each high school team (11 years old and over) can work with flexible offense. Too often I hear "I can't run flex with my team, my big ones can't dribble or get past to save themselves!". My response is usually something along the lines of - "When else would they have the opportunity to learn how to dribble and pass?" If you're only concerned with winning basketball, then your offense should only be launched with a team of players who all excel in passing, passing, dribbling, rushing, screening and shooting, and all positions are interchangeable. It is difficult (closer to impossible) to find a team of players who do it well or perfectly in high school or high school. Offensive flex doesn't allow you to give the ball to your top scorer and let him play one on one every attack while the weaker players of the attacking team are hidden in the corners. Every player must be involved in the attack. Coaches wishing to use this offense should remember that we cannot expect our players to be perfect in all of these skills before we implement the offense. By implementing a flexible offense, you gradually develop the complex skill and experience of the players, and they will learn fundamental skills in all areas and positions on the basketball court. With that said, I think offense can work well for any youth team, but obviously there will be teams that are more suited to this offense.
1. Teams without tall players. - If your team does not have qualified, or at least high centers, then this is a great offense, because it creates a constant movement of all the players on the court.
2. Teams with excellent snipers. - This is a great offense for a team where all players can shoot with a good % from the perimeter. If you have players who can't shoot from long to medium range, then it allows the defense to go into the paint and cut off the passing lanes.
3. High basketball IQ teams. - All players playing flexible offense will develop a higher basketball IQ. Implementing this offense certainly helps if you have smart players from the start.
Benefits of Flex Offensive
Easy to learn - The reason for the popularity of flexible offense among school programs is that it is relatively easy to learn. Everyone develops and contributes – the flexible offense is truly a TEAM offense. Unlike most youth teams, you can't rely on one player with good ball control for most of the shot hours and the same players shooting down to the floor every time. Everyone participates in the attack. Basketball with almost no playing positions - flexible offense requires all 5 players on the court to be interchangeable. In order for all players to be comfortable playing anywhere on the court during the game, they practice by playing and developing their skills and confidence in all playing positions.
Defensive fatigue - Offensive flex often shoots many shots in the last seconds of possession looking for an open shot, the defense is forced to defend for a long time. They will constantly struggle against rushes, passes and screens, constantly moving, and this can really wear them down.
Game Pace Control - When using flexible offense, you dictate the speed of the game. You can slow down the game and not play run-and-gun against a superior team.
Uneven screen changes.- A common defensive tactic against Flex is to switch all screens. When used correctly, this is a fantastic asset to the offense, as it often results in height disparity in dangerous areas of the floor.
Develops Versatile Players. - It's all too common in youth basketball to have players with limited skill in their position. In agile offense all players must learn and develop all areas of their game. Big players need to learn how to pass, small players need to learn how to play center, defenders need to learn how to screen and so on.
Less Dribbling. - There is one basketball skill - the skill that is abused in youth games is Dribbling. Flex offense will not allow players to use extra dribbling. If a player dribbles in a flexible offense, then only with a specific purpose.
Disadvantages of flexible attack
Predictability - The big disadvantage of flexible attack is its predictability. The opposing teams will know where you're going to sprint, who you're going to screen, and where you're going to throw. Although this does not necessarily mean that they will be able to stop your attack, as there are many alternative defense countermeasures.
Too many transmissions. - In youth basketball, the more your team passes the ball, the more chances the opponent has to intercept the ball.
The opposing teams will play the zone. - One of the easiest ways to defend against a flexible offense is a simple zone defense. If this is allowed, then many teams in the game will switch to the zone and the flexible coach must know how to counter this defense.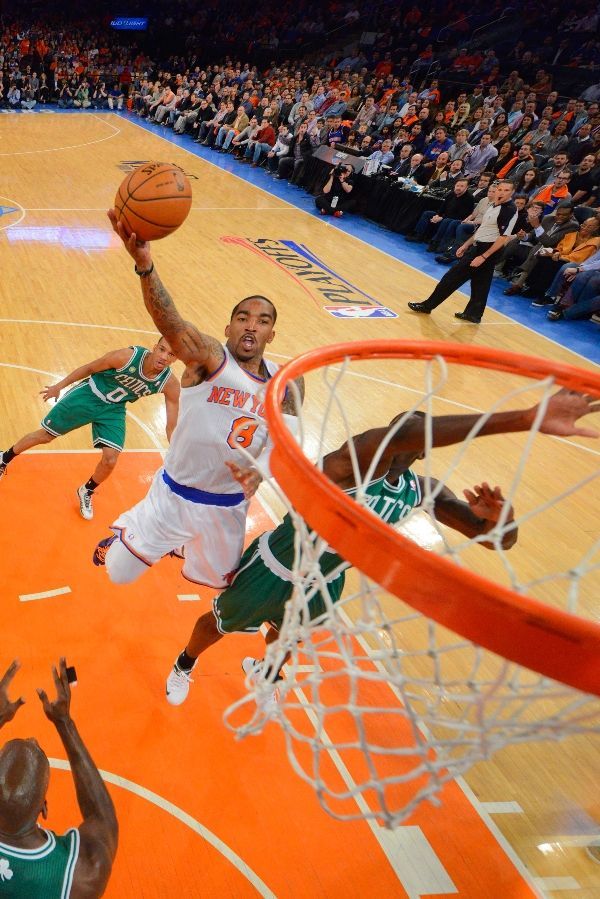
All players must be able to shoot from different positions. - All your players must be able to shoot from medium and long positions. If they can't do that, then it's easy for the defense to retreat into the penalty area and close off the passes that allow for easy scoring.
Going through motions. - One of the most difficult things for players to know in flex offense is when to execute the throw. Players can get so wrapped up in where to go and what to do next that they forget the main goal of the offense, putting the ball in the basket.
Setup Flex Offensive
The first thing you need to learn is the basics of continuity of the flexible offense. The core of the offense is the penetration to the basket, the variety of screens and the variations of playing formations that will develop and improve your offense. The basis of the continuity of the flexible offense is designed to get open free throws from two areas on the floor:
1. Throws from under the basket after jerks.
2. Jump shots from a high center position.
During the main flexible attack, there are 6 spots on the court that must always be filled by the player. There must always be two players at the top of the 3-point line, there must always be two players on the wing, and the last player must be on any bottom center position depending on which side the ball is on.
Basic continuous Flex attack
The attack begins with two players at the top of the 3rd point line, two players at the edges and one at the position of the lower center from the ball.
• The attack starts when the ball carrier (1) passes the ball to 4. This pass causes a flexible dash (3) into the penalty area using a screen (5). (4) may pass the ball to (3) under the basket. After screening (5) for (3), (1) sets a screen down for (5) (screen to screener) so that (5) opens up to receive the ball. (1) goes to the edge, and (3) takes the post position.
• Important to remember: the flex dash (3) can go either side of the screen set (5) depending on the reaction of the defender.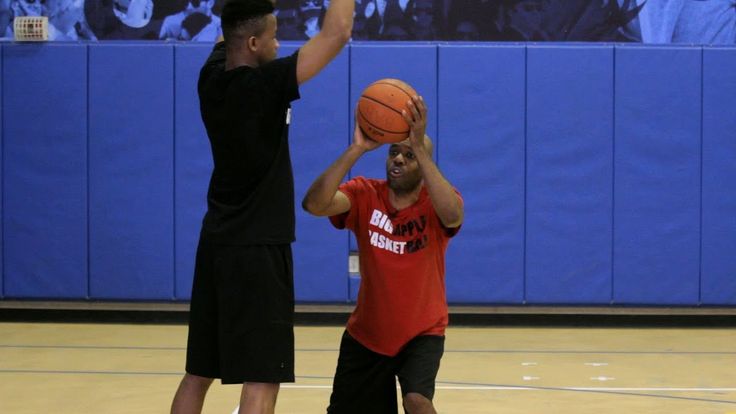 IF IT IS NOT POSSIBLE TO PASS THE BALL (3) to the low center position, then this is half of the attack. Pass the ball back to the other side of the court (5).
(4) passes the ball to (5) who makes a dash up. (3) puts a side screen for (2) who makes a dash to the basket and can make an easy layup from close range after passing (5) ). (4) now screens down for screener (3), who, using the screen, opens up to the 3-point line and can take a free throw after passing the ball from (5). Now we come to a new beginning of the flex attack with the opportunity for free throws from the formation of 4 players on the perimeter and 1 inside.
Why is this simple action so effective? The reason why this action is so effective is that it will be extremely difficult for the defender of the player who is rushing to the basket to defend himself after the screen. Most of the time they will need help from the screening defender to stop an easy basket grab.
While this defender is helping to stop the run to the basket, his player charges up and is free to receive the ball for an open shot.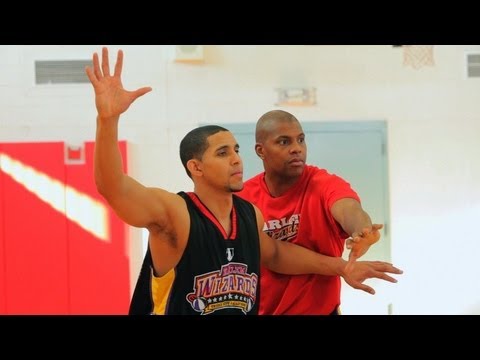 Does this force the defense to make a decision... do I help the rushing player or do I stay with my player? These are very difficult steps to make the right decision. Moreover, these actions can be performed by attacking 3 or 4 times in one possession of the ball.
Flex attack started.
One of the nice things about the Flex attack is that there are many ways to disguise it from your opponents. I recommend that your team use one of the following formations after a time-out or during a throw-in. Throughout the game, it is quite easy to use this offense from pre-trained positions. Players must communicate and be aware of what formation and which side they will play in order to enter this attack without wasting time. Starting from a 1-4 formation: 1-4 Down There are two ways to enter a Flex attack from a 1-4 formation down. Through passing the ball to the center player or passing to the wing. Let's take a look at both... Down - Pass option to post. This attack starts with an initial 4-1 formation with transitions to a 2-3 formation.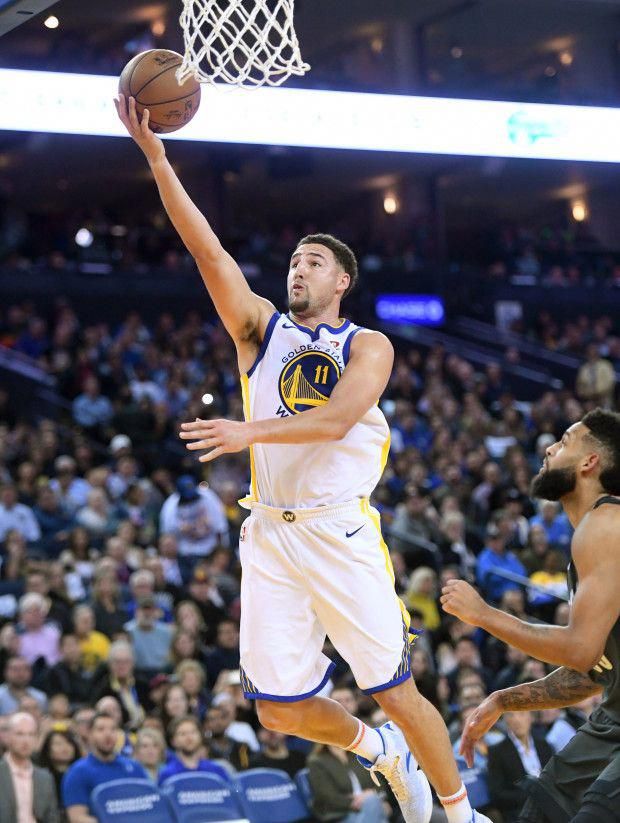 01 advances with the ball to the 3-point line and decides which side to pass the ball to. When the point guard dribbles to a certain side, the center on the opposite side makes a dash up and receives the ball from the point guard. Now we are at the beginning of the Flex attack. After passing the ball to 4th, 5 sets a side screen for 2, and 1 screens for screen 5. Passing 2 under the basket or 5 to a 3-point is possible.
1-4 Down – Option to pass to the outer. In the diagrams below: The beginning is the same. 1 dribbles the ball to the right. 4 makes a dash up, but 1st's pass follows 2nd's on the edge. When this happens, 5 cuts up and puts a screen in the back for 1. 1 cuts down (UCLA cut). If pass 1 is not possible, 2 passes ball 1 to the 3-point line and we continue the flex attack.
Starting from a Box setup
In the diagrams below: 4 players form a box. As ball carrier 1 approaches the 3-point line, both centers take two steps forward and point guard passes the ball to one of them.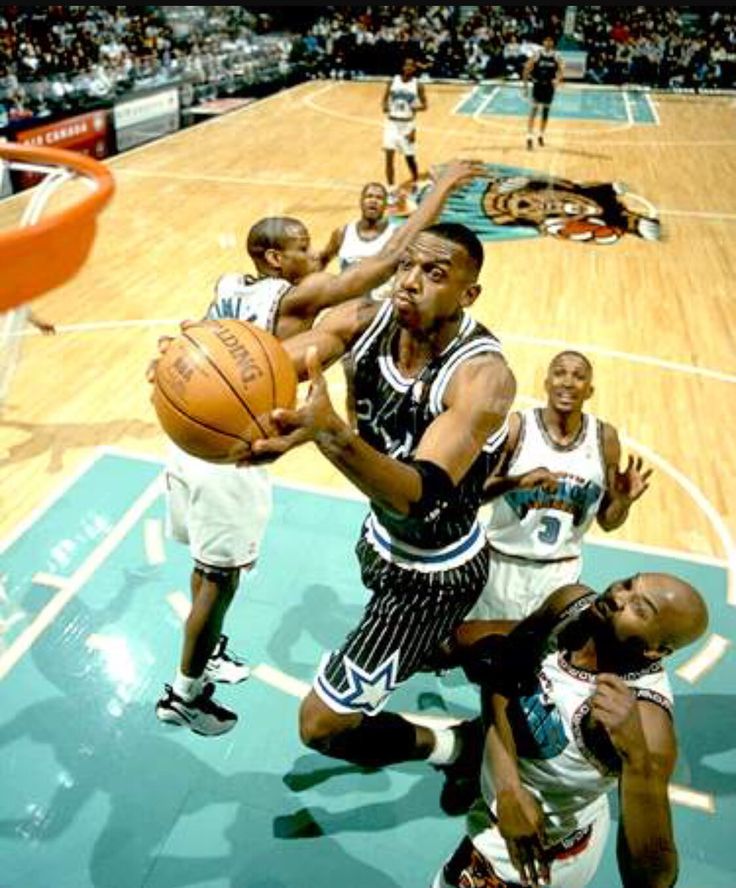 After the pass, the point guard instantly makes a dash into the corner from the side of the ball. At this time, the center from the weak side (4) puts a screen down to the 2nd player in the position of the bottom center. 2, using a screen, dashes up to receive the ball from 5. Now we are on the offense of Flex.
Start 3: High 1-4
There are two options for starting the attack from a high 1-4 setup. Through the transfer to the center or wing player. Consider both…
High 1-4 – Variation through winger. Declarer passes ball 2 to edge and cuts down (UCLA cut). using a screen behind 5. A pass from 2 to 1 is possible. If the pass is not possible, then 5 passes the ball to 4 and 1 sets a side screen for 2, and 5 screens down for 1 and we enter flex.
High 1-4 – Variation via post
In the diagrams below: Now 1 passes the ball to one of the posts in the high center position (5). 4 diagonally dashes to bottom center position. 5 passes the ball to 1. After passing the ball to 1, 4 screens 2 and 5 screens down 4. 1 can pass the ball to 2 under the basket or 4 to the 3-point position.
Start 4: Throw-in at the endline
Here are a couple of formations for the throw-in at the endline.
Throw-in pattern #1
2 side screens 1 and 4th screens 5th. 3 can pass the ball to 5 or 1. The ball is at 1. 1 can pass to 5. 3, after passing the ball to 1, uses screen 4 and opens to the 3-point line. 1 passes the ball to 2, 2 goes on to 3.
Throw-in formation #2
From formation 1-4. When the thrower slaps the ball, the nearest post uses his body to hold the defender and open up to receive the ball. 4, having received the ball, immediately passes it to 5, who made a dash up. 3 screens 2 and 4 screens 3. We are on offense flex.
Start 5: On a throw-in on the touchline.
This is my favorite scheme, through which we start the flex attack on a throw-in from outside. Players start the face-off from a box formation. When the thrower hits the ball, the nearest post screens down to 1. 2 passes the ball to 1. At this time, 4 screens behind 3. Then 1 passes the ball to 4. 5 screens 2 and 1 screens 5. 4 can pass the ball 2 for the basket or 5 for the 3-point line. We are on the attack flex.
Flex Offensive Corner Variations
The main continuity is assumed to be two top players passing the ball back and forth looking for open players to receive the pass and shoot. We must give the players the opportunity to receive the ball in the corners if necessary. Since constant passing from defender to defender is predictable, a common method for opposing coaches to stop a flex offense is to block the passing line between them. If you don't have the ability to pass the ball into the corner, your flexible offense will come to an immediate stop! There are many options for how to pass the ball into the corner. I'm going to share 5 options with you. My advice is to pick 2 or 3 of them and use for your team and have a code word for each. Don't try to implement all 5 options because your players will never learn them. It will be more beneficial for your team to master 2 or 3 options.
Quick note: When passing the ball to the corner, the post must always be ready to receive the ball within 1-2 seconds, and the perimeter players must always be ready to pass the ball to the post within these 1-2 seconds.
Option 1: Pass and break
This is the easiest action to learn and act on. I have seen young teams doing this but not creating a big opportunity to take the basket. After passing the ball (3) into the corner, (1) cuts into the opposite groan, simultaneously two other perimeter players open towards the ball before returning to the flex. The problem with this option is that there is no way to pass the ball to the first incoming player. to the player, since (5) is in a low center position, and the transfer is simply not possible. But this option can be used with continued use for young teams. 3 passes the ball to 4 and 4 passes to 2. When the ball receives 2. 4 screens 3 and 4 screens down to 5.
We have entered the flex attack.
Option 2: ucla jerk. Another simple variant, once (1) the ball has passed into the corner, (5) moves up and screens UCLA for (1), which opens up towards the basket. If passing (1) is not possible, then (3) passes the ball (5) and we are back in Flex.
On the opposite side of the court, (4) sets up a down screen for (2), who charges upwards and can receive the ball for a free throw or an attack.
Variation 3: Dribble start
Instead of passing into the corner, declarer advances with the ball into the corner to get out of trouble. We do this in the case when the transmission line to (3) is blocked. Declarer calls a keyword like "dribbling"! And (3) curls the post and jumps to the top of the 3-point line to receive the ball. Now we are back in Flex.
Option 4: Single shutters
The player who passed the ball into the corner becomes the screener for play. First, (1) sets up a cross screen for (4), which replaces (1) in declarer's position, and then (1) immediately sets a down screen for (2) to replace (4) in his position. After both barriers (1) is located in the opposite corner. Now we are back in Flex.
Option 5: Staggered barrier. (1) passes the ball (3). In this variation, players (1) and (4) set up a staggered screen for the player on the weak side of corner (2). (2) uses this screen and opens to receive the ball and shoot. (1) retreats and takes position (4). While (4) opens into a corner. Now we are back in Flex.
Option 6: Horizontal screen
If the ball is passed into a corner, both players on the side of the ball (1) and (5) put a side screen on the teammates on the weak side. Both screeners should catch the defender and put up a solid screen.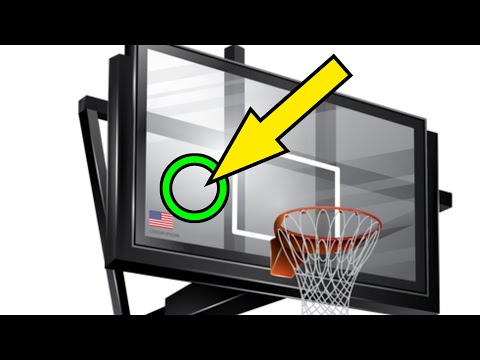 If the players breaking into the penalty area are closed, then the ball is passed to the top of the 3-point line. Now we are back in Flex.
Passing the ball to the center
From the formation of 4 players on the perimeter and 1 inside, a flexible offense begins and all the screening and switching that occurs creates a perfect situation to pass the ball to the center player in the positions of the bottom center, and let your post players continue their work. When our team is on offense, I encourage the players to keep their eyes focused on the position of the bottom center, if it is in our interest, pass the ball inside and let the player use the 1 on 1 game situation. The best time to pass the ball to the post is to pass to the perimeter player into the corner, followed by a pass to the center. In order to stop the post from defending and countering the trap, I will share with you several options that will force the perimeter defenders to stay with their players, and this will allow your post to play 1-on-1. As you will see in the example of the next two options, nothing should be called to continue the attack after the ball has been passed to the center. This transfer dictates which variation will be used, so the perimeter players must read the reaction of the defense and decide what to do and adjust.
Option 1: Dash to the basket and rotate on the perimeter
After a pass to the post from the perimeter, if the post does not move immediately, the passer will dash to the basket on the opposite side. All perimeter players move to the right one position. The sender may dash from either side of the post and wait for a short pass or hand-off if open.
Perimeter dashes force all defenders to stay with the attackers they are guarding. If they don't, then there will be a great opportunity to rush behind the back and get and score the ball easily.
Option 2: The barrier for the player playing
after the ball transmitting the ball to the central player, transmitting (3) puts the barrier to the 3-point line playing upwards. (1), using a screen, opens to position (3) to the touchline. The defender, after setting the barrier, makes a dash to the basket and can
receive the ball from the post.
How to Counter Defensive Tactics
There are several tactics that coaches use to try and stop a flex offense. We're going to go through the two most common tactics and give you ways to get around them.
1. Blocking a pass between two perimeter players
This is the main tactic that coaches use to stop a flex offense. If the attacking team fails to make a pass between the two perimeter players (which causes a flex dash and down screen), then the offense is abandoned. Lucky for us, there are several alternatives.
1. Dash behind defender
If the first pass between players on the perimeter is blocked, the attacker to whom the pass is blocked must make a dash to the basket behind the back of the defender blocking the pass line. In the diagram above, X4 overrides the transfer to (4).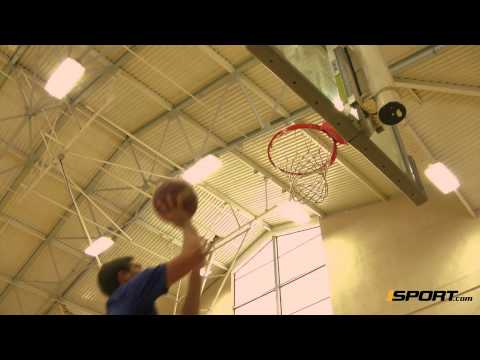 (4) dashes behind his defender and may receive the ball from (1). If the pass is not possible, X2 can insure the pass to (4) from his side, then (2) makes a dash up to the center of the court and receives the ball from (1).
2. Change of positions with dribbling
If a pass on the perimeter between (1) and (4) is not possible, the player with the ball with the help of a dribbling changes positions with a partner (4).
2. Defense changes at all screens
One of the best ways to defend a flexible offense is by switching at screens. This allows the post players to stay close to the basket and the perimeter players to play defensively on the perimeter. Here are some ideas on how you can counter switch defenses...
1. Dive while defending a flex screen
Sets a screen with a flexible screen (5.
at cut) 0.094 In this case, X5 will be forced to help defend against O3 in order to prevent an open shot from under the basket. When this happens, O5 should cover X3 and make a high-handed dash (dive) into the center of the
area. This causes X5 to block the pass to O3 and O5 at this time is free to receive the ball from (4) and pocket an easy ball. This defensive tactic results in a lot of fouls and free throws.
2. To transfer the ball the right player at the right time with unequal shifts
This is important to remember, ... When the enemy changes with all the barriers, the attacking team should quickly determine who is protected against whom. Depending on which of their opposing players is weak defensively, find a time when he is defending against your strongest attacker and pass the ball to him. The same situation occurs when a tall player changes with a small one and vice versa. This requires planning and knowledge of the players on the other teams.
3. Starting with our bottom center point guard
Some teams may mimic the match-up area defensively before they begin to switch screens.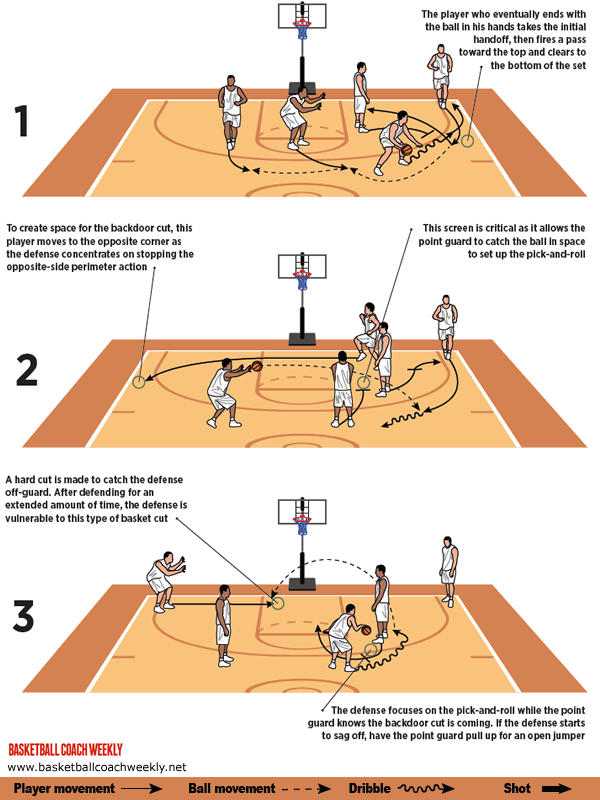 In that situation, you can apply the option, starting the attack with our point guard on the post position. Thus, when the defenders start to switch, in the end, in this situation, when changing, (X1) should defend against our (5), and the center defense will guard our point guard. As you can see in the diagram above, (04) can pass the ball to (05) under the basket when the opposing point guard is defending against it.
4. Be patient. Simple advice, but very important. After a couple of postbacks, you can be sure the defense will make a mistake. Two defenders will get confused and accidentally end up with one attacker. It happens all the time! Your players need to be patient and wait for this to happen and then be prepared to reap as much benefit as possible when it happens!
Conclusion: Ask anyone who has played against a flexible offense, they should know where and from where screens will be placed and how difficult it is to defend against them.