Home » Misc » How to put basketball lines on driveway
How to put basketball lines on driveway
A Home Basketball Court Without Court Lines Is Like Boston Without The Celtics – The Sports Installer
Court Painting
by Michael Westhead
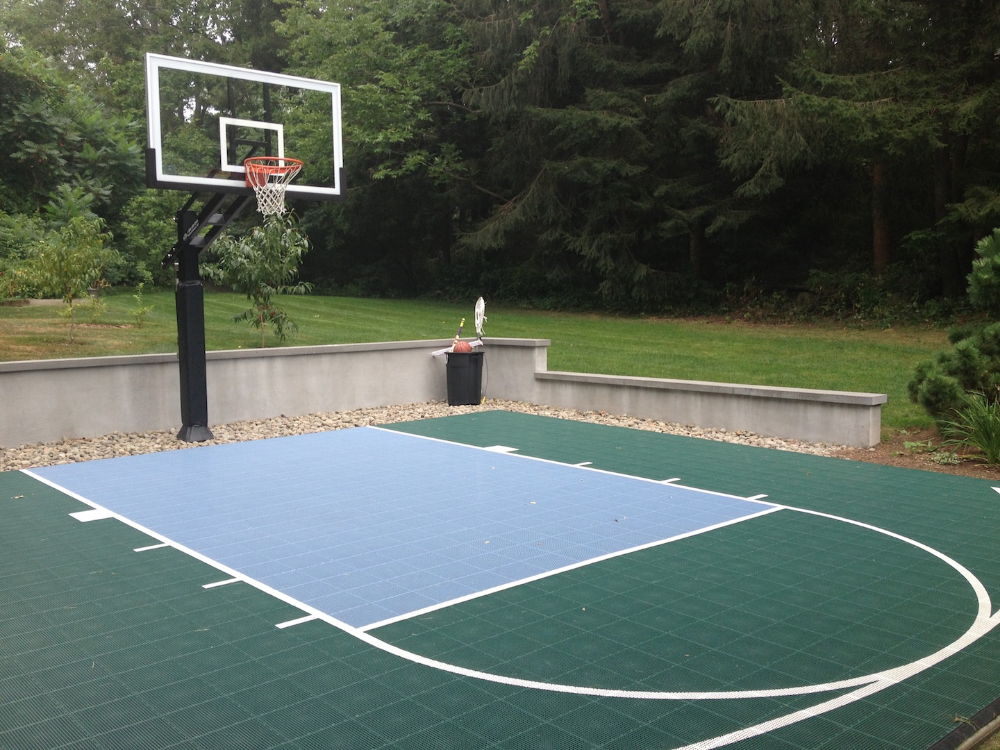
Having an out-of-the-box basketball hoop is great but adding basketball lines and a custom-lettered pole pad increases the number of games kids can play and the overall excitement of the court.
Here’s my disclaimer before I start telling you how great basketball court stencils are for a home court both for the installer as an additional income opportunity and for the homeowner as a playing experience.
As someone that’s trained dozens of people to paint basketball lines, I admit it’s not rocket science but I also firmly believe you’re either a painter or you’re not. Some people, painters, intuitively get it and can do it. Some people, non painters, don’t get it and I usually didn’t let them do it if they were terrible. After all, paint is permanent.
Now on to how great line painting is.
For the installer
A big negative with sports-equipment installs is the travel time between customers. You burn a ton of time commuting between jobs. If you’ve already sold them a hoop or are doing the install, talk about a prime customer for an upsell on line painting. You can add a significant chunk to your daily pay and not have to do another stop. It’s just more efficient business.
Another major bonus to line painting is it really adds pop to your job. Yes. Neighbors will see a new hoop. But will they really see it? Probably but it will be out of mind very quickly.
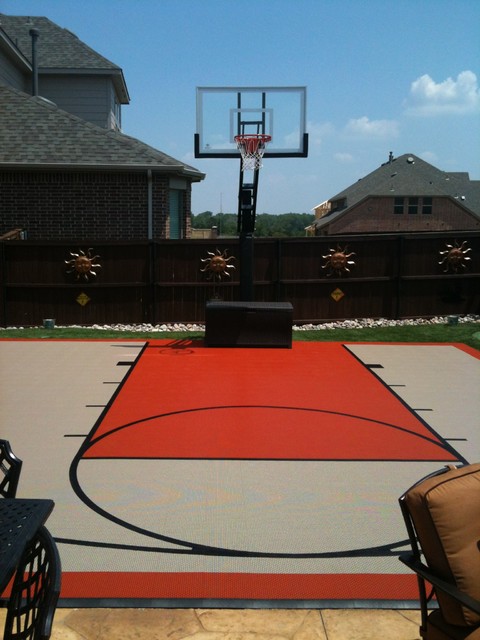
Painting lines on a driveway really adds visual pop to the job and will catch the eye of the neighbors every time they drive by. Their kids are going to want it to and they’re going to ask their neighbor where they got their lines done. This will not only lead to more work but, potentially, neighborhood-type jobs. This is not just word of mouth marketing, this is word of mouth and site marketing.
For the homeowner
Much like the carpet in The Big Lebowski, lines on a court really tie the court together, man.
https://youtu.be/_vGK008c_rA
Caution. Foul language.
All joking aside, it really does tie a court together. A basketball hoop is great. It really is, but lines add a visual that increases the number of games and shots your kids will take by leaps and bounds.
Free throws
3-point shots
Baseline 3-point shots
Bank shots
Mid range jump shots
The lines add the perspective for the serious player to practice and the kids who just want to shoot around to have fun.
You can do a lot of fun stuff with the lines too. You’re not limited to just white. You can paint lines in pretty much any color Rustoleum or Krylon carries. For instance, some customers prefer not to have lines stand out on their driveway. In this case, black lines actually blend in quite well on a faded asphalt driveway.
You’re also not limited to just a high school 3-point line. You can do either a high school, NCAA or NBA 3-point line, or, why not do all three?
Logos are another cool addition you can add to your court. Whether it’s your kid’s town team or your alma mater, logos take the carpet tying the room together analogy to epic proportions.
This is more of a motivational post for the benefits of painting driveway basketball lines. I will follow up with an instructional post and video on how to actually do it.
Most hoop lovers are content with a full court to play in, but most will agree that it’s a different feeling when you play in a good-looking court. Not only will it prolong your sneakers’ life span, paint and design on a basketball can inspire spirit and pride. What’s more, it also boosts teams’ morale, and for designs inherent to a community, it does give your place an identity. This article will provide you with tips and tricks on how to paint a basketball court and more.
What Materials are Used to Paint a Basketball Court?
Both indoor and outdoor basketball courts are subject to a lot of wear and tear. So at some point, you will have to replace or redesign how the floor looks. For wooden floors or wood tiles used in outdoor gyms, you won’t need to replace them as often. The same cannot be said, though, about outdoor courts.
Outdoor basketball courts are subjected to heat, rain, snow, and everything in between. In extreme conditions, paint should be reapplied every couple of months or so. Most experts recommend acrylic paint to finish an outdoor basketball court. What are some of the reasons acrylic is the best type of paint to use for basketball courts?
Perhaps the most important reason is that acrylic is made with specially-graded silica sand that prevents slippage. A slippery basketball court because of poor choices in the type of paint can be perilous and may cause injuries. Applying acrylic paint court surfaces make them aesthetically very pleasing while being easy to construct and maintain. Additionally, acrylic paint is resistant to common chemicals.
For other materials to paint a basketball court, you will need rollers (4 inches and 9 inches), pads, and trays. You may also need assorted art brushes, paint can opener, latex gloves, paint cups, duct tape, painter’s tape, and caution tape. During the project, you may need a water hose, pencil or chalk, and measuring tape.
What Kind of Paint Do You Use on a Basketball Court?
As pointed out earlier, the most recommended type of paint for outdoor basketball courts is acrylic. Acrylic has some properties that make it best for traction while adding to the basketball floor’s aesthetic value. What’s more, acrylic is essentially fade-resistant, easy to repair, waterproof, and highly durable.
Now, there are other kinds of paint that you may use on a basketball court. Some may suggest rubberized paint for concrete basketball courts or perhaps epoxy paint. Generally, both rubberized and epoxy paint are considerably more expensive than acrylic paint, so the latter is more popular as paint used in a basketball court.
How Do You Paint a Three-point Line on a Basketball Court?
Marking and painting the three-point line is one of the more difficult paint jobs you can do on the basketball court. The three-point line is long and shaped like an arc, so it’s easy to mess up if you don’t know how to go about with it.
The first thing that you need to do is look up the dimensions of the three-point line. It would be up to you to adopt the regulation distance of the three-point line, whether the high-school, college, or pro dimensions.
After determining the dimensions, the next thing you need to do is to create a makeshift compass. One method of doing it, and perhaps the easiest, is grabbing a string. One end should be at the bottom of the basket and have someone hold the other end with chalk. Drag the chalk with the string across to mark the three-point line. You can paint the line with acrylic paint by merely following the chalk lines.
In the NBA, the three-point line does not have the same distance all around. If you want to simulate an NBA three-point line’s appearance, it will be a little bit more complicated than just tracing an arc from one corner to the other.
What is the Best Surface for Outdoor Basketball Court?
If we are talking about outdoor basketball courts, two surfaces are preferred– concrete and asphalt. Other options for the base material for an outdoor basketball court are crushed stone and modular bases. With that being said, most outdoor basketball courts are either concrete and asphalt.
Honestly, it would boil down to personal preference in choosing between the two. In most cases, concrete is the better choice if you consider the cost of maintenance and repair. When done right, a concrete base material for a basketball court is basically maintenance-free. On the other hand, asphalt will deteriorate over time considering the freeze/that cycles, but unlike concrete, it is less likely to sustain cracks.
Now, how do you decide whether to go for concrete or asphalt? It depends on several factors. Relatively, both concrete and asphalt are incredibly strong surfaces, with the former potentially lasting 40 years with proper care and the latter for around 15-20 years. Other factors that contribute to the durability are proper application, thickness, and supporting materials.
As for appearance and functionality, asphalt provides an even surface than concrete. It would also be easier for the joints since it is not as hard as concrete. On the other hand, concrete is essentially non-slip. As we have pointed out, deciding which one is better comes down to personal preference.
As it stands, whether you choose to have a concrete or asphalt base material or surface, both will require upkeep to lengthen its service years. Resurfacing the material at least once a year may help prevent holes and cracks from developing, thereby lessening the risk for injuries. Sealcoating will also help the weather or rough play from ruining the surface, and applying sealant provide moisture resistance, reducing the need for repairs in the long run.
Here is a rundown of the differences between a concrete and an asphalt surface basketball court:
Asphalt is the cheaper option than concrete.
Concrete is more challenging to install than asphalt.
Asphalt does not last as long as concrete, more so if it’s not correctly built and installed.
An asphalt surface is more even and softer than concrete, which makes it easier for the joints.
Post-tension concrete basketball courts are a type of concrete that adjusts to tension to prevent cracks. While that is way more expensive, it may be one of the smartest choices as an outdoor basketball court surface.
Additionally, there is a considerable difference in using premium acrylic paint and its standard counterparts. The standard acrylic paint typically has a 1-year warranty while the premium has up to five years. However, the most significant difference is that the premium acrylic paint has a life expectancy of up to 30 years compared to the standard’s five years.
What’s the Average Cost to Paint a Basketball Court?
Like any construction project, the cost of painting a basketball court depends on several factors. Naturally, the bigger the court is, the more expensive the project. How much does it cost to paint a basketball court? A generous estimate, which means at the low end of the spectrum, may cost around $16,000, including the installation of the hoop.
However, not many of us can afford to hire a contractor to do the work. That is why when you consider how much it costs to paint a basketball court, it would be better off to do it yourself than hire someone to do it for you.
If you or the community already have a basketball court in place, you will save a lot of money doing the project yourselves. At most, you will only need to buy $100 worth of top-notch acrylic paint, or even as low as $50 for acrylic paints with lesser quality. There will be other expenses thrown here or there (like tapes and markers), but that still dwarfs the cost of hiring a contractor to do the job.
5 Tips on How to Paint a Basketball Court
1. To ensure that the entire project goes smoothly, pay attention to smaller details such as the materials and how you want the court to look. Sort the materials, piling them by how similar the items are. If you can, make a diagram to follow the pattern that you’d like as to the appearance of the basketball court.
2. Before applying the primer, make sure you wash the whole basketball court clean with a power washer and a broom. If you don’t have access to a power washer, a hose with a powered nozzle will do. Broom the court afterward to make sure it is clean and let the surface dry completely. Drying time may vary depending on the temperature and humidity. This is not the time to be impatient.
3. After the area dries completely, apply a clear primer to the surface. Use rollers to do this.
4. If you want to take it to the next level and paint some center court logo design, we recommend making a stencil out of poster board. Trace the outline over the poster board and cut out certain sections. Another method uses the grid system where you use the grid or squares as a guide for sketching the image. This is not for everyone, but if you have an artist in your midst, it’s worth a try.
5. Paint the lane in a different color than the lines to add that authentic look and feel. And remember, basketball lines are approximately two inches wide, so don’t vary the sideline, baseline, and centerline width.
Wrapping Things Up: How to Paint a Basketball Court
Basketball courts, whether indoor or outdoor, need retouching and a repaint every once in a while. For outdoor basketball courts, repainting may come more often than the elections since these courts are subject to harsh weather.
The most recommended type of paint for outdoor basketball courts is acrylic. Acrylic paint is made with specially-graded silica that essentially makes it slippage-free. It is also excellent to look at and is available in dozens of colors. Moreover, acrylic paint is resistant to common chemicals.
Acrylic paint is available in standard and premium variants. Standard acrylic paints cost less, but the premium alternative may be the smarter choice in the long run. It has a more extended warranty (five years compared to one) and typically outlasts its standard counterpart in terms of life expectancy (30 yrs to five yrs).
Now, when you’re given a choice between asphalt and concrete as base material or surface in an outdoor basketball court, which should you choose? Most experts would recommend concrete and rightly so.
Concrete is generally more durable and virtually a non-slip surface. Asphalt has a more bouncy feel and typically costs less to install. However, concrete trumps asphalt when it comes to years of service because some well-built concrete surfaces may last as long as 30 years. Post-tension concrete is an even better, albeit expensive choice. This type of concrete surface “adjusts” to any tension to prevent cracks. It is definitely a smart choice, considering the amount of money you would save in the long haul.
Well, if you had no idea how to paint a basketball court, we hope that this article pointed you in the right direction. Sometimes, these kinds of projects are not to be taken too seriously. If done with friends and the people in your community that care and love basketball, it is definitely an excellent way to build camaraderie while having fun doing manual work.
If you found this post helpful, you’re definitely going to like our other basketball FAQ articles here.
More interesting basketball FAQ posts here:
> How Many Laps Around a Basketball Court is a Mile?
> How Many Yards is a Basketball Court?
> How to Install a Ground Basketball Hoop?
> How Many Square Feet is a Basketball Court?
Basketball court markings: standards and norms
Author of the article
Khvatkov Dmitry
Consultant in the production of rubber coatings
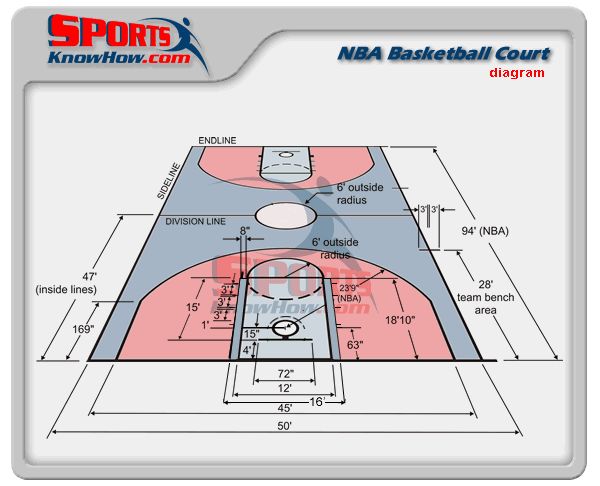
Basketball field marking requirements are approved by the FIBA standard. The site must be flat with a hard surface, free of bends, cracks and other obstacles. The accepted dimensions of the field are 28 m long and 16 m wide. By NBA standards, the field is slightly larger: 28.7 m (94' ft) long and 15.3 m (50' ft) wide.
Areas not intended for international competitions may differ from accepted standards (for public use, in schools or universities, etc.) and usually vary from 20 to 28 m in length and from 12 to 16 m in width.
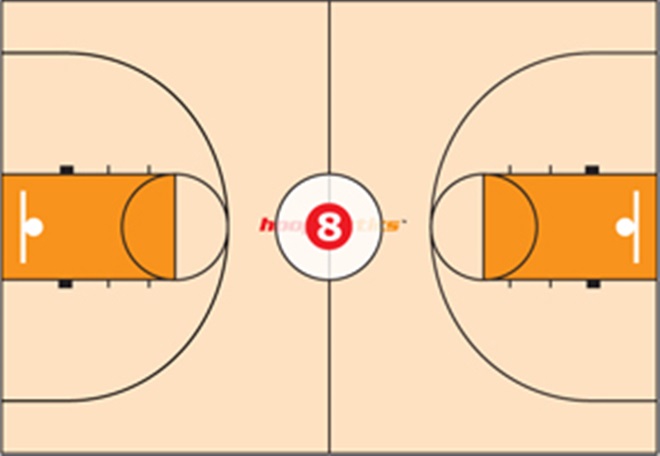
Basketball Court Marking Standards
Basketball court markings are conventionally divided into 5 components:
Boundary lines. They are located along the perimeter of the site and set its size. The lines that run along the field are called side lines, and those that are behind the baskets are called front lines.
Central line. Divides the court in half parallel to the front lines.
Central zone. It is a circle and is placed in the middle of the center line, and, accordingly, in the center of the entire field.
Three-point line. It is a semi-ellipse and is located around the shields on both sides of the field. It limits the close range.
Free throw line. It is located in front of the boards parallel to the front line and is limited on the sides by paint lines.
The standard line width is 5 cm. All outlines and lines must be of the same color (usually white) and be clearly visible from anywhere on the court.
Common lines
Common lines are used to limit the playing area of the court. The side lines (along the field) according to FIBA standards should be 28 m long, and the front lines - 16 m. For public areas, deviations from the accepted standards are allowed. Typically, basketball courts in schools or gyms are made from 20 m long and 12 m wide.
Central lines
The center line is parallel to the front and divides the field exactly in half. According to the standards - it should extend beyond the side lines by 15 cm on both sides.
In the middle of the center line there is a circle with a diameter of 3.6 m, which limits the central zone of the field. In this zone, the ball is played at the beginning of the game.
Three-Point Line
Three-Point Lines are located around the backboards on both sides of the field and consist of two straight lines 2.9 long9 m and a semicircle. Straight lines run perpendicular to the front at a distance of 0.9 m from the side lines. Despite the fact that visually the distance from the ring to the side of the three-point line seems to be less than to its central part, the distance from the backboard to any point is 6.75 m.
Penalty lines
Penalty lines limit the nearest area at the backboard. They consist of a trapezoid and a free throw zone.
Despite the name, the "trapezium" is a rectangle (until 2009year it really was a trapezoid), which is located under the shield. Its dimensions are 5.8 meters long and 4.9 meters wide. The shield is located at a distance of 1. 575 m from the end line in the middle of the court. In front of the backboard, at a distance of 1.25 m, there is a semicircle that limits the area for picking up the ball.
At a distance of 4.225 meters from the backboard, the trapeze zone ends and the free throw zone begins. It is a semicircle with a diameter of 3.6 m (like the central circle).
Paint zone lines
These lines are serifs on both sides of the trapezoid (parallel to the sidelines). They limit the areas for players who are fighting for the ball during a free throw.
Zones on the basketball field
The basketball court is divided into zones using markings. Each zone has its own specific rules.
Center circle
The center circle is used as a separate kick-off area at the start of the game. One representative from each team stand in a circle from their side and fight for the ball in a jump, after it is dropped by the referee. All players are exclusively on their side of the field, except for one who rebounds on the opponent's side.
Neutral zone
The peculiarity of this zone is that as soon as the player of the attacking team with the ball crosses the center line and is on the side of the opponent, he cannot pass the ball to the player of his team who is on the other side of the field (i.e. behind center line on your side).
Three-point zone
The three-point line limits the near zone of the shot. Hitting the basket from outside the basket brings the team three points. If the throw was made inside the zone, then it brings two points.
Three-second zone
This is the zone in close proximity to the ring. It is called three-second, since the player of the attacking team cannot be in it for more than three seconds. Most balls are thrown in this zone, so when attacking, it provides maximum protection.
Free throw area
In controversial situations, a free throw is provided from this area. The player of the attacking team must score the ball without stepping over the line of the trapezoid. At the same time, the players of both teams are not in the three-second zone. They take up positions along the paint lines on the sides of the trapezoid and may not step outside the lines until the free throw shooter has shot the ball.
How to mark a basketball field?
Basketball field markings, whether it is an international competition court or an open-air amateur field, are best applied using special equipment. This will ensure the long life of the coating, the lines will not clog and will promote fair play.
You can order the marking of a basketball court in Moscow and the Moscow region from Rezkom. We will measure the premises and develop a design project for the field so that it complies with generally accepted rules and is convenient for operation. For more details, you can contact our manager by phone 8-495-64-24-111.
How to equip a basketball court in the country or in the yard
Basketball develops the physical data of the child - coordination, endurance, educates strong-willed qualities, concentration, attentiveness and teaches non-standard thinking. Professionals recommend sending a child to the basketball section from the age of 8-9, but outside the city or in the yard, you can “chase the ball” from an early age.
I myself equipped a basketball court in my country house and now I am ready to share the secrets of its arrangement. I'll tell you what you need to do, how to choose the right equipment and how to care for it.
Prepare basketball court surface
To create a basketball court in accordance with all the rules, you need to select a flat horizontal surface for it and fill it with concrete. After that, I recommend applying a special rubber coating, like on playgrounds in the yard. There is a more expensive coating option - from rubber.
The coating will provide cushioning - the ball will bounce well.
If it is not possible to organize a special platform, you can simply place a rack or hanging basket on a dirt surface. In this case, the ball bounce will not be so strong. An important requirement for safety: the surface must be flat, without holes and bumps.
The dimensions of the site depend on the features of your yard or plot in the country. A full-fledged basketball court has dimensions of 28 × 15 meters. However, not everyone has the opportunity to build such a site in the country.
It is necessary to take into account the technical features of the game. The three-point line in basketball is 6.75 meters from the hoop. Therefore, it is necessary that the size of the site be at least 10 × 13 meters. If you are not going to train three-point shots, a 5 × 5 meter court will do.
Mark out
The second step is to mark up. It is important to use paints of contrasting colors. It is better to buy paints with a high content of rubber or polymer.
If you are equipping a basketball court for children, make the markings bright so that they cheer you up and attract attention. For the game of teenagers and adults, it is better to immediately apply technically correct markings.
Place a small fence or protective net on the site. Thanks to them, you do not have to constantly run after the ball to the other end of the site.
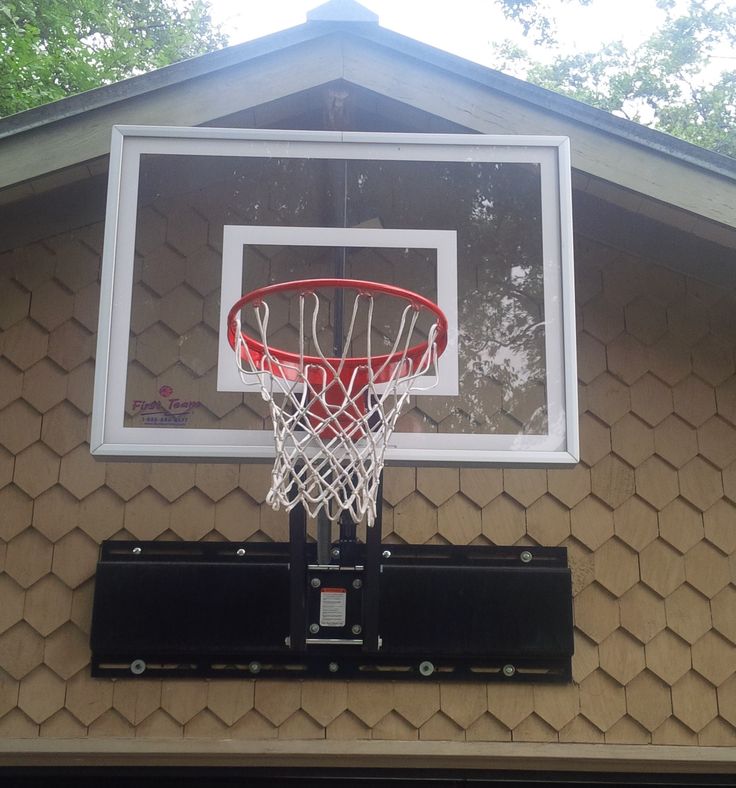
Buy stand or backboard
It is difficult to answer the question of what is better - a basketball stand or a backboard. It all depends on taste, tasks and opportunities. Each of these types of equipment has its pros and cons.
There are two types of racks: mobile and static. The static one is mounted in the ground.
The base of the mobile rack is filled with sand or water - for stability. The main advantage of a mobile rack is that it can be moved from place to place. This is convenient when there is no dedicated basketball court or if you are going to play other games in this area, such as tennis or football.
The main requirement for racks is their stability. It will be much more comfortable and safer to play if you are sure that the stance will withstand a blow of any force.
Pay attention to the materials from which the racks are made. A static rack will be outdoors throughout the year, which means it must be made of reliable materials. It is better to buy racks from well-known manufacturers. So, the American companies Spalding or Royal Fitness guarantee high quality, durability and safety.
Basketball backboards can be made in the country with your own hands from a board, chipboard or plywood remnants. If this option does not suit you, you can purchase semi-professional or professional options in stores.
There are four types of materials from which the shield surface is made: composite, polycarbonate, acrylic and tempered glass. The first one is the cheapest. It is intended for entry-level players. Now manufacturers offer a large selection of colors. A carbonate backboard will provide a good bounce of the ball. An acrylic shield is bought to hold competitions or intense games.
The mobile stand can be moved, so it is suitable for a playground in the country and for those who want to play other games besides basketball
Shields and racks made of tempered glass look solid. They will be appreciated by experienced basketball players
Pay attention to rings
You can buy cheap rings, but I don't recommend doing that. In a year they will deteriorate and you will have to buy new ones. Basketball hoops from Spalding and Royal Fitness are made from quality metal that won't rust in the rain.
The ring must have a springy structure - no rigid attachment to the shield.
According to NBA rules, the ring must be fixed at a distance of about three meters from the ground. For a game with the participation of younger students, it can be hung lower so that it is not very easy to hit it, but at the same time it is quite possible.
Choose rings made from high quality metal to last for many years. For a game involving adults and teenagers, metal chain rings are suitable. They are distinguished by durability and strength.
Know what types of basketballs exist
Success in the game depends on the basketball.
They are divided by size. Size 7 is for men, 5 for women. Even smaller balls are bought for children. The size 6 ball is suitable for street ball or street basketball where the game is played on half the field.
You also need to take into account where you will play the ball: on the street or in the hall. The street ball has a stronger bounce, it is harder and more wear-resistant, but the indoor ball is more convenient to hold in your hands.
It is important to pay attention to the composition of the basketball. Well-known companies use complex polymer compositions for its production. The more expensive the ball, the more complex the polymer composition. The quality of the material determines how comfortable it will be for the players to hold the ball, what kind of rebound it has from the floor and from the bow of the ring.
Another important nuance: do not forget to purchase a pump with any needle.
If you want the ball to have good grip and bounce well, you need to choose polymer models from world famous manufacturers
Proper care
Professional athletes are ready to play in any weather, but amateurs are better off not following their example. If you don't properly store, use and care for your basketball arsenal, its lifespan will be shortened. Humidity will ruin the ball and all equipment, so you can’t leave them outside during rain and snow.
Balls should be stored only in a dry and ventilated room at a temperature of 10 to 20 °C.
Before winter storage, water must be poured out of the base of the mobile rack, and then removed from the street. If you don't feel like doing this every time, fill the rack with sand. Then it will not need to be constantly moved. Basketball stands from Royal Fitness can be left outside in the winter.
Things to remember when setting up a basketball court
The area needs to be determined. The classic version - 28 × 15 meters - is not suitable for everyone. For a dacha, a 5 × 5 meter area will be enough if you want to train three-point shots.
Don't forget the markup. It should be in a contrasting color. Bright colors will interest children and cheer them up.


 This is not just word of mouth marketing, this is word of mouth and site marketing.
 In this case, black lines actually blend in quite well on a faded asphalt driveway.
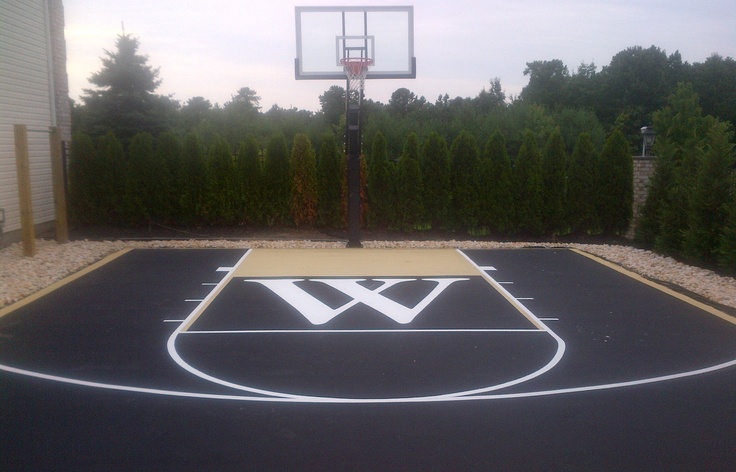 What’s more, it also boosts teams’ morale, and for designs inherent to a community, it does give your place an identity. This article will provide you with tips and tricks on how to paint a basketball court and more.
 A slippery basketball court because of poor choices in the type of paint can be perilous and may cause injuries. Applying acrylic paint court surfaces make them aesthetically very pleasing while being easy to construct and maintain. Additionally, acrylic paint is resistant to common chemicals.
 One end should be at the bottom of the basket and have someone hold the other end with chalk. Drag the chalk with the string across to mark the three-point line. You can paint the line with acrylic paint by merely following the chalk lines.
 When done right, a concrete base material for a basketball court is basically maintenance-free. On the other hand, asphalt will deteriorate over time considering the freeze/that cycles, but unlike concrete, it is less likely to sustain cracks.
 Resurfacing the material at least once a year may help prevent holes and cracks from developing, thereby lessening the risk for injuries. Sealcoating will also help the weather or rough play from ruining the surface, and applying sealant provide moisture resistance, reducing the need for repairs in the long run.
 The standard acrylic paint typically has a 1-year warranty while the premium has up to five years. However, the most significant difference is that the premium acrylic paint has a life expectancy of up to 30 years compared to the standard’s five years.
 This is not the time to be impatient.
 Post-tension concrete is an even better, albeit expensive choice. This type of concrete surface “adjusts” to any tension to prevent cracks. It is definitely a smart choice, considering the amount of money you would save in the long haul.
 The site must be flat with a hard surface, free of bends, cracks and other obstacles. The accepted dimensions of the field are 28 m long and 16 m wide. By NBA standards, the field is slightly larger: 28.7 m (94' ft) long and 15.3 m (50' ft) wide.
 575 m from the end line in the middle of the court. In front of the backboard, at a distance of 1.25 m, there is a semicircle that limits the area for picking up the ball.
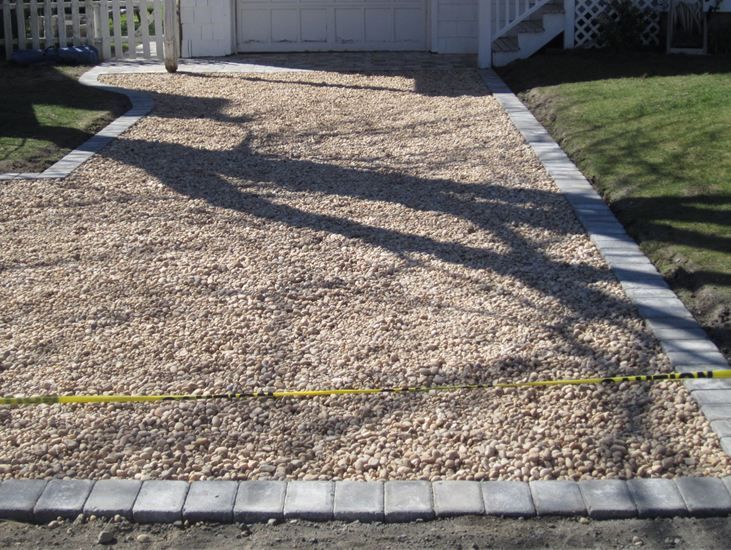
 At the same time, the players of both teams are not in the three-second zone. They take up positions along the paint lines on the sides of the trapezoid and may not step outside the lines until the free throw shooter has shot the ball.
 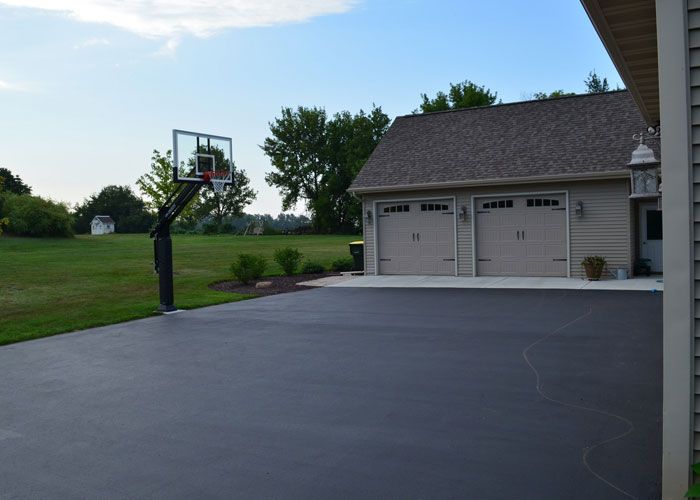 Professionals recommend sending a child to the basketball section from the age of 8-9, but outside the city or in the yard, you can “chase the ball” from an early age.
  An important requirement for safety: the surface must be flat, without holes and bumps.
 If you don't properly store, use and care for your basketball arsenal, its lifespan will be shortened. Humidity will ruin the ball and all equipment, so you can’t leave them outside during rain and snow.