Home » Misc » How to work on ball handling in basketball
How to work on ball handling in basketball
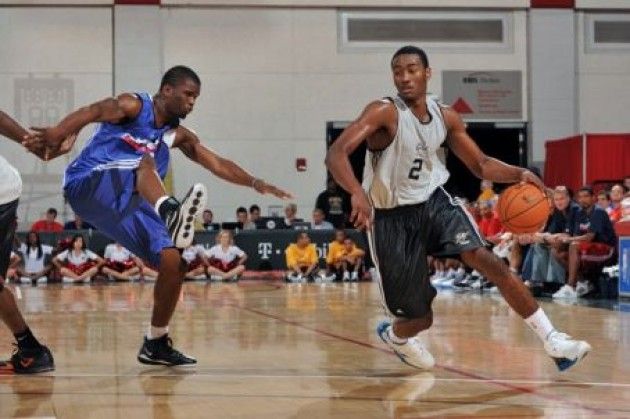
Basketball Dribbling and Ball Handling Video Clips, Fundamentals, Drills, and Tips
Most coaches use dribbling and ball handling interchangeably. Though they are linked, the 2 skills are definitely separate.
Dribbling and controlling the ball is a skill that can be practiced alone and is separate from the other ball skills on the court. Ball handling, however, involves knowledge of the game and integrates dribbling, passing and decision-making.
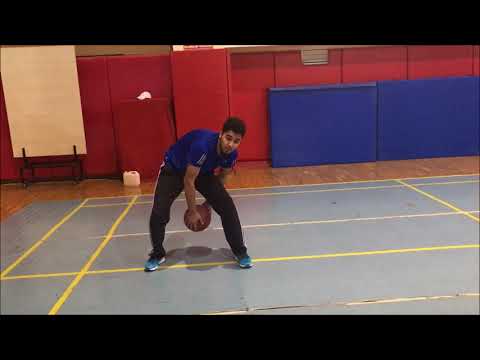
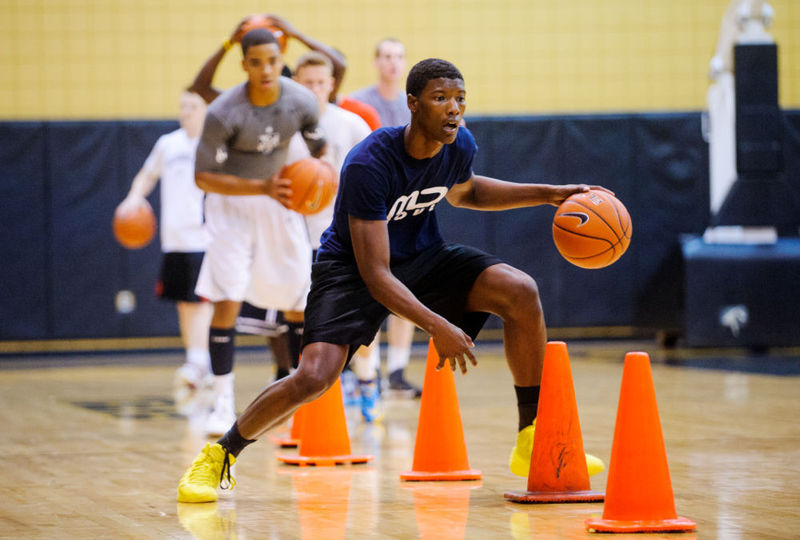
Practicing and improving your dribbling is a simple task. There are innumerable dribbling drills that are in use today that are challenging and effective. The set of drills that have come to be known as "Maravich Drills," (after the late ball-handling wizard Pete Maravich) are widely known. They include drills such as passing the ball around your body, dribble figure 8s, spider dribbling, drop and catch.
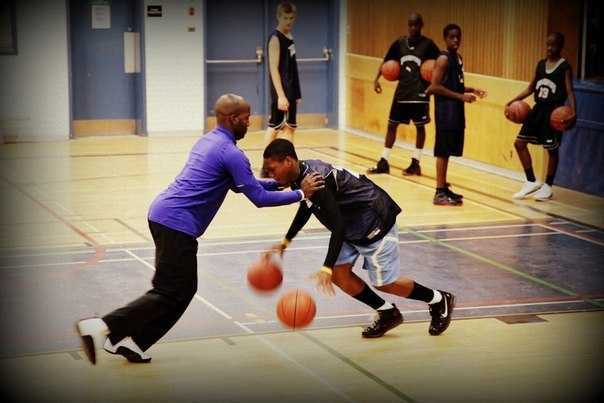
Practicing and improving your ball handling requires imagination, as you have to put yourself in game situations.
One of our favorite series of ballhandling drills that helps develop better ballhandlers is the Maravich series! Watch it below.
9 Tips To Improve Your Dribbling & Ball Handling
Here are 9 tips from pro coach Don Kelbick.
Dribble the ball hard. The more time the ball spends in your hand, the more control you have of the ball. The harder you dribble, the quicker it gets back in your hand.
Head up at all times. Look at the rim or a spot on the wall during all practice.
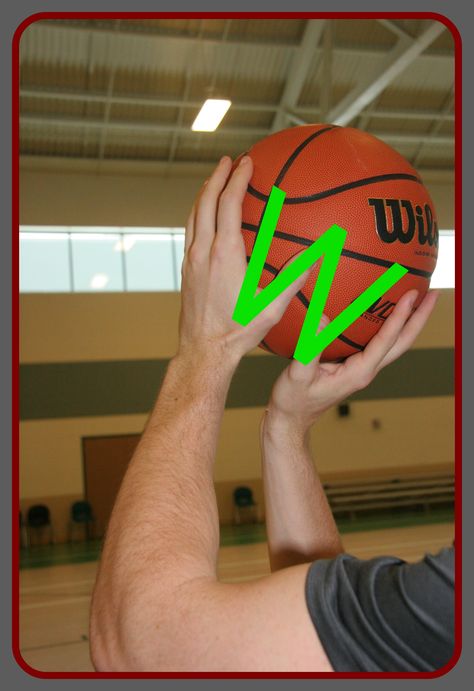
Use your finger tips to control the ball, not your palm.
Use your imagination. Picture when and how you would use each of the dribbles.
Teach mentality. There is too much dribbling for no reason in our game today. I like to teach that the primary purpose for putting the ball on the floor is to get a lay-up. If you don't have an opportunity, don't put it on the floor.
Basketball is a game of length. Work on lengthening the dribble. Work to get your opportunities with 1 dribble. You don't beat defenses with your dribble. You beat people with your feet; you SEPARATE from your defense with the dribble.
Basketball is also a game of angles. Try to move in straight lines. Whenever you make an "East-West" move (something that takes you toward the sideline), re-capture a "North-South" path (direct line to the basket) as quickly as possible.
Don't do things in 2 dribbles that you can do in 1.
Practice outside your comfort zone. Experiment; go faster than you are used to, use your imagination. When working on new skills, don't be concerned with losing the ball. Just pick it up and do it again. If you practice only things that are comfortable, then you will never improve.
More Ball Handling Tips and Articles
Executing The Basketball Pick and Roll
The Importance of the Back Up Dribble and How It Reduces Turnovers Against Pressure
A Secret to Chris Paul's Success - Change of Pace
Handling Ball Screens Like Steve Nash
Chris Paul Hesitation Move & The Importance of Counter Moves [VIDEO]
Other Blog Posts About Ball Handling
Dribbling Practice
"Maravich Drills" are very good at getting players comfortable with the ball. Below are some examples.
Dribble Figure 8's - Spread legs about shoulder width. Dribble the ball through and around legs in a figure 8. Can be done multiple ways - front to back, back to front, low dribbles (as many dribbles as possible with dribble about shoe height), as few dribbles as possible (high dribble about waist high), can even be done walking. For even more of a challenge, try the drill with one hand instead of two.
Spider Dribble - Feet spread about shoulder width. Dribble the ball between your legs in the following manner - left hand, right hand in front of your legs; left hand, right hand behind your legs. Work to as fast a possible.
Drop and Catch - Hold ball between your legs with right hand in front of your body, left hand behind. Drop the ball and exchange you hand position and re-catch the ball before it hits the ground.
These are just examples. There are too many of these drills to list here. Pete Maravich devised these drills out of his imagination, his need for challenge and his drive to improve. You do not need to be bound by other people's drills; challenge yourself to come up with your own drills.
Dribbling Warm Ups
I prefer to practice skills in combinations that are relevant to multiple aspects of the game. It saves time and instills a great sense of urgency.. It
saves time and has a great sense of urgency. One of the ways I do this is to add dribbling into my stretching exercises.
Hamstring Stretch - While dribbling with your right hand, cross right leg over left. Bend at the waist, touch the floor with your left
hand and bring your dribble down to shoe top level. Hold for an 8 count. Reverse position and switch hands.
Lower Body and Achilles Stretch - Dribble waist high while standing up. Step as far forward with your right leg as you can, keeping
your back straight and your left heel on the ground. At the same time bring your dribble forward of your right foot, keeping the ball at
shoe-top height. Hold for an 8 count and then stand up. Switch legs and dribble hand.
Crossover - Same as above except, step forward with left leg. As foot goes to the floor, switch hands, right to left, keeping
dribble shoe top height. Cross back when standing up.
Through Legs - Same as above except instead of crossing over, put ball through legs at shoe top height.
Multiple Through Legs - Same as above except put ball through legs 3 times (left, right, left) on quick, successive dribbles
shoe top height.
Torso Twist - Spread legs outside of shoulder width, dribble with right hand. Keeping legs straight, bring ball across body to
left side, outside left foot and dribble at shoe top height behind left foot.
These are just samples. You can develop a dribble stretch for any part of the body.
Two Ball Dribbling Drills & Videos:
I think the most effective way to improve your dribble, however, is by using 2 balls. Any dribble or drill you can do with 1 ball, you can do with 2.
Stationary practice at first will build confidence. Stand on the baseline and try to control both balls. Then start to move. Go half court, then full court. Follow
the lines around the court or in any route you can come up with.
To see more DRILLS & VIDEOS Click Here.
The difference between dribbling and ball handling is intent. Dribbling is the skill of controlling the ball as you bounce it to the floor. Ball handling (at least 1 aspect of ball handling) is what you do with that dribble.
Whether you use it to go to the basket, make a passing angle, escape from pressure or anything else, those situations have to be imagined and practiced.
Here are some situational drills:
Full Court Lay-ups - Start on the baseline. Dribble full court with right hand in 5 dribbles and make a lay-up, come back with left hand. Then reduce the number of dribbles to 4 and then to 3.
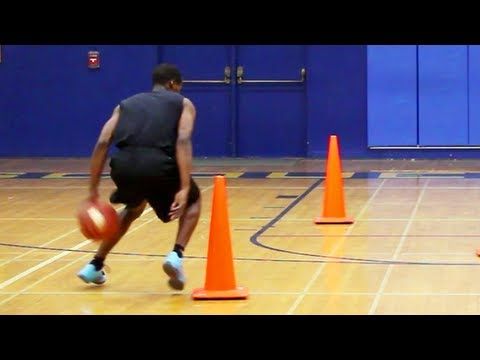
Chair Changes - Place a chair about 21 feet from the basket. It can be on top, on the wing, or in the corner. Start about 8-10 feet beyond the chair. Dribble straight at the chair. At the chair, use a change of direction dribble (crossover, inside out, behind back, etc) to go beyond the chair and make a lay-up. Try to get to the point where you only need one dribble to get to the lay-up. Practice all the changes.
Two up - Two back - Set a chair such as in the drill above. Take 2 hard dribbles at the chair. When reaching the chair, take 2 backup dribbles. After the second dribble, push ahead into 1 dribble lay-up or pull-up jumpshot.
Dropstep Dribble - (works on footwork and ballhanding)
Chair Curl - This is another great multi use drill. It combines shooting, ball handling and speed and high intensity change in direction.
Chair Curl Phase 2 (With 2 Chairs)
Two Ball Dribbling Drills & Moves - Excellent way to improve one on one moves.
Basketball Pick and Roll Drills
Shooting drills can also be adapted to work on ball handling aspects by adding changes of direction and pivoting to create 1 and 2 dribble opportunities for either jumpers or lay-ups.
Once you have developed a feel for the ball, it's very important that you practice your ball handling in competitive, game-like situations with defenders present. In the DVD 30 Competitive Skill Development Drills, you will find 12 drills that are specific to improving your ball handling skills in game-like situations.
More Dribbling and Ball Handling Drills
Coaches, go here for more Dribbling & Ball Handling Drills
Players, go here for more Dribbling & Ball Handling Drills
Recommended Training Resources:
Youth Ball Handling & Workout App - Over 200 ball handling and footwork drills. 24 Different Levels.
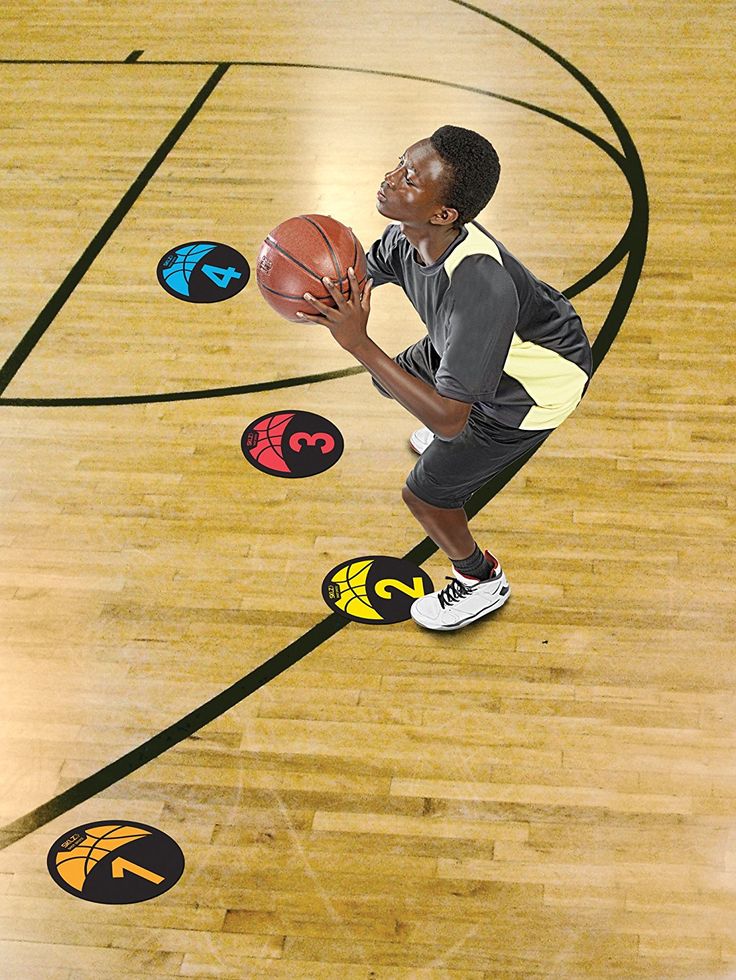
SKLZ Court Vision dribble goggles will help you develop better ball control and improved awareness of the whole court. They force players to handle the ball with their head up to survey the court...(more info)
Basketball Ball Handling Drills - Basketball Tips
Basketball Tip
Presented by Lance Von Vogt, Camp Director Nike Boys Basketball Camp William Jessup University
Daily work on ball handling skills is a key component to our basketball camps in Rocklin, CA. Ball handling is the easiest way to work on your game and become a great all-around player as all you need is a ball and a flat surface.
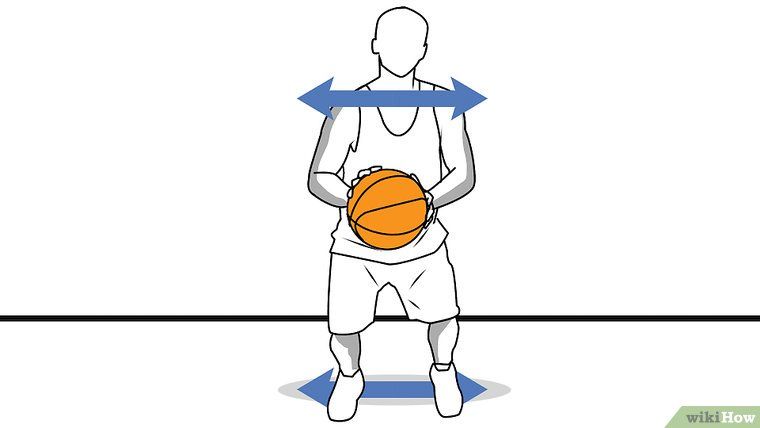
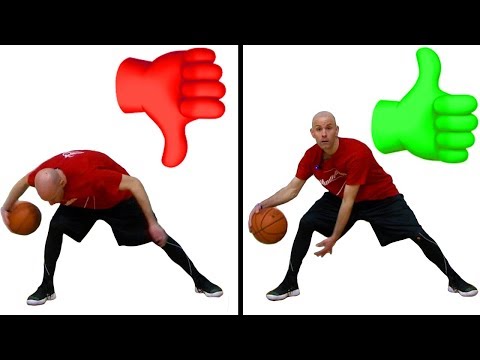
Just as in all areas of basketball, the foundation of working on ball handling is to make sure you are balanced and in an athletic position. Dribbling the ball in a balanced position, make sure your knees are bent and your chest is up; this enables you to look forward and see the floor. Avoid looking down while you dribble as that takes away from your court vision. Lastly, use your fingertips to dribble the ball and spread your fingers out, as it helps cover the ball and give you more control of your dribble. Only using your arms (do not use your entire body), dribble the ball as quick and hard as you can without worrying about making mistakes. If you lose your ball, no big deal, just retrieve it and start from where you left off.
Remember, practice makes perfect, and you can only make perfect by practicing outside your comfort zone!
With that being said, here is a solid warm-up and 4 ball handling drills we practice at our Nike Boys Basketball Camp at William Jessup University:
WARM-UP
Ball Slaps – slap ball as hard as you can with one hand as the other hand holds the ball. Rotate hand on every slap.
Finger Tips – Extend arms out and push ball back and forth with your fingertips. Once you feel comfortable with the ball extended out in front of you, move the ball high above head and low in front of your ankles working the ball in the same way.
Wraps – Wrap ball around your head, then around your waist, and finally around your ankles. Do each one separate, and then do all three together as one rep.
Figure 8 – Wrap ball around legs going in front in between your legs first then wrapping behind one knee. Then bring ball back in front in between legs then behind other knee. Continue that motion continuous.
BALL HANDLING DRILLS
Pound Dribble (1 Ball) – Dribble the ball as hard as you can with one hand, not allowing the ball to go higher than just above your knees. After 30-45 seconds, rotate hands.
2 Ball Dribbling – Similar to the one hand pound except for you are now dribbling with both hands at one time. You can do 2 ball rhythm and 2 ball alternating for 30-45 second each.
Single Leg Dribbling(1 Ball) – Dribble the ball with the Right hand making circles around your Right leg, the alternate doing the same with the Left hand and leg.
Figure 8 Dribble (1 Ball) – Same as Figure 8 in warm-up, but now we are dribbling the ball instead of wrapping it.
Check out more basketball training tips to help take your game to the next level!
Share This
See all the latests basketball tips
5 Basketball Exercises to Move the Ball with Passes
There is nothing like watching a team move the ball quickly and efficiently around the court without greed.
Overcoming the defense with smart passing the ball to each other, creating situations for open shots and passes is one of the great offensive techniques.
Want your team to do it?
Basketball passing exercises in this article will help you with this.
But first let me explain something very important...
There are two types of training exercises:
1. Technique for passing the ball.
2. Decision making during transfers.
Unfortunately, most coaches only focus on the "technical" aspect of training and forget how to train their team's decision-making ability when it comes to sharing the ball.
Your players will not improve their game passes by doing thousands of repetitions of chest passes.
While technical drills have their place, they are far less important than passing drills with decision making.
We must let the players learn how to read the defense and make the right decisions.
In addition, ball passing exercises are great for starting a workout to warm up your team and get them to communicate and work together.
5 ball passing exercises.
1. Advance
How the drill works:
Players form 3 columns evenly distributed along the end line. The two outside players start with the balls.
3 players advance across the court passing the ball back and forth to the middle player and then finish the exercise with two shots from under the basket.
Purpose:
A fun passing exercise that works on catching and passing without running, with communication, timing, and shooting from under the basket at game speed.
Formation:
Players form 3 columns behind the end line.
Two players on the outside lines have balls.
Instructions:
3 players (1, 2 and 5) begin to move forward on the court. The 1st outside player passes the ball to the 2nd player in the middle line.
Immediately upon receiving the ball, the center line player returns the ball to the same player on the touchline.
The 1st middle player then turns to the other side and receives a pass from the 5th outside player and immediately returns the ball to him.
Outside players may use 1-2 steps to avoid running.
The drill continues until the players reach the opposite 3-point line. When this happens, the two outside dribblers go to the basket and shoot.
The group then waits at the opposite end for the rest of the groups to complete the exercise before starting the exercise on the other side. On the right scheme at the top, the three players (4, 3 and 2) continue the exercise according to the scheme described above.
Options:
Medium or 3-point shots. Instead of ending with a run to the basket, players may end with mid-range shots or 3-point shots.
Back and forth - Instead of waiting at the other end, the troika can complete the drill both ways. Only now the threes are placed on both end lines and begin the exercise when the three from the opposite side return to their half of the court.
One Ball - If you are coaching very young players, you can run this exercise with one ball until the players understand how it works.
Coach's notes:
Passes must be passed on the move in front of the player using proper passing technique.
The receiver must hold his hands at goodie level, showing 10 fingers and calling for the ball to be passed to him.
The middle player must catch the ball and quickly pass the ball to a running partner. Don't run!
Shooting technique while moving from under the basket is very important in this exercise. Watch your footwork and make sure all players are doing it right.
2. Monkey in the middle
How the exercise works:
Players are divided into groups of three. Each group has one ball. The two transmitters lined up 12 to 15 feet apart. The third player in the group is the "monkey in the middle". He tries to hit or steal the ball. The two outside players must pass the ball to each other without using cross passes or dribbling. Simply turning and using feints to open up the passing line and pass the ball past the defender.
Goal:
A fun exercise that works on defense at the same time. This exercise will teach players how to use feints and turns to create a passing zone and also to protect the ball.
Lineup:
• Groups of 3 players.
• Each group has one ball.
• The passers are lined up 12-15 feet apart with the third player (back) in the middle.
Instructions:
1. The drill starts with the defender attacking the player who starts the drill with the ball.
2. The attacker uses feints and steps to pass to another attacker while the defender attempts to parry or intercept the pass.
3. After each pass, the defender rushes towards the ball carrier and tries to press the ball again.
4. When the defender recovers the ball or kicks the ball, the players change positions.
Variations:
Change after a certain time - Players can change positions
after a certain period of time (depending on the age of the players, their strength and stamina), and not after each interception and elimination. For example, 30-40 seconds.
One dribbling available. Let the attacking players hit the ball once to the floor to open up the passing corner. It will be tougher for the defender.
Only bounce passes allowed - in order to make it more difficult for attackers, allow them to only bounce passes.
Notes:
• It is very important for a defender to have active arms and legs at all times. This is the best way to intercept.
• Passing players must wait for the defender to recover before making the next pass. The purpose of the training is to learn how to pass and create passing angles.
• If there is no set time, the offensive player must not hold the ball for more than 5 seconds without passing the ball.
• No passing in an arc! They make the drill too easy for the attackers and will not lead to improvement.
3. Swing passes
How the exercise works:
The team is divided into 4 groups in the corners on half the court. The players make a pass to the player on the right, who start running along the sideline towards the endline. The sender then joins the end of the column into which he passed the ball.
Purpose:
A drill intended to be used primarily with young players or as a warm-up. This training will improve passing the ball on the move, as well as improve reception and passing without dribbling.
Lineup:
• The team is divided into 4 groups. One group located in each corner.
• The first player in one of the groups has the ball.
Instructions:
1. The drill is started by ball carrier 02 passing the ball 01 to the player on the right.
2. Before passing the ball, the receiver must start running in the direction of the next group, where he will make the next pass of the ball.
3. 01, having received the ball, passes it to player 05, who starts a dash towards 03.
4. After each pass, the passer joins the end of the group where the ball was passed.
5. The exercise continues according to the same scheme with passes and jerks of the players along the square in the same direction.
6. After a certain period of time, the coach changes the direction of the passes.
Options:
Turn on the second ball. If the players perform confidently, then you can enter the second ball in the opposite corner.
Various types of passes - The drill can be performed with one or two hand passes, bouncing, etc. One Dribbling - Players are allowed to make one dribbling before passing to the next player. This can be useful if you are passing with one hand.
TIPS:
• The receiver does not need to slow down or speed up to catch a transmission. Transfers must be accurate, timely and forward.
• The receiver must initiate the snatch in a timely manner with arms outstretched to assist the passing player in making a timely and accurate pass.
• It is very important that you do not make any mistakes during the exercise. Don't let them fall into this bad habit.
• Begin the exercise at medium speed at the beginning until the players understand it. Then increase the intensity.
4. Bronze gears.
How the drill works:
Starting at the end line at the edge of the penalty area, pairs of players pass the ball back and forth using different passes as they run across the court to the other end line. When they get there, they move closer to the touchline and come back using various passes over the players in the middle of the court.
Purpose:
An excellent warm-up that provides many passes in a short amount of time. Including passes of various lengths and types for players in training.
Line-up:
• All players find a partner.
• Each pair has one ball.
• Pairs split into two columns behind the endline at the edge of the SR.
Instructions:
• 1. The first pair move to the opposite side at a slow pace in the middle of the court, passing the ball from the chest to each other.
• 2. As soon as the first pair is closer to the 3-point line, the next pair starts.
• 3. When the first pair of players reach the opposing endline, they move to the touchlines and return, passing the ball over the pairs of players moving in the middle of the court.
• 4. When the players return to their starting position, they rejoin the pairs in the middle of the court and continue continuous training.
• 5. Every couple of minutes, change the type of passes players make for middle pairs and outside pairs.
Options:
Gears for pairs in the middle. For the mid lanes, there are several types of passes that I recommend: from the chest, with a rebound, one-handed from the chest, and one-handed with a rebound.
Outline Passes - For outside lines there are several types of passes that I recommend: chest passes, overhead passes, one hand passes.
Remember to consider your team's age, strength and skill level when deciding which passes they should use during practice.
Tips:
• Follow the pace of the exercise; especially if it is used as one of the warm-up exercises. Walking should not be allowed, but too much traffic should also be avoided. Accurate transmission is the main focus of training.
• Players on the outside lines must not make too many passes in an arc and with a very high trajectory on their passes. They should be at a height that is safe enough not to hit the midlines, but straight enough to reach your partner quickly.
• The ability to pass the ball with either hand is an important skill to develop. Expect mistakes when your players first perform a drill, but make sure you train them properly.
• Footwork is very important during this workout. Players must be able to catch the ball and pass back to their partner in two steps. If you are training young children and they cannot pass the ball at speed yet, slow down the pace of the exercise.
• After each run around the court, the players must switch to the sides so that they practice passing short and long passes from both sides of their body.
5. Netball
How the exercise works:
regular battle without dribbting the ball is allowed at any time. Games can be played 3 on 3, 4 on 4, or 5 on 5.
Target:
An excellent exercise that improves not only passing the ball, but also moving without the ball, positioning, jerking, etc. This exercise will lead to less use of dribbling in games and fewer losses.
Lineup:
• Divide the players into two teams based on the number of players available for training.
• Try to make teams of the same height and skill level.
• Only one ball is needed for training.
Instructions:
1. Teams play normal full game - no dribbling!
2. The exercise is performed within the time specified by the trainer.
3. Start with the arrangement shown in the diagram.
Point system:
• The game is played up to either 5 or 11 points.
• Each 2-point roll is worth 1 point.
• Each 3-point roll is worth 2 points.
• Must win by 2 points.
• In the event of a shooting foul, the offensive player throws one free throw for 1 point.
Variations:
One Shot Allowed - Players are allowed 1 dribbling when they gain possession of the ball. This is not a requirement, just an option.
Only bounce passes allowed - Restrict your players to only use bounce passes.
3 teams. The exercise starts by dividing your team into 3 groups of 3 to 5 players. Two teams start defense in each half. The third team is in the middle of the court on offense. The offensive team chooses one side and tries to score the ball without dribbling. Same scoring system as above. After a goal is scored or the possession of the ball is changed, the defensive team receives the ball, attacks in the opposite direction. The previous offensive team may play defense up to the center line of the court. Play until one team reaches 5 or 11 points.
Tips:
• It's very important to give players instructions on how to set up wide and run smart to get the ball.
• If you need to step in to make adjustments or re-emphasize the most important points of the exercise (distance, snatches), step in but keep it short.
• All passes must be at least 3 feet long. Don't let the players run up and pass the ball from each other's hands.
• Footwork is important in this exercise. Make sure the players are not running and that they are using turns correctly.
• Players must speak and use raised arms when rushing to the basket to receive the ball.
V. Melnichuk
Special exercises in teaching basketball technique
I offer a set of special exercises for teaching the technique of elements of basketball. The exercises are aimed at developing the basic techniques in basketball, as well as developing speed and agility on the basketball court. We will divide these exercises for basketball into 2 categories:
The 1st category of exercises and relay races will focus on honing the most common techniques used in basketball.
The 2nd category of exercises will help you develop agility and speed on the court, you will move and think much faster when you master all the described maneuvers.
Basketball technique drills:
Stances and movements
Catching and passing the ball
Dribbling
Double step
Retrieving the ball
Basic Move Video Training in Basketball
Basketball Speed Drills:
Super Shuttle
Zigzag
Shuttle with ball transfer
Square
Exercises for basketball
While playing basketball, the player needs to constantly accelerate and quickly jerk in different directions at distances from 1 to 20 meters, the basketball court will not allow for more. So great results in the 100m do not always lead to the same success when trying to run into a fast break. Much more important will be the ability to quickly "switch" between running forward and backward, left and right. Combining agility training with classic speed training will have a huge impact on your playing ability. As a result, you will not only be able to cover the distance from one ring to another much faster, but you will also be able to direct the remaining energy to perform other specific basketball elements, such as a jump, feint or throw.
Stands and movements
Jump rope in motion.
"Shuttle" running backwards.
"Fraction" in place, on signal - acceleration.
Tunnel relay (players stand in a column one at a time. Players take turns to crawl under the feet of the whole team).
Relay "Skiers" (standing on two sheets of paper, the player moves forward. Option: you can move by rearranging the sheets).
Relay "6-9-12" ("shuttle" run: the odd players in the team arrange the cubes at a distance of 6, 9 and 12 m, the even ones collect them).
Relay "Face to face" (move, standing facing the partner on his feet).
Relay "Cuttlefish" (movement in emphasis on the hands behind, the ball on the stomach).
"Kangaroo" relay (jumping on two legs to the conditional line, holding the ball with your feet, throwing into the ring, jumping back in the same position).
The outdoor game "Mirror" (move in pairs, one of which is the leader, in different ways, facing each other, and repeating all the actions of the leader).
Outdoor game "Pair leapfrog" (movement in pairs, jumping over the back of a leaning partner).
The outdoor game "Day and Night" (at the signal "Day!", the players perform basketball movements, at the signal "Night!" they freeze. Whoever moves is out of the game).
Relay - cuttlefish (ball on the stomach, hands point-blank behind) Game - double leapfrog (jump over the partner's back)
This game requires 2 people. From the start line to the conditional obstacle, move by jumping over each other. Then a turn and in the opposite direction.
Catching and passing the ball
Throw the ball up, clap in front of the chest (behind the back, in front of the chest and behind the back, push up, crouch, turn 360°) and catch the ball.
Hold the ball over your head, release it behind your back, turn around and catch it.
Legs apart, ball behind the back; with a rebound from the floor, move the ball under your feet forward.
Passing two balls on the spot and on the move in pairs.
Passing the ball while lying on the back of one of the partners.
Passing the ball at a short distance between partners at maximum pace.
Passing the ball in opposing columns.
Running in a circle in a clockwise direction, passing the ball to a neighbor; on a signal to change the direction of movement.
Passing the ball in motion in threes with a change of place (“eight”).
Passing the ball in threes with a screen 3 x 3, 4 x 4.
Pick Up Object Relay (toss the ball up and collect as many objects from the floor as possible).
Passed - sit down relay (the captain is located opposite his column and passes the ball to the players who must catch the ball, return it to the captain and sit down).
Outdoor game "Race of balls in a circle" (players are arranged in a circle, having previously calculated for "first-second", the balls are with the captains of the "first" and "second"; on a signal, the balls are passed to the players of their number until they hit the captain).
Outdoor game "Ball in the center" (players form a circle and pass the ball to each other; two drivers try to intercept the ball).
Mobile game "10 passes" (players are combined into two teams, each of which tries to make 10 passes in a row between its players, the second team tries to intercept the ball and start passing it between the players of its team).
The Shtander mobile game (the leader throws the ball up, calls any of the names of the players (at this time the players scatter), shouts: “Stop!”. The one whose name was called must catch the ball and, without leaving the spot, try to hit ball to a nearby player).
Simple drills for basketball without dribbles, turns with the ball, etc.
Technique of passing the ball to a partner with two hands from the chest and passing with one hand from the shoulder
The simplest and at the same time reliable way of mastering the ball is considered to be catching the ball with two hands. The preparatory phase of the exercise for basketball goes like this: if the ball flies towards the player at chest or head level, you should stretch your arms towards the ball, with fingers and hands that are not tense, forming a kind of funnel, somewhat larger than the girth of the ball. The main phase: at the moment of contact with the ball, you need to grab it with your fingers, bringing your hands together, and bend your arms at the elbow joints, thereby pulling the ball to your chest. The final phase: after receiving the ball by the player, the body again moves slightly forward; the ball, sheltered from the opponent by spread elbows, is taken out in a position of readiness for subsequent actions.
Catching the ball with one hand. When the game situation does not allow reaching the flying ball and catching it with both hands, you should catch the ball with one hand.
Preparatory phase: the player extends his arm in such a way as to cross the flight path of the ball (the hand and fingers are not tense). The main phase: as soon as the ball touches the fingers, the hand must be taken back - down, as if continuing the flight of the ball (automated movement). Finishing phase: the ball must be supported with one hand, then firmly grasped with both hands so as to be ready to proceed immediately.
Ball Dribble - Basketball Exercises
With markers, hoops.
In place with a squat.
With one hand in an emphasis lying.
Jumping forward on one leg.
On the wall with one hand and alternately with both hands.
In pairs towards each other from the side lines of the court, exchange balls in the center.
During the "shuttle" run.
In the direction indicated by the teacher's gesture, stop on signal.
With the pronunciation of the number that the teacher shows with his fingers.
In groups of 5-6 players within the 3-second zone, each trying to knock the ball away from the other player.
On the gymnastic bench.
Sitting on a gymnastic bench, moving forward.
While changing from a column of one to a column of four.
With transfer from behind, stop, continue dribbling.
Relay race.
"Snake" relay (driving the ball "snake" between the pins in pairs, holding with free hands).
"Train" relay (the first player circles the ball around the post, comes back, the second one joins him, then they continue to dribble together, then three, etc.).
And the most mobile exercises for basketball are the well-known Salki with the ball dribbling ”(the driver with the ball tries to touch the players running away from him with his hand. The driver is forbidden to walk with the ball and throw the ball at the players).
High dribbling technique
Dribbling with a transfer behind the back
Dribbling is a technique that allows a player to move the ball around the court with a wide range of speeds and in any direction. The dribble allows you to get away from a tight defender, get the ball out from under the shield after a successful fight for the rebound and organize a swift counterattack. With the help of dribbling, you can put up a barrier to a partner or, finally, distract an opponent who is guarding a partner for a while, in order to then pass the ball to him for an attack.
In all other cases, dribbling should not be abused, so as not to reduce the speed of counterattacks and not disturb the rhythm of the game. The dribbling is carried out by successive soft pushes of the ball with one hand (or alternately right and left) down and forward somewhat away from the feet.
Double step
After a partner pass.
While running nearby, take the ball from the teacher's hands, throw after a double step.
Dribbling, double step, passing the ball to a partner instead of a throw.
Throws into the ring in pairs, triples, fours after a double step.
Passing in a pair of two balls in motion with a double step and a throw into the ring.
Dribbling, passing back to a partner who takes a double step and throws into the ring.
Team competition (players attack different rings after dribbling and double step, counting team hits aloud).
Double step and hoop shot
Retrieve the ball
Passing the ball in a double jump, positioned on both sides of the backboard.
Matching balls in pairs (players try to pick up and throw the ball into the ring).
The outdoor game "Fight for the ball" (players stand in circles and pass the ball to each other. Several drivers move between circles and try to intercept the ball. The one who caught the ball announces a change of circles. The one who was left without a circle becomes the driver).
"Get rid of the ball" mobile game (players are united into two teams that stand on opposite sides of the area where the balls are located. The task of the players is to throw all the balls to the opponent's area).
Methodology for teaching the basic move in basketball to elementary school students
Exercise for the development of speed - Super Shuttle
-Starting position - on the front line under the ring -Start moving to point "A" in a protective stance and a quick jerk from “A” to “B”, we pay attention to minimizing the time to turn -From point “B” with an added step in a protective stance, we move to the starting position -Jump and touch the shield (well, or to the ring). -Again in a defensive stance, move to "C" -Turn and jerk from "C" to "D" -Additional step in a defensive stance, return to the starting position -Jump and touch the shield or ring
Exercise for training - Zigzag
- Place 4 markers, it can be absolutely
any things: chips, balls, stones, etc.
The main thing is to spread them on the same line at
distance of about 3 meters from each other -Now stand in the middle between the first and
with the second cone, measure 3 meters to the side and
be sure to put another marker
(after that you will need to put 3 more markers). -Jump to the first marker - then
in a defensive stance move to the left - when you get to the marker
- step forward in a defensive stance to the right -After the last marker we perform a short jerk (3-5 meters)
Such exercises for basketball as a zigzag must be performed 6-8 times, a break is the time until you reach the start.
Exercise - shuttle with the transfer of the ball
-So, we start the movement from the front line (START). The ring is on your left. -Dash to point "A" and receive a pass from the coach (partner) -Immediately give the pass back, turn around and dash to the endline "B" -At point "B" jump out and touch the backboard, net or rings -After landing, we run out to the perimeter again, we get a pass and return it back -Again, a dash to the ring, a jump, we return to the coach, we receive a pass and now we don’t give it back -Turn around and perform a quick dribbling to the ring and finish with a lay-up or dunk.
Exercise square - psychological training in basketball
These exercises for basketball should be performed for 60-90 seconds. Then you can switch roles. For starters, 2-3 sets will be enough, and then move on to 4-6 sets with a 1-2 minute break. If you are training a group of players, then change them every 60 seconds.


 If you don't have an opportunity, don't put it on the floor.
 Below are some examples.
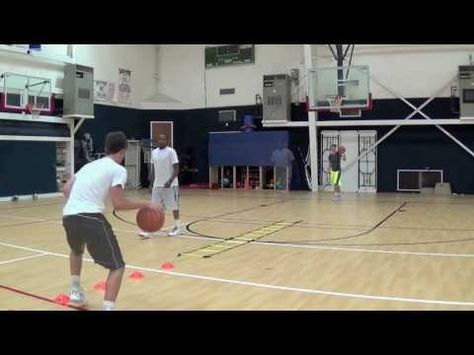 You do not need to be bound by other people's drills; challenge yourself to come up with your own drills.
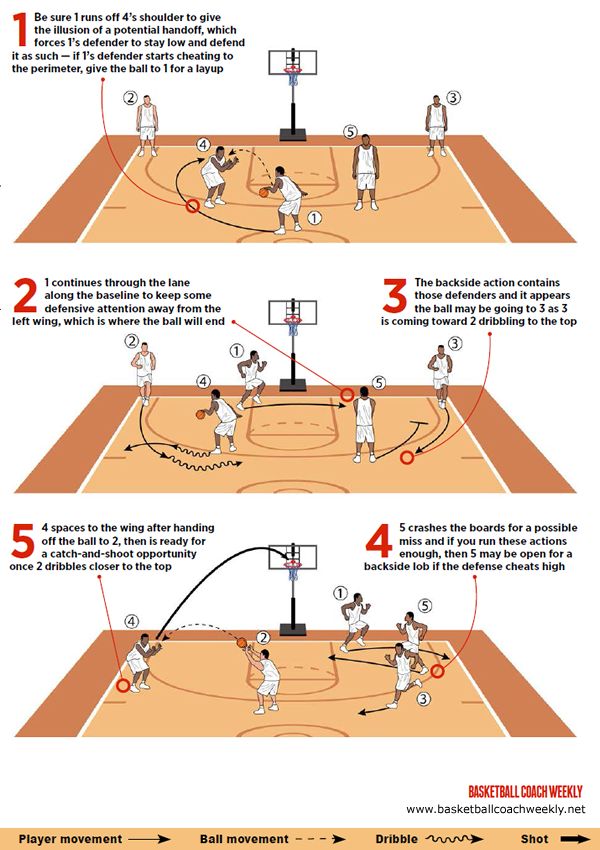 Hold for an 8 count and then stand up. Switch legs and dribble hand.
 Any dribble or drill you can do with 1 ball, you can do with 2.
Stationary practice at first will build confidence. Stand on the baseline and try to control both balls. Then start to move. Go half court, then full court. Follow
the lines around the court or in any route you can come up with.
Any dribble or drill you can do with 1 ball, you can do with 2.
Stationary practice at first will build confidence. Stand on the baseline and try to control both balls. Then start to move. Go half court, then full court. Follow
the lines around the court or in any route you can come up with.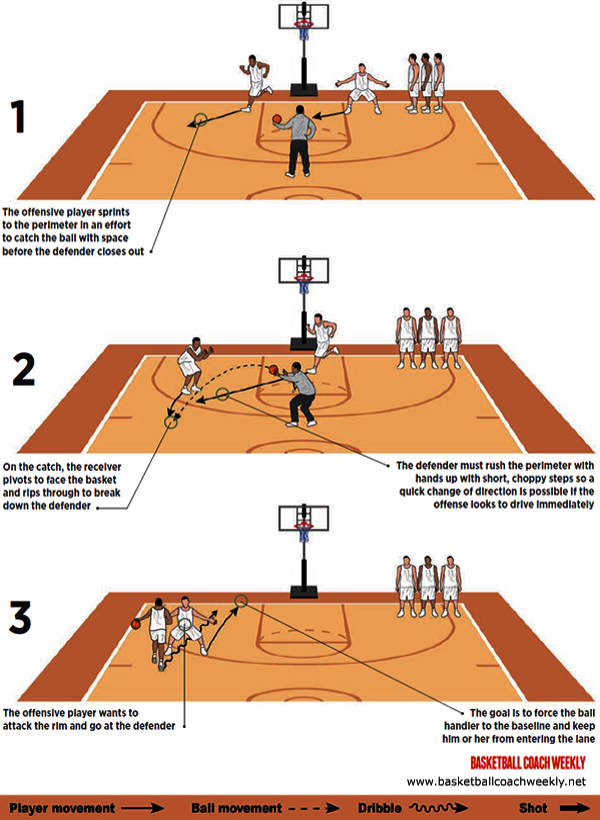
 24 Different Levels.
 Ball handling is the easiest way to work on your game and become a great all-around player as all you need is a ball and a flat surface.
 Rotate hand on every slap.
  You can do 2 ball rhythm and 2 ball alternating for 30-45 second each.
 The two outside players start with the balls.
 This exercise will teach players how to use feints and turns to create a passing zone and also to protect the ball.
  For example, 30-40 seconds.
 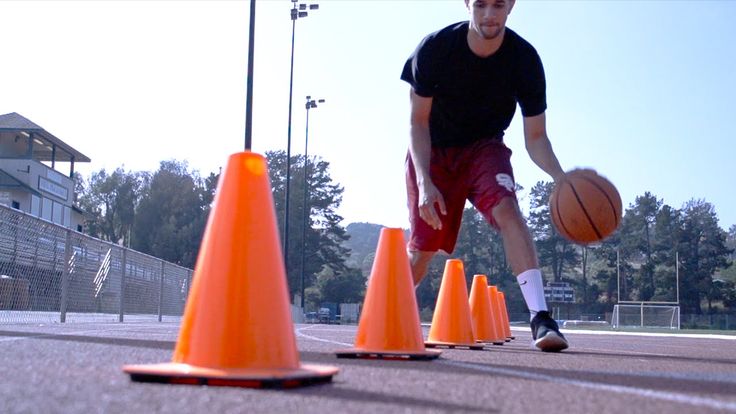 The players make a pass to the player on the right, who start running along the sideline towards the endline. The sender then joins the end of the column into which he passed the ball.
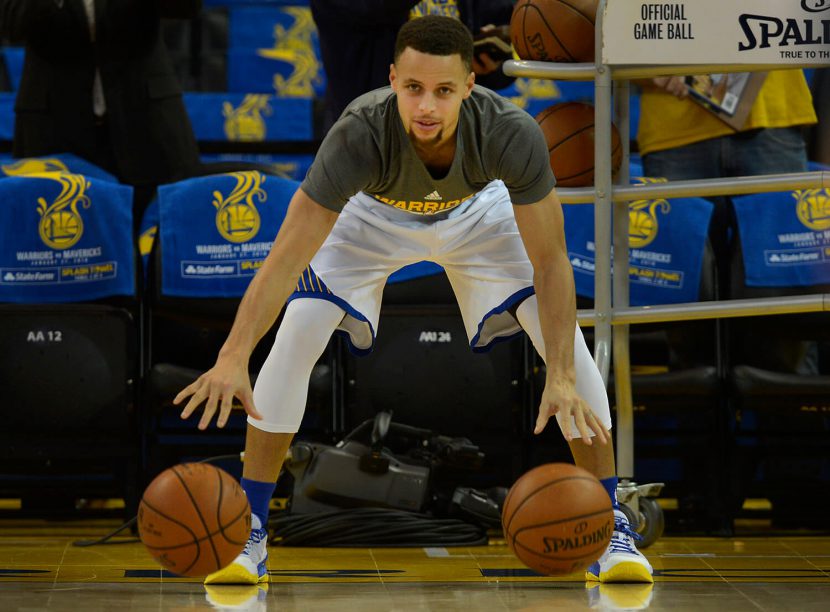
 Don't let them fall into this bad habit.
  The first pair move to the opposite side at a slow pace in the middle of the court, passing the ball from the chest to each other.
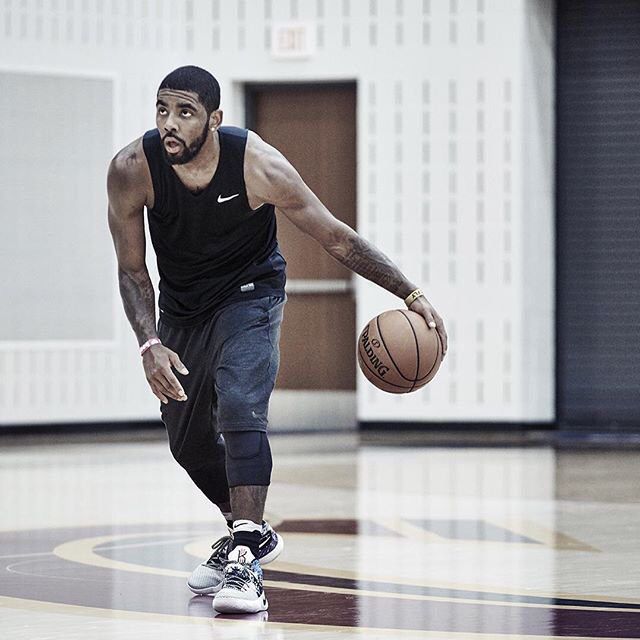

 The previous offensive team may play defense up to the center line of the court. Play until one team reaches 5 or 11 points.
  We will divide these exercises for basketball into 2 categories:
  So great results in the 100m do not always lead to the same success when trying to run into a fast break. Much more important will be the ability to quickly "switch" between running forward and backward, left and right.
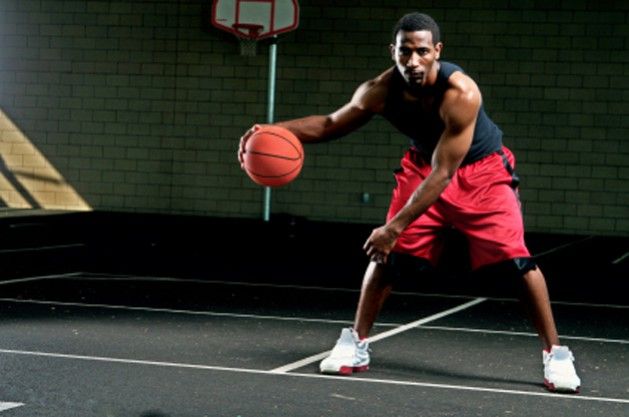
 Then a turn and in the opposite direction.
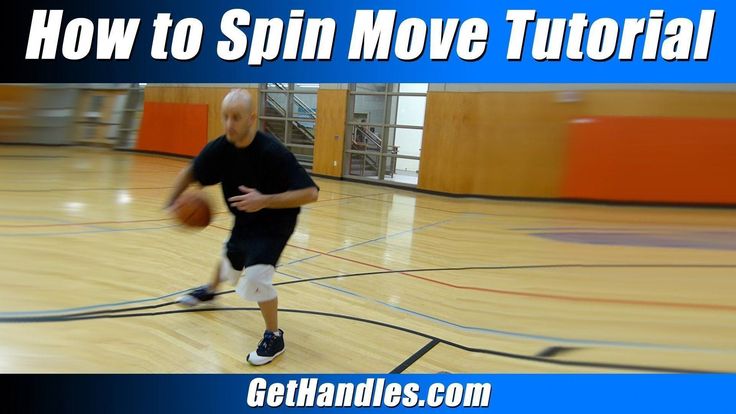
 The one whose name was called must catch the ball and, without leaving the spot, try to hit ball to a nearby player).
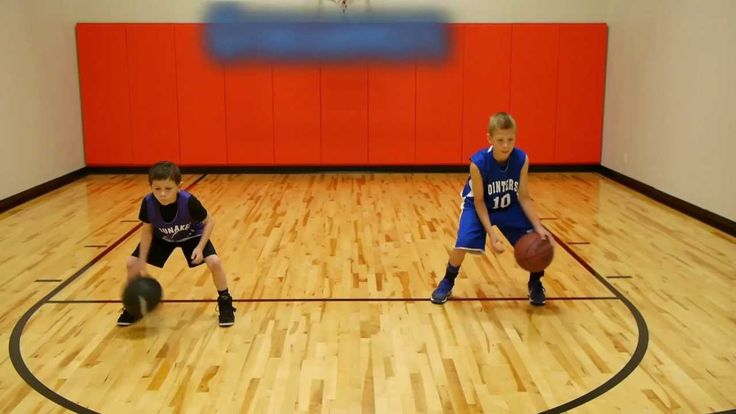
 The driver is forbidden to walk with the ball and throw the ball at the players).
 Several drivers move between circles and try to intercept the ball. The one who caught the ball announces a change of circles. The one who was left without a circle becomes the driver).